Tipsy Tuesday: Fav products Part 3

Tipsy Tuesday is back!  I missed a couple Tuesdays, but I didn’t get a chance to finish this post until last weekend.

Previously I covered products I use for prepping furniture in Part 1 and paint products in Part 2.  For Part 3, here are my thoughts on my products for stains and finishes.

Stains:  Wood conditioner and stain go hand-in-hand. Using wood conditioner is an easy step and makes the stain look consistent. You can see a brief how-to on staining a table top here.

My go to stain is Minwax dark walnut, its a beautiful dark tone and looks great on most wood types. I love special walnut too, it’s a nice mid-tone colour.  I’m trying to branch out on stain colours lately. I hope to test out some of the coloured stains or a white wash.  The only thing I don’t like about staining, is that they are stinky.  I’d love to find one that doesn’t have a strong odour.  Any suggestions are welcome!

dining table@ Pivot~Paint~Create

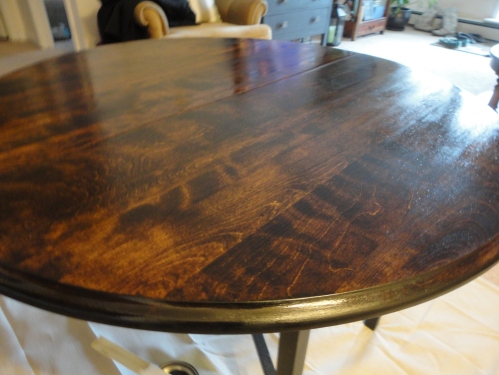
Stained with Dark Walnut

commode after @ Pivot~Paint~Create

Stained with Special Walnut

Top coats:  I use 4 different top coats,  Polyurethane, polycrylic, wax, and hemp oil.  What I choose to use depends on whether the furniture needs to be durable, if it was painted a light colour, and also what type of paint product was used.

Minwax polyurethane is great for well-used furniture and stained table tops (ie dining tables, desk tops etc).  It allows the furniture to be durable and easily cleaned.  Avoid using it on white or light coloured painted pieces.  It will cause yellowing.  For a piece that is intended to be all white…yellowing would look horrible.

While refinishing a coffee table, Penny and I had a happy accident.  We painted a union jack motif on the top and the white in the flag yellowed after the polyurethane coat was applied.  It actually looked good, it looked like a weathered flag.  Gotta love mistakes that turn out better than intended!

Union jack@ Pivot~Paint~Create

Sealed with polyurethane. The white stripes eventually yellowed, but it looked great!

Varathane clear satin finish.  I mainly use this on table bases and chairs.  Looks great over painted or stained pieces.  The satin finish gives just enough sheen to the furniture without being too shiny.  Bonus: it doesn’t have a strong petrochemical smell like polyurethane.

Sealed with Varathane polycrylic in Satin

Sealed with Varathane polycrylic in Satin

Miss Mustard Seed Hemp Oil, oh how i love thee!!!  And for so many reasons: it doesn’t have a strong smell, kinda earthy or dried grass odour.  It refreshes dried wood, brightens and enhances the colour/grains of raw and stained wood.  You can use it on pretty much any surface that needs moisture. It looks great on pieces painted with milk paint. You can easily reapply hemp oil in the future if the piece needs refreshing.  But I would still use polyurethane on a table top (like a dining table or desk) that needs more durability.  Also, avoid using it over painted pieces (with chalk paint or latex).  Those are best sealed with wax or varathane.

Half moon table @ Pivot~Paint~Create

Stained with special walnut and sealed with Hemp Oil.

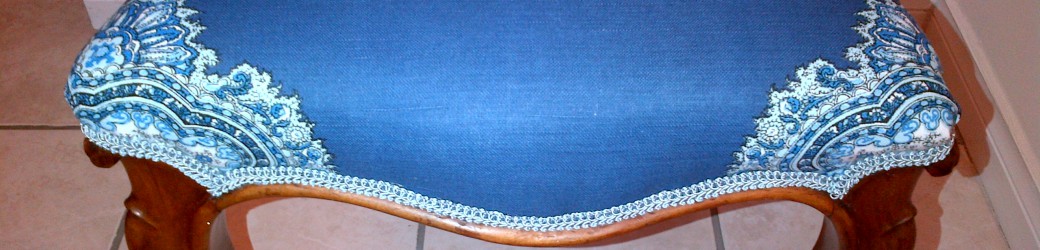
Waxes.  I’ve used Minwax furniture wax and Annie Sloan, both of their clear and dark waxes.  I love Annie Sloan’s clear wax.  It has much less of a smell, easily applied and buffed off.  If you leave wax on too long or cover too large of an area with the wax, it can be hard to get a good sheen.  So, remember to start small and apply wax to a small area and then buff off the wax.   Dark wax is great for toning down a bright colour and giving the piece a beautiful antique look.  Always apply clear wax first, buff and then apply the dark wax.  If you put on too much dark wax, you can apply clear wax to reduce the darkness.

grey french chair @Pivot~Paint~Create

Sealed with both clear and dark wax

wash basin @Pivot~Paint~Create

Sealed with Minwax clear wax

That’s it for my favourite finishing products!  My ‘go-tos’ are Annie Sloan clear wax, MMS hemp oil and Varathane polycrylic.  All three are great products and have little smell to them.  It’s important for me to use environmental and health friendly products.  I do most of my work in my work shop that doesn’t have much ventilation.  Don’t want to get ‘high’ while working on furniture! 😉

What are your must-have products?  Do you stick to one kind of paint or finishing product?

Let me know of other products you have tried out, good or bad!

Thanks for stopping in!

Until next time,

Laurena

Tipsy Tuesday: Fav Products (Part 2)

Welcome to Tipsy Tuesday! In Favourite Products Part 1, I reviewed some essentials for prepping furniture.  In Part 2, I’ll go over the many paint products available and which are my go-to paints.

There are sooo many options for paint.  Milk paint, latex, chalk, clay and acrylc paints.  Having the wide variety is great for furniture refinishers, so many colours and paint effects to choose from!  But, for those who are occasional diy-ers, it’s tough to decide which paint to go with. It’s hard enough to choose what colour!   In this post I’m aiming to make the choice a little easier.

Milk paint:  I am not a fan of surprises…but I have one exception: milk paint.  With each piece of furniture, chippyness is unpredictable.  Sometimes it drives me nuts, but it looks authentic and unique.  So I just let it be!

Chippy goodness @ Pivot~Paint~Create

Chippy goodness!

There are a couple types of milk paint, ‘normal’ and acrylic.

Milk paint comes in powder form and you mix with warm water.  The best ways to mix milk paint is with a whisk, small electric mixer or a mason jar with a lid.  I use a mason jar and shake it good so the paint isn’t clumpy.  It may seem scary having to mix your own paint, but you can always adjust the recipe.  If it’s too clumpy stir and add more water.  If it’s too watery, add a little more powder.

Don’t stop at the first coat!  With my first try at milk paint, the first coat looked horrible.  It looked streaky and didn’t cover well. I also wasn’t feeling the colour yellow so I painted over it.  BUT I’m sure another two coats and some dark wax, it would have looked good.

First attempt with milk paint

First attempt with milk paint

I’ve used Old Fashioned Milk Paint and Miss Mustard Seed’s Milk Paint.  Both are great products.  The colours available are beautiful and can easily be mixed to make custom colours.  Make sure to keep track of your ‘recipe’ if you need more of the colour.

Benefits: Milk paint looks great on all furniture.  You can add a bonding agent to reduce chippy-ness. I love using milk paint on antique style furniture especially those with carvings.  Milk paint isn’t made of chemicals, has no odour and is easy to cleanup.

Cons: Chippyness.  It can be unpredictable.  If it scares you or you want a modern look, add the bonding agent.

Acrylic-based milk paint is great too.  I’ve used General Finishes Milk Paint and I absolutely love it!  It’s not a ‘true’ milk paint, its acrylic based and comes pre-mixed.  But the quality of the paint is very good.   It has a low odour, which is a big plus.  It doesn’t give the ‘chippy’ look so you can either distress the furniture or leave it sleek and modern.  There are a few colours available and they also mix well for different colour options.  I’ve painted several pieces in Lamp Black, Tuscan Red, Antique White and Coastal Blue, all beautiful colours.  GF milk paint’s coverage is superb!  Two coats usually does the job.  The paint gives a beautiful finish especially after sealing with a satin finish.

Benefits:  So many!  I can’t think of any reason not to use this paint, I just love it.

Cons: None, haven’t come into issues with this paint.

maple side table

Lamp black

small red hutch

Tuscan red

navy night stand after 4

Coastal blue

Annie Sloan Chalk Paint: I finally tried ASCP recently!  A shop in the city recently started to carry the paint!  I took a fun painting class at the shop where I learned a few tricks.

Playing  around with ASCP

Playing around with ASCP

Chalk paint is just that, paint with chalky additive in it.  It allows the paint to cover very well with no prepping.  Before opening the can, turn it upside down for a bit to allow the paint to mix.  Then mix it well with a paint stick when you open it.  That just makes sure all the colour and chalky goodness mixes properly.

Benefits: ASCP is very versatile.  You can paint anything, wood, metal, fabric.  No lie.  And you can use it for different furniture styles, distressed/antiqued, modern/sleek, and any style you like.  Great coverage and no prepping needed, no sanding or priming, oh my!  You can distress the piece of furniture using sand paper…or even a damp sponge (the green/yellow kitchen sponges).  Love that.  There’s not much I don’t like about ASCP.

Cons: The paint is expensive…but a little paint goes a long way.

grey french chair

Paris grey ASCP with dark wax

Homemade chalk paint: I’ve made my own chalk paint mixture using plaster of paris (POP), a little bit of warm water and latex paint.  I don’t measure usually, just go by consistency.  I try to make it like greek yogurt, if that helps.  I think lighter colours are best when mixing with POP.  Mix well to avoid clumps and the finished product won’t look chalky.  It bonds well with any surface, so little prep needed.  Once its sanded lightly then waxed…the piece is smooth like butter!

Benefits: Cheaper than ASCP.  Make your own using latex paints and there are soooo many colours available.

Cons: You have to sand to make it smooth.  If you don’t mix it well or use warm water, it can look chunky or chalky.

Homemade chalk paint

Homemade chalk paint

Clay Paint:  Clay paint is a cool product.  I love that its a natural paint, since it’s clay based, and has no smell.  When distressing all you need is a wet rag! No dust in the air or clean up to do.   I’ve used CeCe Caldwell‘s brand of paint.   They have beautiful colours.  Layering a couple colours can make your piece unique!

Benefits: So many!  Love how its natural based and no VOCs. Its worth trying clay paint out!

Cons: It’s expensive and hard to get in my area (have to order online).  There are a couple companies (like this one) that make a similar product and have more retailers.

Layered colours with clay paint.

captains chair after 2

Watery blue effect

Latex Paint:  I love Behr and Benjamin Moore colours.  Both paints are high quality and great to paint with.  I try to go for the paint and primer in one (Behr) since the coverage is much better…and one less step!  Key thing when using latex paints, is to prep the piece well.  Stripping and sanding til the surface is smooth is important.  (If you mix latex and POP to make chalk paint, its more forgiving and bonds better with the furniture).   Any style of furniture can be acheived; distress away or leave it sleek.

Benefits: So many colours available and reasonably priced for a quart of paint (probably can get 2 cans versus 1 of ASCP).

Cons: More work goes into prepping.  (Have I mentioned I dislike prepping?!) 😉

dipped end table @ Pivot~Paint~Create

Using latex paint to create unique pieces.

Currently, my go to paints are General Finishes Milk Paint and homemade chalk paint.  I’m hoping to stock up on more milk paint and ASCP.

That’s it for paint products…for now!  Next I will talk about stains, waxes and other finishes.

Thanks for stopping by!  Until next time!

Laurena

Tipsy Tuesday: Favourite Products (Part 1)

Hard work, a little knowledge and a few good products are key when refinishing furniture.  For the next few Tipsy Tuesdays, I will chat about products I’ve used.  The good, the bad and the best products for furniture refinishing.

First off, cleaning and preparing the furniture.  If you don’t prep properly or you use poor quality products, the finished piece will look cheap and paint can peel.  Not pretty!  Here are some of my favourite products for prepping furniture:

Glue: I like to use Gorilla Glue or No more Nails for repairing pieces of furniture.  I try to avoid furniture that needs a lot of repair.  I try to find the most sturdy or well made pieces to refinish.  Less hassle and better end product for customers!

88mL No More Nails Glue

Orbital sanders (like this one) are a must!  Especially when you are refinishing something like a table or dresser top.  Always have safety glasses and a dust mask on hand, even if there is a dust collection attachment.  Safety first! 🙂

Strippers:  I’ve used a few kinds, even oven cleaner.  I try to avoid using strippers because of how smelly or fumy they can get.  My workshop doesn’t have windows, so it’s difficult to air out fumes from strippers and spray paint.  I do like strippers that are more on the environmentally friendly side.  Some actually smell nice! Like this one:

1L Safe Strip Wood Stripper

Cleaning:  Unless the furniture is filthy or just chemically stripped, I use plain old water.  A quick wipe down with a wet rag or cheese cloth should be good.  I use a mild cleaning spray for furniture that needs a little more cleaning.  1L Ready to Use All Purpose Safe Prep Natura Cleaner

Primer: I have a love-hate relationship with primer.  I totally get that it’s a needed step for certain pieces of furniture, especially for preventing bleed through.  My main reason for disliking primer is I don’t like the white peeking through when distressing. But primer can be tinted to any colour so that is a good option.  For furniture with a modern look, typically I use ‘paint and primer in one’ latex paints, since they cut out an extra step.

Before starting to paint, determine the style you’re aiming for.  Do want it to be antiqued and distressed versus modern and clean lines?  Once you have a plan, you can choose the type of primer or if you need to prime at all.  For pieces that have a smell (smoke/mustiness) or that may bleed through the paint, I use Zinsser’s Bulls Eye Primer or Shellac.   Both are great to use under light coloured paints when painting over mahogany or knotty pine.  It reduces the bleed through, orange-ugliness.  You can also use Shellac to help milk paint bond to the furniture and prevent a lot of chippyness.

I love painting with milk paints and chalk or clay based paints.  Priming is not needed, which makes me love them more!   Next Tipsy Tuesday I will talk about paint products I love, the ones I avoid and those I can’t live without!

**Please note: The above opinions and tips are my own through testing products myself.**

Do you prime or just paint away?

If you have other products you like, please leave a comment!  Love hearing tips from others!

Until next time!

Laurena

Tipsy Tuesday: Back it up!

Hey all!  Welcome to what I’m calling “Tipsy Tuesday.”  I’ll be posting tips on a variety of topics, painting, furniture, decor and whatever else comes to mind. 🙂

Random note: Back in college my friends and I used to call Tuesdays ‘tipsy’ for a different reason. We were a tad over worked with studying and lab projects.  Tuesdays were a day to let loose.  Don’t tell my ma. 😛

I originally planned on doing an actual post with painting tips, but yesterday I dropped my laptop.  The poor thing now randomly beeps and has a scrambled screen. 😦 Ugh!  Mistake #2: I usually back up my computer regularly but I didn’t do that in a couple of months.  I may have lost some of my files and pictures.  Bummer.  So my first tip: don’t drop your laptop and back up your computer!

An upside to this, I got to buy a new laptop!  Now to figure out how to use Windows 8 and hopefully find my files.

Until next time!

Laurena