Just a few…

Here are a few projects that I have worked on over the past year.  I’ve refinished lots and lots of tables, a few chairs and more to come!

First off, I kept this one.  Simple redo with Casement Fusion Mineral Paint and just sanded the top, kept it as is.  Beautiful!

side table 1

IMG_1086

IMG_1079

Side table refreshed with Heirloom Fusion Mineral Paint and Dark walnut stain.

side table 3

IMG_1094

End table refreshed with Mountain Haze Fat Paint and ebony stain.

side table 2

IMG_1126

Coffee table refreshed with Natural Grey Behr paint.

2017-07-19 12.38.51

IMG_1243a

Coffee table refreshed with Inglenook Fusion Mineral Paint.

DSC_8650

IMG_1247a

Old school side table refreshed and painted with Paris Grey ASCP and Heirlook interior.

_20170908_175640

IMG_1266a

IMG_1272

End table painted with French Linen ASCP and white wax on top. Love this look!

IMG_1277

IMG_1335

IMG_1336

End table painted with Paris Grey.

IMG_1289

2018-03-29 15.36.59

Half moon side table painted with a grey mix with Ash & Casement Fusion Mineral Paint.

demi moon table 1

demi moon table 2

ikea grey 1

ikea grey 2

Coffee table painted with a grey custom mix, and white wax on the top.

2017-06-12 15.37.36

IMG_1063

IMG_1068a

Coffee table turned bench, painted with Casement and a striped fabric.

2015-10-17 19.41.34

IMG_1347

IMG_1350

Coffee table, refreshed with Little Lamb Fusion Mineral Paint.

IMG_1280

IMG_1413

IMG_1411

Sad to FAB, table refresh.

One of my followers from my Facebook page contacted me to see if I wanted to buy a table. For $20. Ummm, yes please!! It was a fun and unique piece. It had chippy yellow paint and messy stained top. But such a fun shape. So much potential.

I loved the shape of it. Those legs! I couldn’t wait to transform it. But, the table sat in my workshop for awhile. I didn’t know what colour to go with. After a couple of months, I finally decided to use special walnut stain on the top and Inglenook Fusion Mineral Paint for the base.

I love how it turned out. It took awhile to sell but it found a happy home. Thankfully… ’cause it was going to be mine!

Side note, I ordered a light kit to help me with my furniture pictures. Since my workshop and staging area are in an unfinished basement, good lighting is lacking. Here’s a couple pics to show how the light kit improves photos. The first photo, taken without the light kit, the wood top doesn’t shine. Everything is yellowed. With the light kit, the wood looks so much better, the colour is on par and the photo is much better.

I got mine from Amazon and it was worth the $45!

Back soon with some quick before and afters!

Laurena 😉

Side tables, refreshed

I was MIA on the blog for a few months, so I figured I will do a couple more posts.

A friend of mine who I’ve known since junior high school, contacted me to redo a couple of side tables. Of course I said yes, it’s a good excuse to catch up. We hadn’t seen each other in almost 10 years (when we were in junior high… Lol, I wish!). She gave me free rein when choosing colours and what to do with the tables.

Here are the two tables, before and after! I used my favourite colours, little lamb and Inglenook Fusion Mineral Paint. Love the grey and the colour combo.

Can’t wait for her to see them in person next week!

Laurena 😉

Fun and flirty footstools.

Back for a quickie. 😉

It’s been a busy few months. I’ve finished a few custom projects and worked on pieces I’ve had in stock for a long time.  I had lost a little mojo after being so busy with custom pieces. I thought a fun project would get me back in the groove.

I walked into Home Depot and saw some wooden crates for $10. My mind went crazy with ideas. I settled on making a couple of footstools. Since I had some casters, lots of fabric and wood scraps, it’d be a cheap project. I made a removable, cushion top and stained and painted the crates. They turned out perfectly cute! I made a couple, then sold a couple…then a few more for friends. Now I’m up to 10. Lol! It was a great project to do, fun to make and it got me excited to tackle the other projects.

Back to the paint brush!

Laurena 😉

Bringing sexy back: a story of a little chair.

I love reupholstering and refinishing furniture that have a story.  And of course,  working on a piece for a family member makes it even more fun.

My aunt asked me to reupholster a chair she inherited from her mother in law Chris.  She had passed away just a few years ago and was quite the lady.  She may have been short in stature but she had a personality that was large in life.  The chair had been purchased after Chris and her husband married back in 1940.  It was a cute, low chair. Perfect for Chris.  😉

Over time the little chair was recovered and well loved.  Once I started working on it, I found four layers of fabric!  Lots of work and love went into the chair over the years.

I started to take the first layer of fabric off and noticed that the stuffing and some of the fabric was easily falling apart. Its amazing how long everything held together.  There was a manufacturing label on the chair from May 1940!

I had a messy job ahead.  I removed the fabric, hay stuffing, padding and old batting.  And a million old nails, tacks and staples.

After the chair was down to the bare bones, I sanded down the chair legs.  They had been scratched up over time and lost their luster.  A couple coats of Minwax dark walnut stain and General Finishes top coat, the legs looked fantastic!

Before reupholstering the seat, I did some research and watched a few youtube videos to get some tips and tricks.  I’ve done a few chairs previously but I try to check out what the professionals use for tools and materials.  I’m always trying to learn more!  Here are some great videos that I found helpful (here & here).

 The chair seat had old zig zag springs that were in great shape, not bent or broken.  To make sure that the chair didn’t sink m too low, I stapled burlap binding underneath the springs.  I also tied the springs with strips of fabric remnants to make sure they didn’t shift.  I stapled a piece of fabric remnant over the springs to make sure there were no squeaks and to allow the foam padding to sit on something ‘solid’.   I cut the 2″ padding to size and shaped it to fit the seat shape (cutting the edges to make it not as square or cube shaped).  I covered that with a couple layers of batting and stapled that down.

The chair back was a little easier, as it didn’t have springs and had a solid back.  I cut foam to fit and covered it with a couple layers of batting.

Now the fun begins!!  I started with the seat, cutting the piece of fabric a few inches larger than needed.  Since I had to cut the fabric to fit around the chair back supports I wanted some leeway in case I made mistakes.  Luckily my aunt found a great deal on fabric and I had lots of room for error!

After reupholstering similar chairs I’ve learned a few things.  Here are some tips:  Take your time. Staples can always be taken out as long as you are careful with the fabric and wood.  Always cut around chair arms in small snips,don’t be too snip happy and avoid cutting too much around the arms.  Make sure the staples are somewhat in a straight line so if you are using piping or gimp as trim, you can make a straight trim line.  Don’t pull the fabric too tightly as you staple, it will look bumpy.  Hope this post helps, upholstery is fun to do!

Here she is in all her glory!  My aunt was happy with her little chair.  I think Chris would have loved the chair redo too.  Now the chair will be ready for another 90+ years 😉


Thanks for stopping by!

Laurena

Summer project: building a fire pit!

My parents moved to Cape Breton almost 20 years ago.  The house they bought came with a pool.  I loved it!  Who wouldn’t really?!!  I was in College back then and lived with Mom and Dad during my summer breaks.  I worked a bunch of summer jobs, as a labourer on dairy farms and at the provincial park.  So taking a dip in the pool was a perfect way to unwind after a hard work day.   Sadly, after one too many harsh Cape Breton winters, the pool didn’t make it and had to be taken down.

So after it was gone, we were left with a large area covered in pea gravel.  For years we had chatted that it’d be a perfect place for a fire pit!  Since Nick and I had fun building the planters for his Mom, we wanted to do a project when visiting my parents.

One Saturday afternoon, in the hot, hot sun, we loaded up my new Subaru (my beast!)  with shale rock and built the fire pit.

_20170908_215237

We didn’t really have a plan.  Only to use the metal plate as the base and stack the shale around.  We underestimated the amount of rock we needed, so we had to go back for another load.  I gotta say, I love my Subaru Impreza!  My car may be little, but it was like a truck hauling rock on the dirt roads.

2017-07-29 12.57.21

2017-07-29 12.57.292017-07-29 14.27.55

Here’s the finished project!  I love the view over the cow pastures.

2017-07-29 15.04.31

2017-07-29 15.04.40

When the Belleisle Mac’s were home, we christened the fire pit with a marshmallow roast and jam session.  What a fun evening!!  Even Willow the dog enjoyed it!

2017-08-11 19.24.342017-08-11 20.29.17

Another project done and well worth the hard work!  I think my nieces loved having a fire pit at their Grandparents’ house!

Hopefully it will be nice weather at Thanksgiving.  I’d love to squeeze in one more night around the fire before the cold weather comes.

Laurena

Catching up: Spring project.

Earlier in the spring, Nick and I did a project for his Mom.  She has wood planter boxes on her deck that had seen better days.  As a fun project, Nick wanted to build new ones…and of course I wanted to help!  I love a good diy project (as if you didn’t know that already!).

Since we don’t have a house, we don’t have many tools for big projects.  Nick bought a Mastercraft mitre saw and I fell in love!  It wasn’t fancy or expensive, but it did the job.

2017-05-20-10-25-34.jpg

We followed the same plans as the original planter boxes.  Nick’s father had built them 25 years ago and we wanted to give tribute to him by using his design.

Before I start with the pictures showing our progress and finished project…

Please note:  We have a basic knowledge of carpentry and are not experts!  That said, I think we did pretty good!  The mitre saw was easy to use.  Definitely a good purchase.  Throughout the project we kept measuring and checking our cuts.  The old saying “measure twice, cut once” is certainly true.

I’m not going to give a step by step of our project since I don’t have measurements for each planter.  If you want to do something similar start off with easy dimensions and remember to consider the thickness of the saw blade when measuring for your cuts!

We used pressure treated wood and 3″ wood screws.

2017-05-20-10-25-39.jpg

We started with the two rectangular planters.  And cut away!

2017-05-20 10.25.482017-05-20 11.15.142017-05-20-13-26-42.jpg2017-05-20 13.27.022017-05-20 19.34.45

After finishing the two rectangular boxes…we took a break for the day and enjoyed some good food and drinks!  We started back up the next day with the square box then made the L-shaped box.  I thought this one was going to be difficult but it was easier after we made the other two.

2017-05-21-15-00-14.jpg

2017-05-21 12.30.142017-05-21-15-00-49.jpg2017-05-21 15.47.312017-05-21 15.47.49

Here are the planters in use!

2017-07-15 11.11.342017-07-15 11.12.102017-07-15 11.12.232017-07-15 11.12.35

It was a fun project to do with Nick!

I think his Mom was pretty happy with the results!

I’ll be back soon with some more projects.  It was a busy summer!

Hope everyone has a great weekend and stays safe during hurricane season!  Sending thoughts to those in the path of the hurricanes, Irma and Jose.

Laurena


A little behind… 

Wow I can’t believe that my last post was a few months ago.  I’ve been so busy with projects that I haven’t had the time to gather up pics for a post or two.  I hope to do that soon. 

I wanted to wish everyone a happy summer!  Hopefully your days are sunny and your toes are sandy! 

Be back soon, 

Laurena 

French Linen Hutch

A friend asked me if I wanted to buy a hutch from her.  She sent a picture and I couldn’t pass it up!   It was a beautiful piece but it needed some TLC.   The surface was scratched and the drawers needed repair.

wp-image-2117497047jpg.jpg

wp-image-1557226227jpg.jpg

I sanded the top down, applied a coat of wood conditioner and one coat of Minwax Provincial stain. The wood top drank up the stain and turned out a bit reddish than expected.  The plus side,  the stain showed off a beautiful wood grain.

2017-03-08 13.31.19

2017-03-08 13.53.47

I’ve had a General Finishes top coat on my wish list at Lee Valley for awhile and finally ordered some.  I tried it out on this hutch and I love it!  General Finishes high performance top coat is a little different from other polyurethanes.  You just brush it on, careful to not overbrush, and wait 48 hrs between coats.   I lightly sanded before applying the second and third coats. No fuss and easily applied.  The top coat turned out beautiful!   It gave a nice finish and will be pretty durable for whatever the hutch is used for.   I’ll definitely use the product again.

I tried to pick paint colours that would appeal to everyone,  so I tried out Fusion Mineral Paint in Coal black, General Finishes Milk Paint in Coastal Blue, and Annie Sloan Chalk Paint in French Linen.  I painted swatches on the back plate so I could visualize it better with the wood. Once it was dry, I compared the 3 colours to the wood colour.  I was aiming for a colour that complimented the reddish hue in the wood,  and not compete with it.

I found the black and blue were both too dark and on the colder side.   So, I chose French linen,  It’s a nice warm grey and complimented the wood.  After 3 coats, I lightly sanded and distressed then waxed. The inside of the drawers were painted Duck Egg Blue to make them look clean and new. Some new knobs mixed in with the old,  made the hutch look refreshed!

hutch 1hutch 4hutch 7hutch 10IMG_1046

I love the wood top!!  Another project done!

Thanks for stopping by!

Laurena

A room to dream of.

This past week I was asked to put together a mood board of my dream living room. Once I finished reading the email I, of course, panicked.   How can I narrow down so many options; sofas, chairs, coffee tables, and accessories into just one living room??!  The task would be difficult.  I find it hard to pinpoint my design style.  I love so many aspects of design.  Classic lines. Industrial mix of wood and metal.  Antique furniture with detailed legs.  Relaxed beachy decor.  And of course anything that Joanna Gaines puts together.  So maybe I can name my style…Eclectic farmhouse, East Coast chic?

The first thing I had to do before I started the post was to call a friend.  I needed my partner in design to help me!  I love any excuse to chat with my friend Penny.  And this task would be perfect for us to work on together.

Penny has always been fashion forward and on trend.  I love seeing what she comes up with when designing rooms.  We have similar tastes in furniture but we may have different design ideas.  While I need a little push to be bold, Penny isn’t afraid to test out new designs and styles. We make a good team that way.

Like many people, we spend long hours at work and a living room is a perfect place to unwind with a glass of vino.   Any room in your home should be a relaxing setting and filled with pieces you LOVE!

Since we had so many ideas for the living room, we thought we’d put together two mood boards.  It was too difficult to settle on one concept once we started brainstorming.

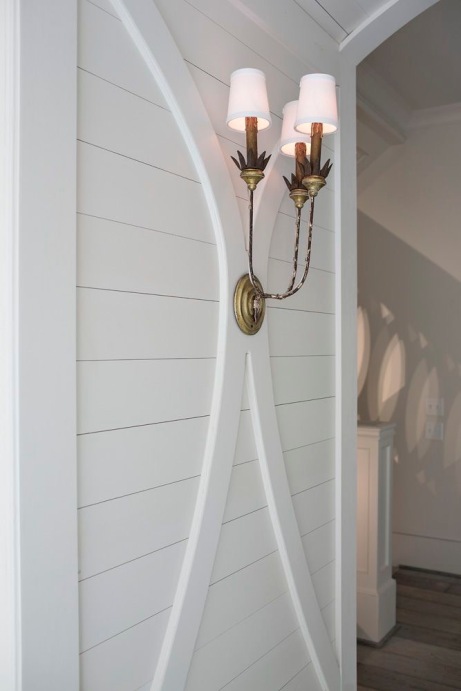
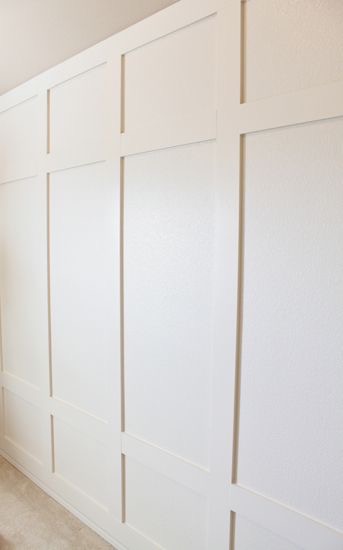
The two rooms would have the same wall treatments.  Crisp white.  Simple mouldings, like board and batten, that add texture and interest.   Here are a couple wall treatments we loved.

image4

image5

We took a look at Arhaus and perused the many sectional sofas.  Oh my!  So many to love!  Both of us quickly chose and swooned over this tufted beauty.  We decided to use this sofa as the one constant in the two rooms.  The piece had a beautiful style and shape.  We wanted to show how one furniture piece could be used in different design styles.

Dream Living Room #1: East Coast Beach House

Calming colours, weathered textures and beach side elements are perfect for a beach house space.  Blues, greys and whites.  Weathered wood mixed with more refined pieces, like the tufted sofa, keeps the room from becoming too laid back.

There was something about the high-back chair, we had to have it in the room.  We loved the deconstructed back and weathered leather.

Of course no living room is complete without a bar.  A bar cart is a versatile piece, as it can be used for wine storage or as a side table.  Art is another must-have in any room.  For the Beach house, paintings of seascapes by local artists were perfect accents.

EC beach house

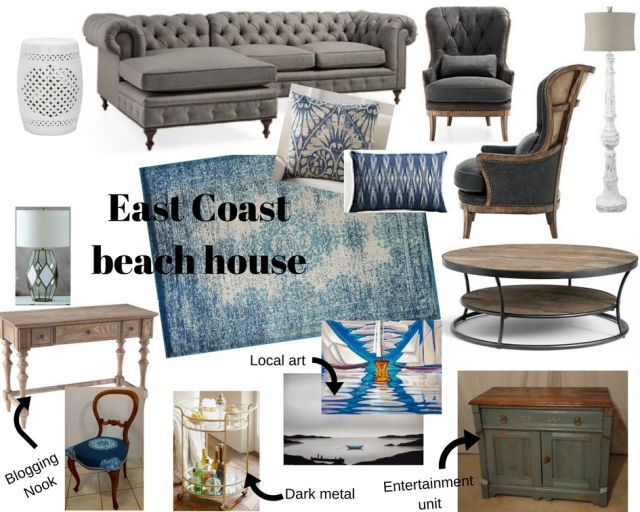
Elements for “East Coast Beach house”

Dream Living Room #2: Urban Eclectic

The two matching wing chairs are the perfect pop of color in a very unexpected way.
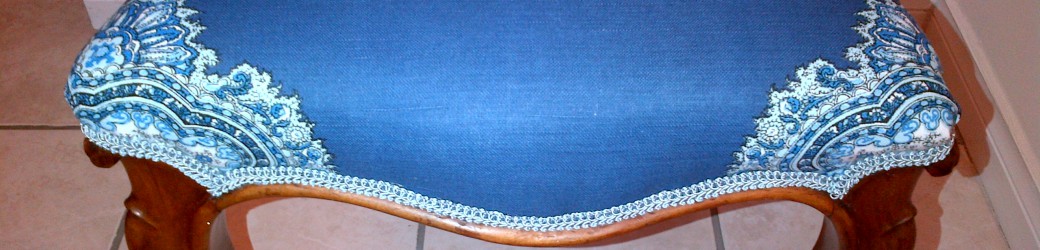
We love the idea of injecting new life into the classic lines of a wing chair.  Using the bold blue fabric is a great example of how to change something old and dated into something fabulous!  Re-imagining furniture can transform your room, often with pieces you may already have in your house. We are obvious fans of DIYing!!
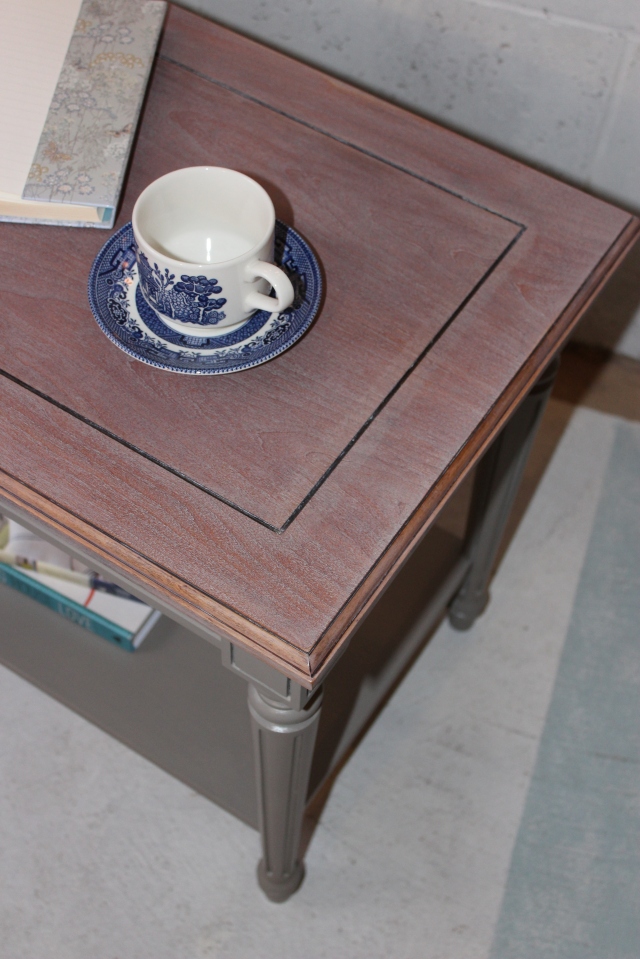
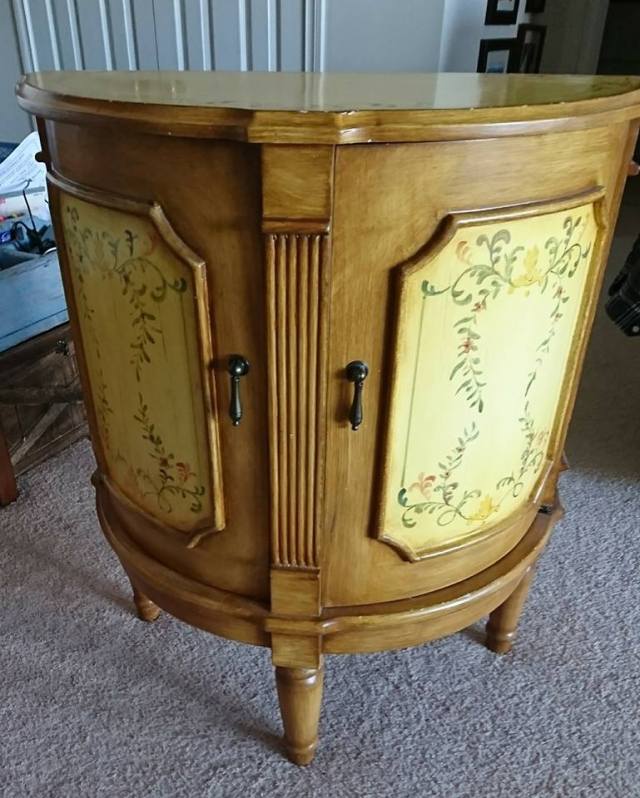
Furniture pieces with curvy lines and antique styles, like the black credenza and the white desk, add great interest and lots of storage options.  Fun patterns, animal prints and colorful art add perfect touches to a room.  The glass coffee table, bar cart and table lamp allows light to move throughout the space and keeps the room from looking too cramped and stuffy.

urban eclectic

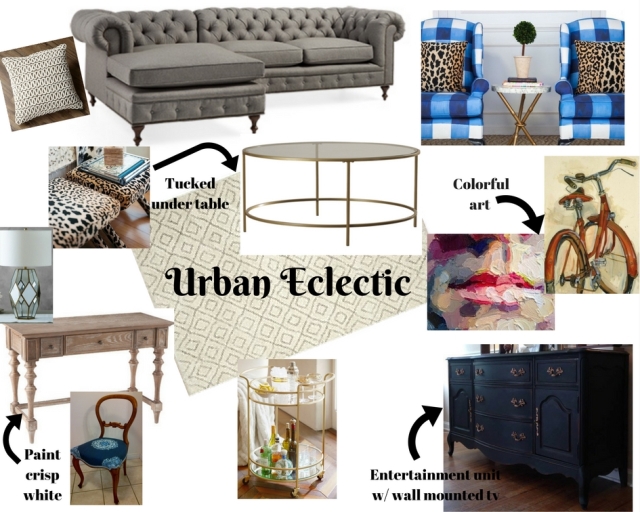
Elements for “Urban Eclectic”

We love both rooms so much!  So many fun elements.  Imagining and designing the dream rooms was way too much fun.

We hope these two rooms inspires you to make your own living room a space to love and dream of.

Laurena & Penny

PS:  if you want to create your own mood board on your own room or anything at all, I used http://www.canva.com. So fun and easy to use!