Bringing sexy back: a story of a little chair.

I love reupholstering and refinishing furniture that have a story.  And of course,  working on a piece for a family member makes it even more fun.

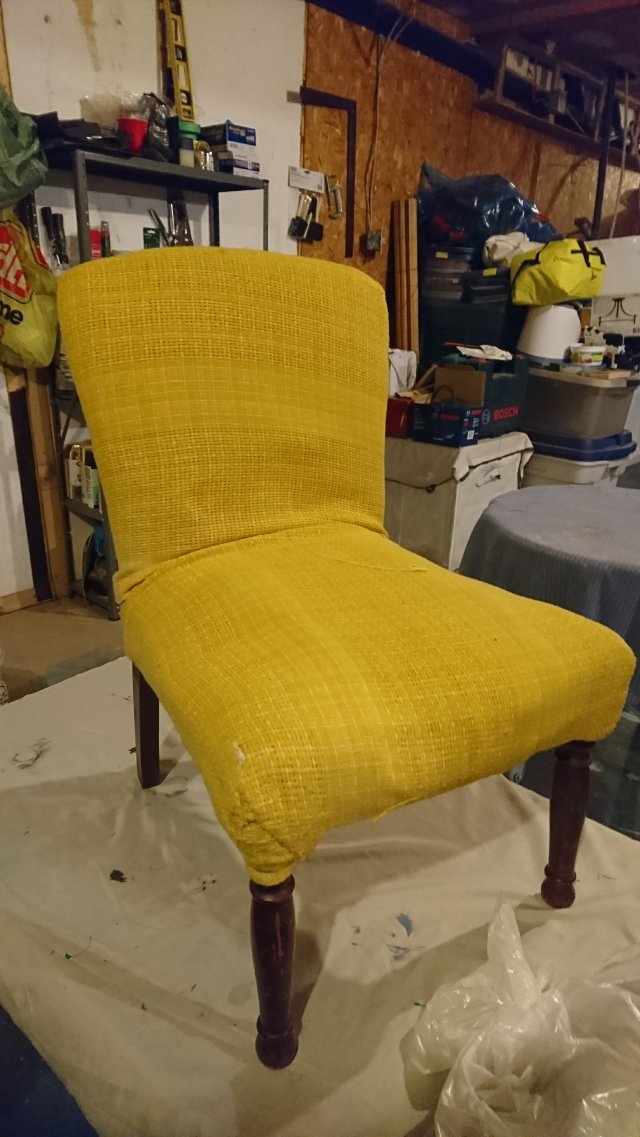
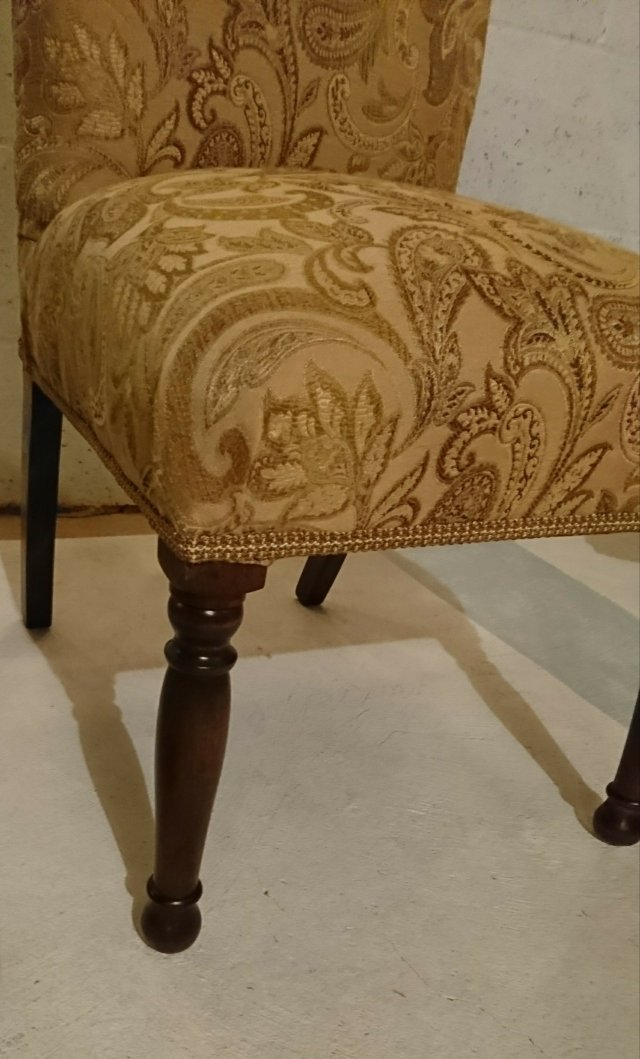
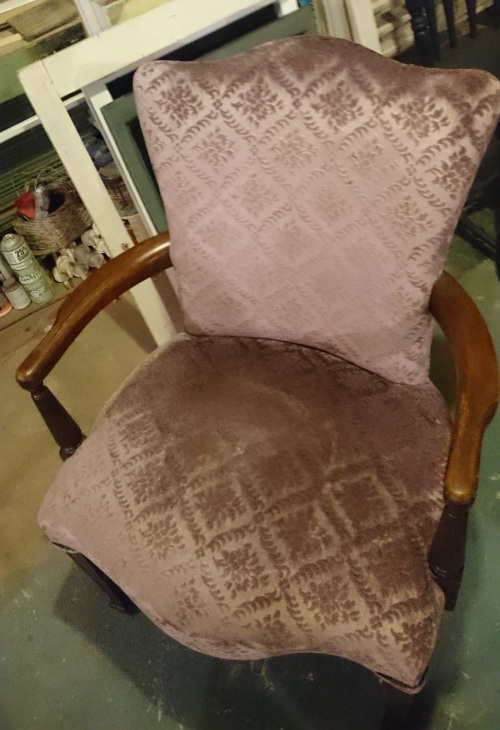
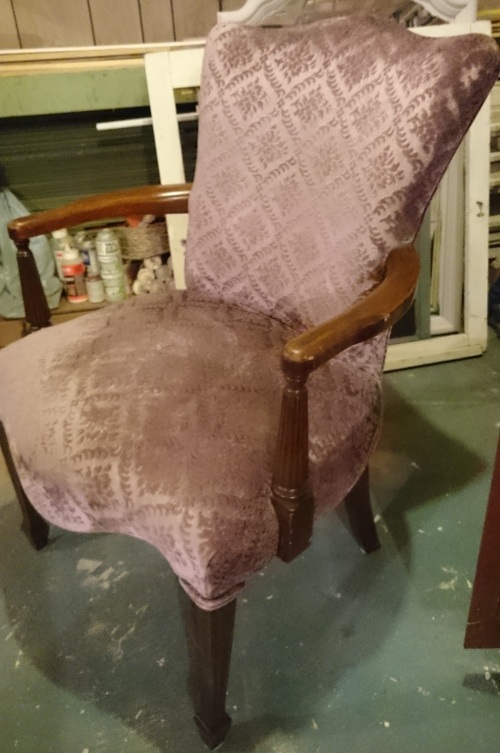
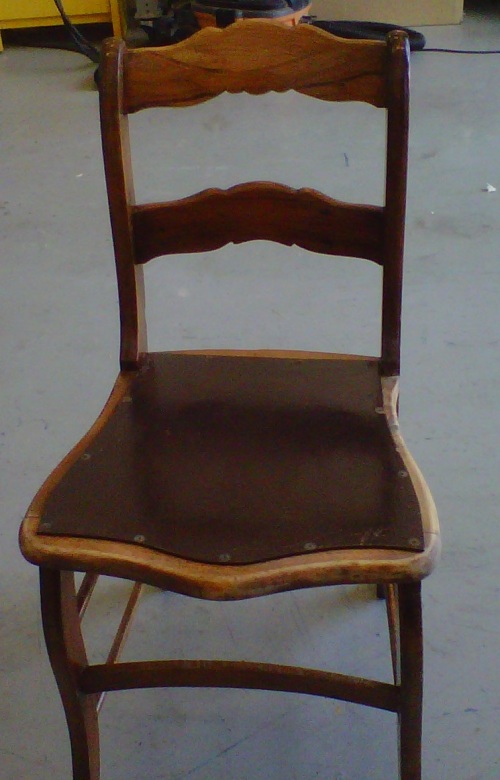
My aunt asked me to reupholster a chair she inherited from her mother in law Chris.  She had passed away just a few years ago and was quite the lady.  She may have been short in stature but she had a personality that was large in life.  The chair had been purchased after Chris and her husband married back in 1940.  It was a cute, low chair. Perfect for Chris.  😉

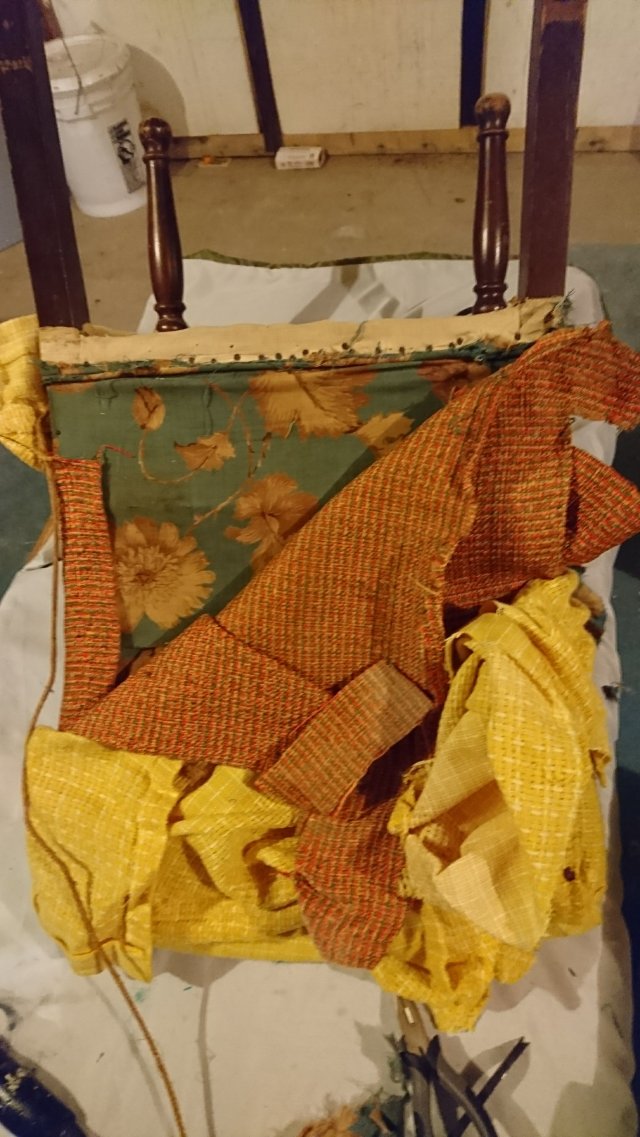
Over time the little chair was recovered and well loved.  Once I started working on it, I found four layers of fabric!  Lots of work and love went into the chair over the years.

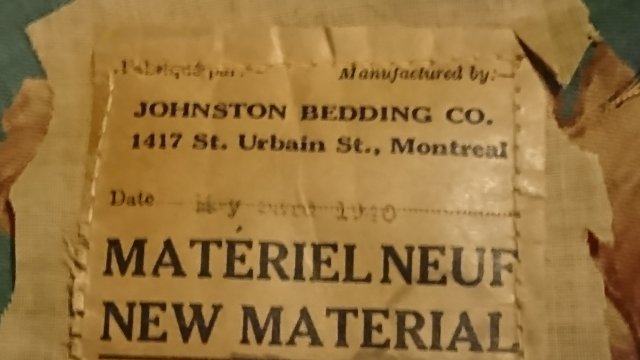
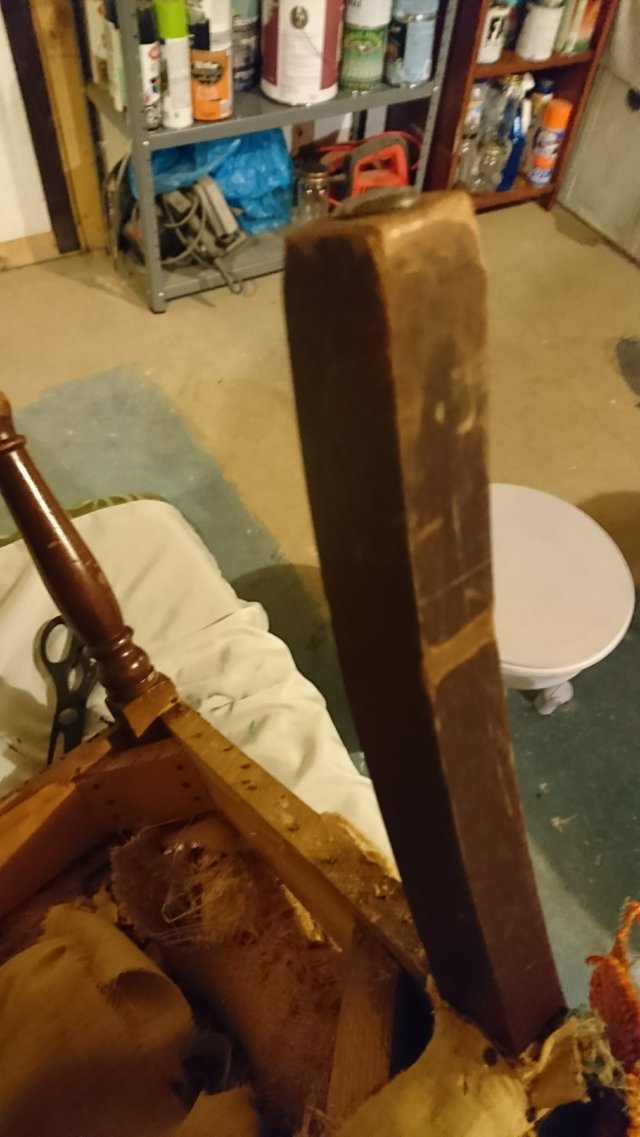
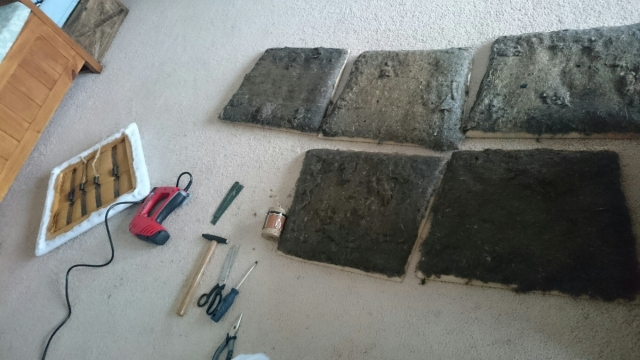
I started to take the first layer of fabric off and noticed that the stuffing and some of the fabric was easily falling apart. Its amazing how long everything held together.  There was a manufacturing label on the chair from May 1940!

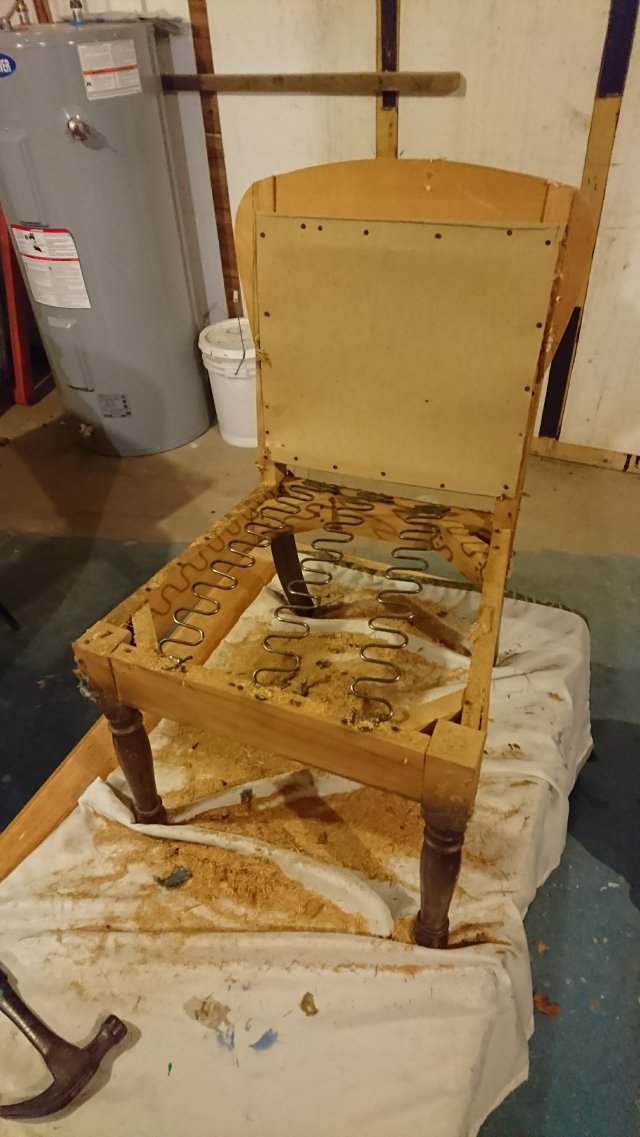
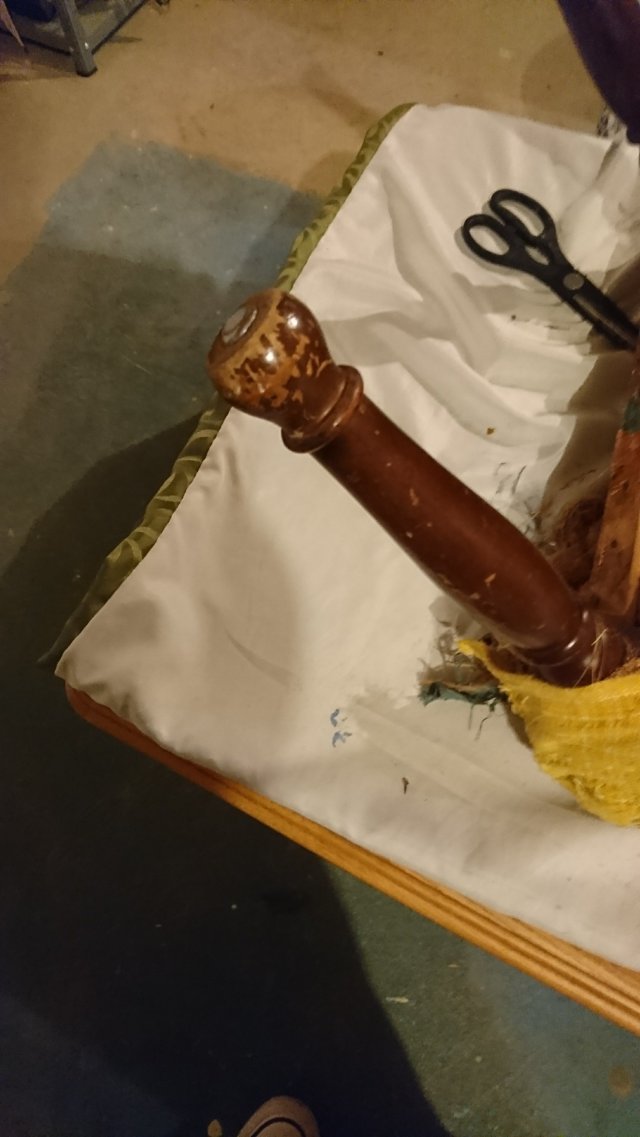
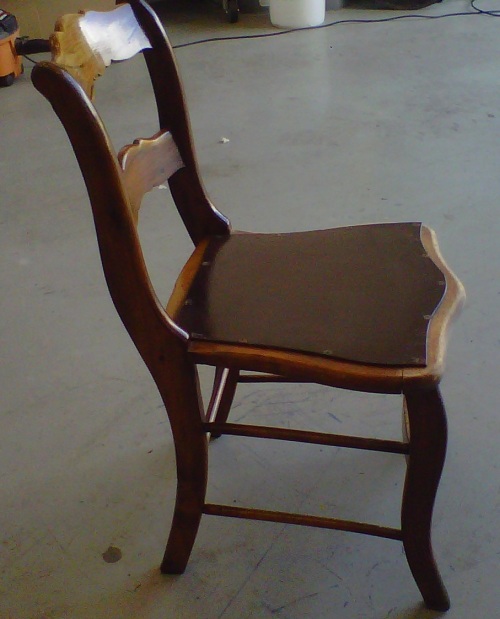
I had a messy job ahead.  I removed the fabric, hay stuffing, padding and old batting.  And a million old nails, tacks and staples.

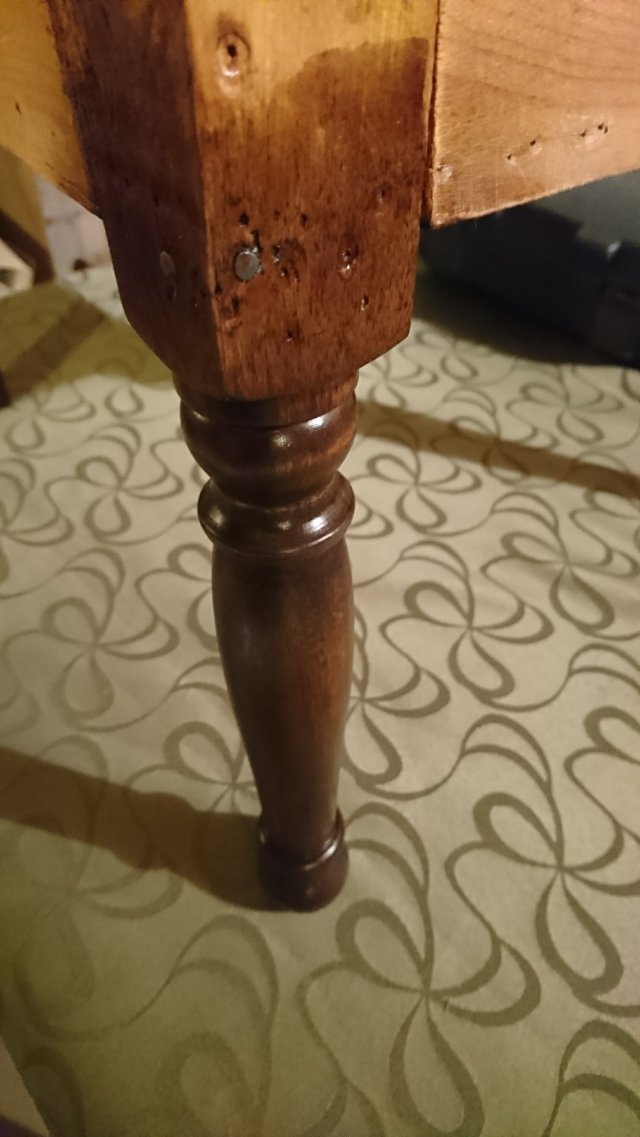
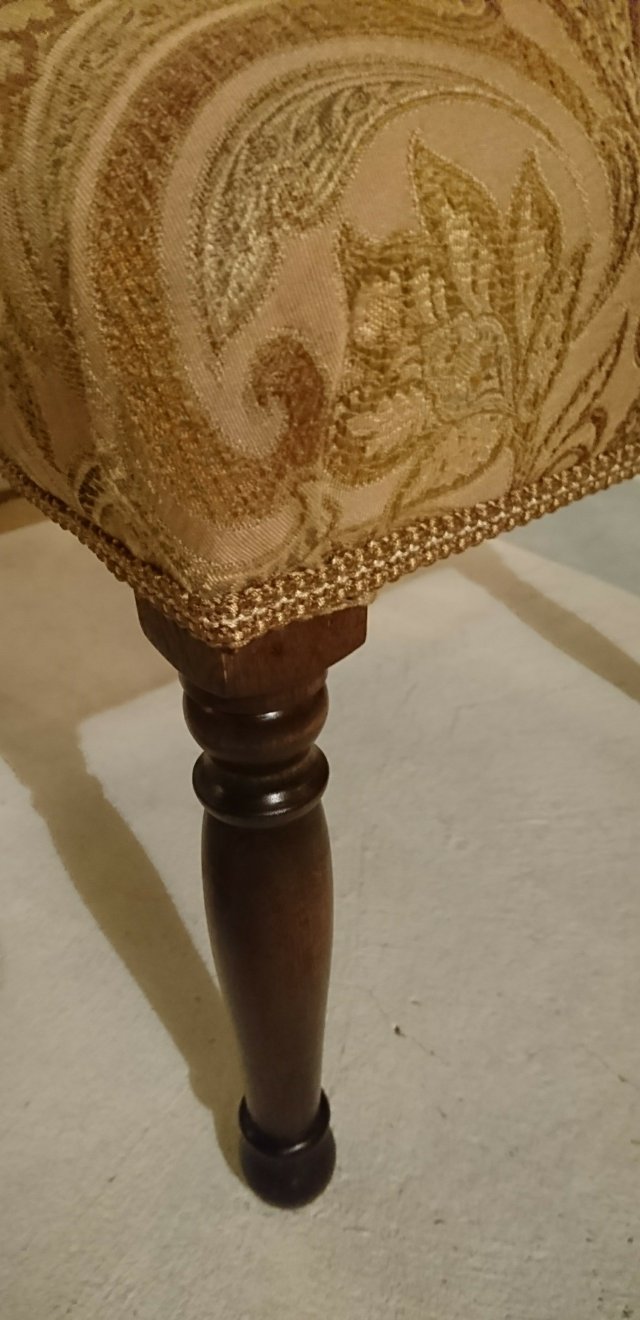
After the chair was down to the bare bones, I sanded down the chair legs.  They had been scratched up over time and lost their luster.  A couple coats of Minwax dark walnut stain and General Finishes top coat, the legs looked fantastic!

Before reupholstering the seat, I did some research and watched a few youtube videos to get some tips and tricks.  I’ve done a few chairs previously but I try to check out what the professionals use for tools and materials.  I’m always trying to learn more!  Here are some great videos that I found helpful (here & here).

 The chair seat had old zig zag springs that were in great shape, not bent or broken.  To make sure that the chair didn’t sink m too low, I stapled burlap binding underneath the springs.  I also tied the springs with strips of fabric remnants to make sure they didn’t shift.  I stapled a piece of fabric remnant over the springs to make sure there were no squeaks and to allow the foam padding to sit on something ‘solid’.   I cut the 2″ padding to size and shaped it to fit the seat shape (cutting the edges to make it not as square or cube shaped).  I covered that with a couple layers of batting and stapled that down.

The chair back was a little easier, as it didn’t have springs and had a solid back.  I cut foam to fit and covered it with a couple layers of batting.

Now the fun begins!!  I started with the seat, cutting the piece of fabric a few inches larger than needed.  Since I had to cut the fabric to fit around the chair back supports I wanted some leeway in case I made mistakes.  Luckily my aunt found a great deal on fabric and I had lots of room for error!

After reupholstering similar chairs I’ve learned a few things.  Here are some tips:  Take your time. Staples can always be taken out as long as you are careful with the fabric and wood.  Always cut around chair arms in small snips,don’t be too snip happy and avoid cutting too much around the arms.  Make sure the staples are somewhat in a straight line so if you are using piping or gimp as trim, you can make a straight trim line.  Don’t pull the fabric too tightly as you staple, it will look bumpy.  Hope this post helps, upholstery is fun to do!

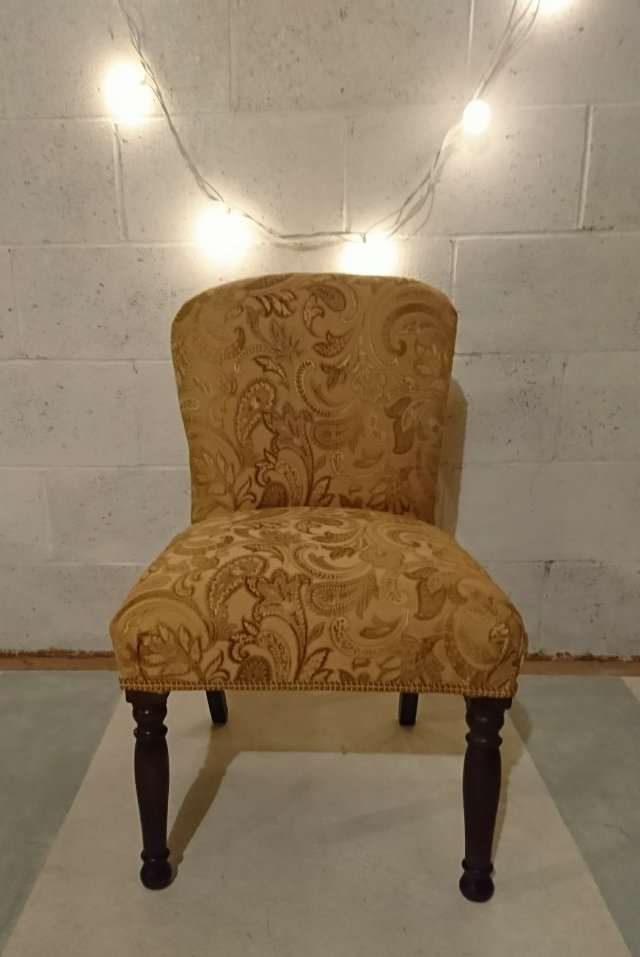
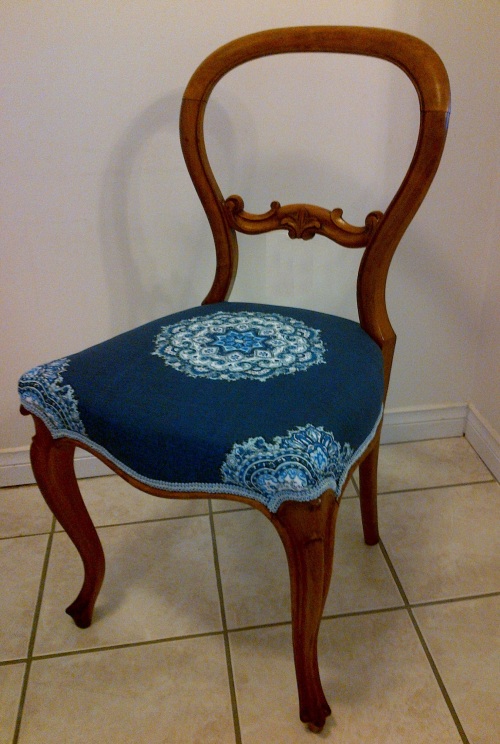
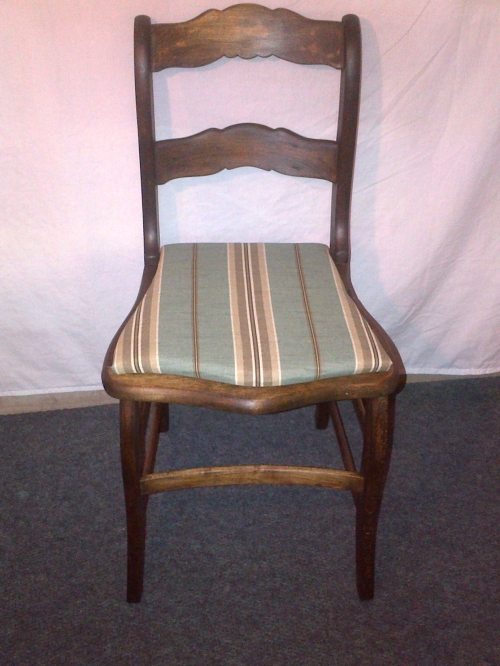
Here she is in all her glory!  My aunt was happy with her little chair.  I think Chris would have loved the chair redo too.  Now the chair will be ready for another 90+ years 😉


Thanks for stopping by!

Laurena

Chair refresh. 

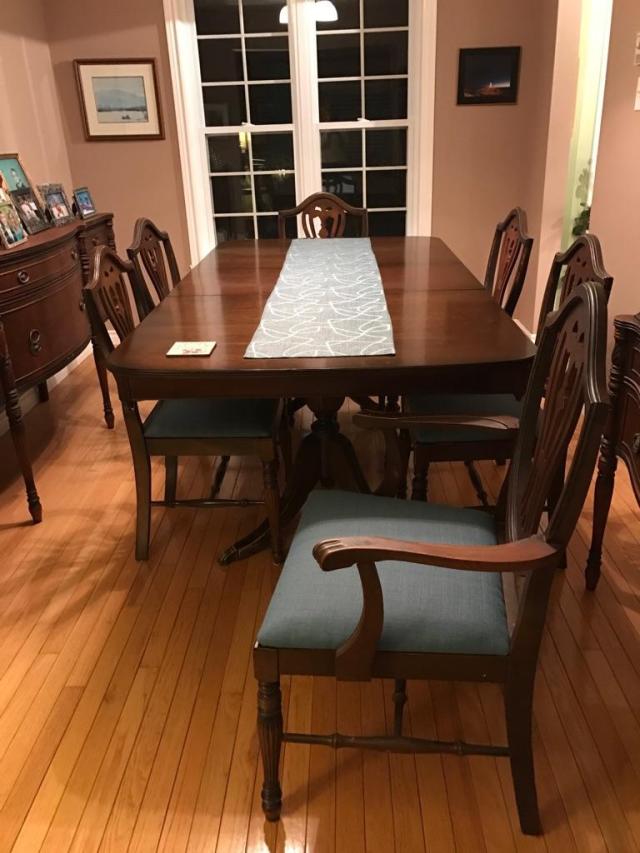
A month ago I was asked if I could reupholster some chairs for a new client. The dining set was her grandmother’s and 100 years old.  She had the chairs reupholstered years ago but it was time for a refresh.

The chairs were going to look awesome with new fabric.  I was looking forward to redoing the chairs.   I picked up the chair seats and had planned on working on them a couple days later.  It was going to be a storm day,  which is a perfect day for reupholstering!  Unfortunately, I started getting sick with a chest infection and was useless for a couple weeks.

So fast forward two weeks and another storm day. (We’ve had a few!!)  I was able to tear off the old fabric and start on reupholstering.  The biggest part of the job was to remove the two layers of fabric and lots of staples and nails.


Underneath the fabric, the old padding was in good shape.  The padding was still cushy and wasn’t damaged by liquids.   I covered the seats with two layers of batting.


My client found some beautiful teal fabric for a great price.   When I finished the seats I couldn’t wait to reunite them with the frames.  I loved the result and my client and her family did too!

Love this before and after!

It was a simple redo and I got to meet a nice family!  I’m so happy to have been able to refresh her grandmother’s dining set.  A treasure for sure!

Laurena

A Chair for Charity

Around this time last year I refinished a bench and put it up for sale, with the aim to donate money to a charity.  I advertised the bench on my Facebook page and mentioned that the money would go to an animal shelter in the South Shore, SHAID.  The shelter is a great spot and some of my favorite fur friends came from SHAID.  When I chose the fabric for the bench, it was a total coincidence the colours I used matched those in my parent’s home.  My Mom saw the bench, texted me that she loved it…and it was sold!  Easiest sale ever. And we were able to make a good donation to the shelter. If you’d like to make a donation, either monetary or food/supplies visit here.

It was fun to refinish a piece of furniture and donate to charity. So, my plan is to do a “Chair for Charity” once or twice a year.  This year I had intended on doing it in the spring and fall.  But with the 2 month strike at work, I wasn’t able to in the spring.  But no excuses now!   I just purchased a beautiful chair and will reupholster it soon.

chair

chair

I’ve decided to donate towards Paws Fur Thought.  It’s an organization that pairs service dogs with Veterans and First Responders who suffer from PTSD.  The therapy and comfort that service dogs give to those with PTSD is inspiring.  There are so many people who have benefited from having service dogs.  I admire the oraganization for helping people who otherwise would have a difficult time.  I have several military members and first responders in my family and group of friends.  This service could help them at some point or their coworkers.

db832a8955cc054400cfd965f4ce37e6

The organization takes donations through the Royal Canadian Legion and Mental Health Foundation of NS.  If anyone would like to make a donation to Paws Fur Thought, please click on one of the following links or contact your local branches.  (Mention the donation is for Paws Fur Thought).

royal-canadian-legion

 MHF

I will be back soon with an update on the chair.  And hopefully be able to post the before and after….once I get some other projects finished of course.

So much to do, and not enough hours in the day for paint to dry!

Laurena 😉

Classic polka.

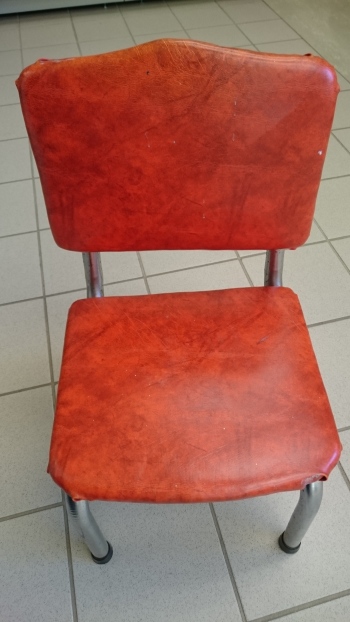
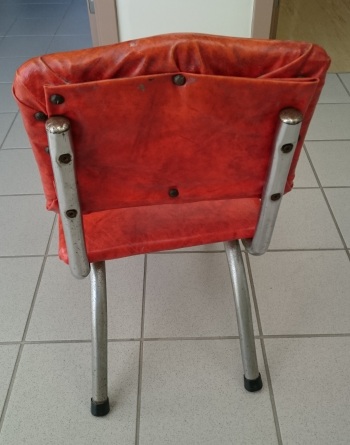
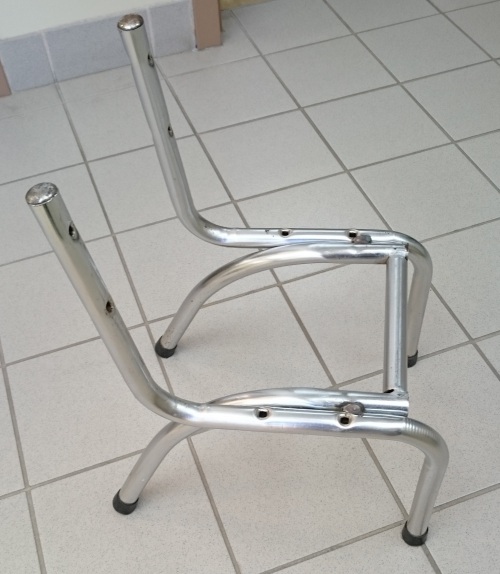
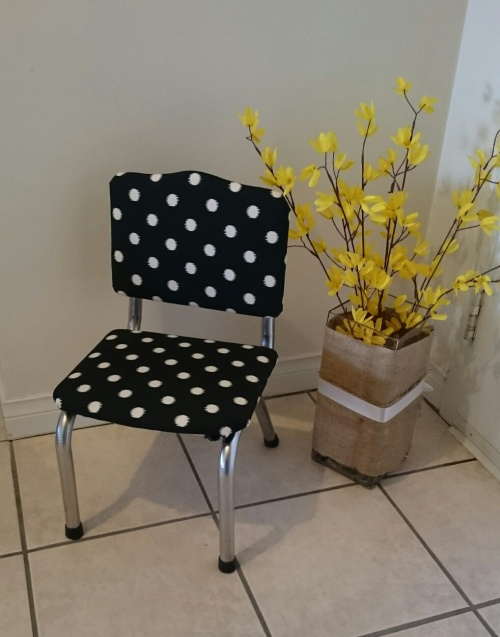
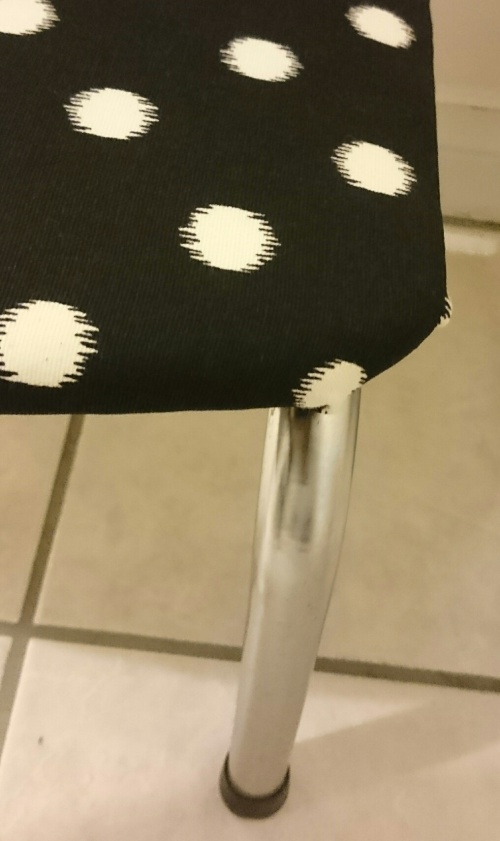
This weekend I finished a cute chair for a client.  I mentioned the chair in this post about Bar Keepers Friend.  The frame cleaned up beautifully!  There are still a couple of imperfections in the metal, but it looks so much better!

Here’s the before…

DSC_0686 DSC_0681

And the chair frame after cleaning…

DSC_0702

Now that the frame is sparkling, I started working on the chair seats.  There were three layers of vinyl on them.  It’s always tedious to take the old fabric off and to remove the staples.   But its a necessary evil to make the chair look like new.  After removing the fabric and old padding, I sprayed the wood with a deodorizer and let it air out on my balcony.   Luckily, we’re having a very mild November here in Halifax.  So being able to work outside is great!  What a change from last fall!  I think I was in hibernation mode this time last year.

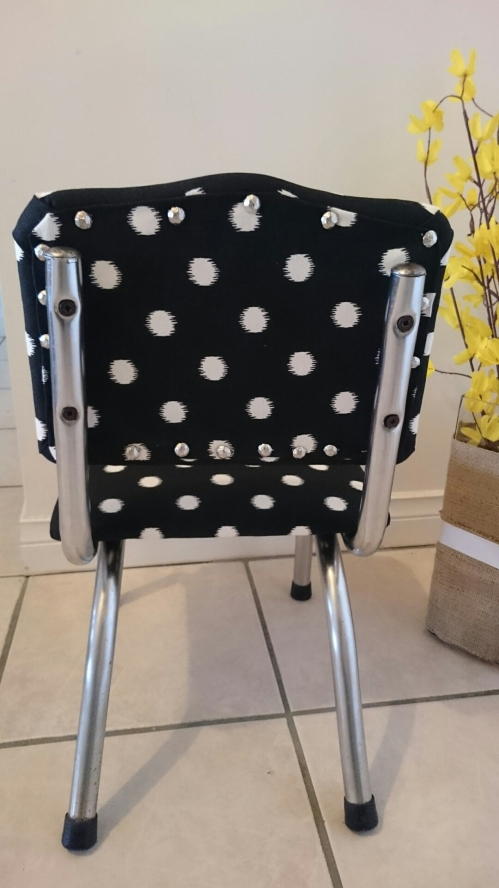
Reupholstering the chair was pretty basic. I used a few layers of batting as the new padding and stapled on the new fabric.  I used upholstery tacks to cover up the staples on the back of the chair.  Before attaching the seats to the frame, I marked out the spots where the screws would go in.  I then snipped through the fabric and batting to make it easier to put the screws in.

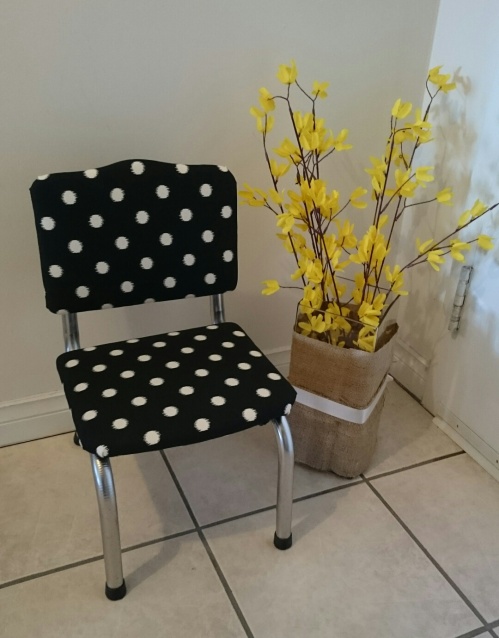
Here’s the final result!!

image

image

image

image

I love the result.  And even better, my client was over joyed with the chair.  The polka dot fabric was the perfect choice.  I hope the chair will continue to be a treasured hand-me-down for years to come.

No matter how many pieces of furniture I work on, I am in awe what some paint or new fabric can do. Sometimes I hear a song when I look at the final piece. Stevie Wonder’s “Isn’t she lovely!” comes to mind, especially for this chair. So sweet!

This chair is one of my favourites!

Laurena
Choosing colours & Painted furniture.

The past couple of years, my goal is to have my favourite things in my home.   I don’t want to have furniture or decor that I hate looking at.  Since (as I’ve been told) I have OCD…ugly furniture and decor drives me nuts.  I’m constantly tweaking things, changing paint colours, art pieces, slip covers, pillows etc.  We all do that don’t we?  Totally.

I want my home to be a cozy place with a nice mix of wood and painted pieces.   I like the eclectic look, but things must have some connection to each other.  (Guess that’s where my OCD comes out?).  Most of my painted furniture are some tone of white, black or grey.  Calming colours, classic and neutral.  When choosing paint colours for my home, I go for neutral on furniture and add pops of colour through my decor pieces.  Like art, pillows, books etc.    I’ve learned it’s easier to switch out accessories than to paint furniture again!  I’ve done that a couple times…not fun! 😉

My dining chairs were one of the last items on my plate.  I’ve switched dining chairs a few times, various chair styles and all different shades of blue. I wanted a more cohesive look, so the blue chairs had to go!

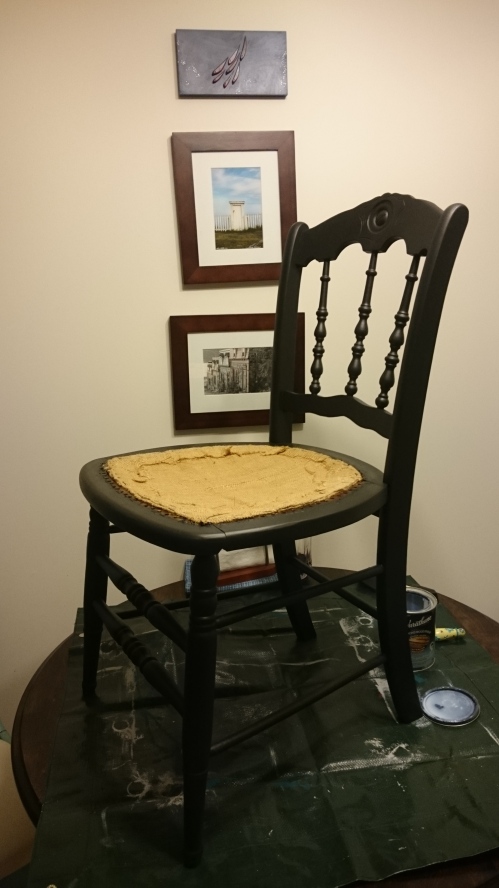
I have had these lovely antique chairs in storage for a couple of years.  I knew I wanted to use them for my dining room, but I had to decide what colour to paint them.  White, grey or black?!


Dining chairs @ Pivot~Paint~Create

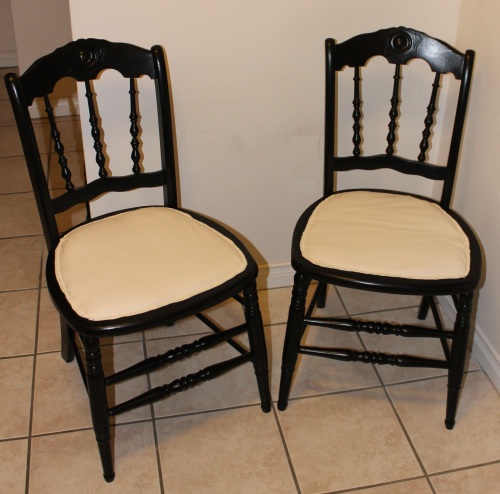
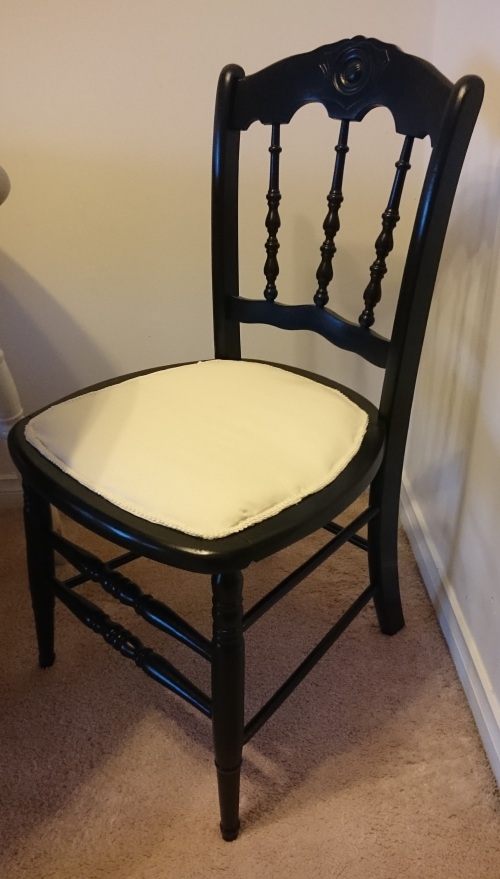
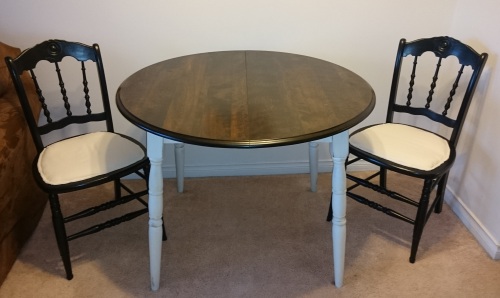
I finally went with black.  Since my dining table base was white, I wanted a nice contrast.  I used Lamp Black milk paint by General Finishes.  Love that paint and the colour.   After stripping the seats and prepping the chairs for painting, they looked better.   Funny how a little paint and getting rid of faux leather fabric can improve the look of the chair!

Dining chairs @ Pivot~Paint~Create

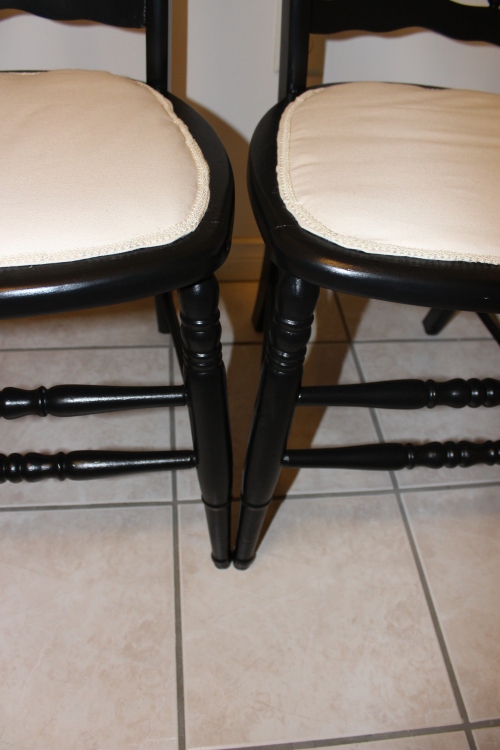
After 3 coats of paint, two coats of satin Varathane, I recovered the chairs in a natural fabric and trimmed with gimp.

Here they are!  I love how they turned out.

Dining chairs @ Pivot~Paint~Create

Dining chairs @ Pivot~Paint~Create

Dining chairs @ Pivot~Paint~Create

Dining chairs @ Pivot~Paint~Create

Dining chairs @ Pivot~Paint~Create

Til next time!

Laurena
Finally, Eastlake Chairs are finished!

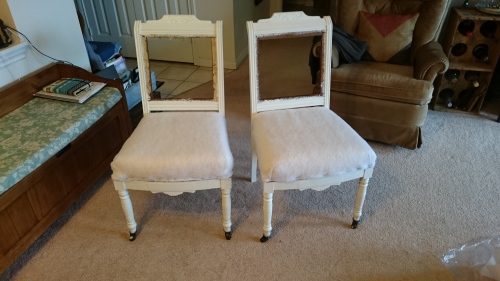
So it has been 4 months since I posted these two Eastlake chairs were ‘in progress.’

eastlake chairs @Pivot~Paint~Create

 Obviously I got a little side-tracked.  I blame it on the two month labour disruption and trying to catch up on sleep.

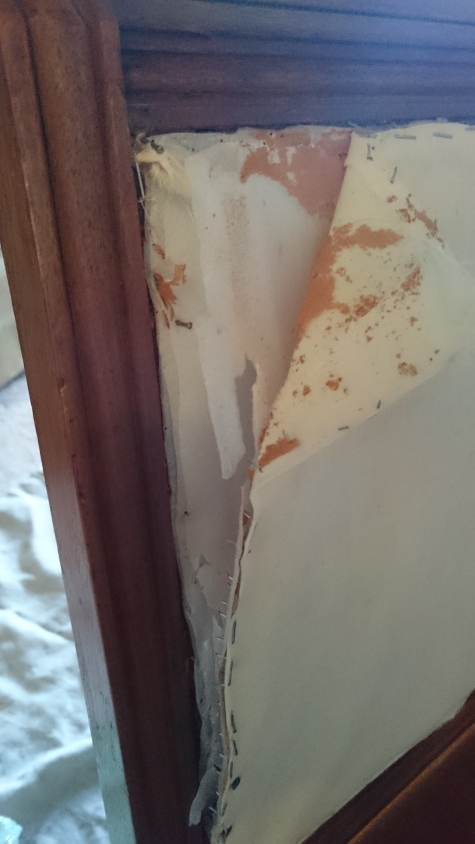
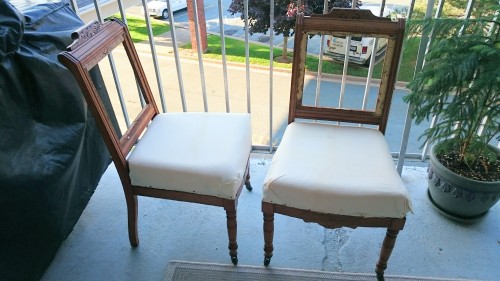
The sad thing is, I knew what I wanted to do with the chairs but I just didn’t get around to starting.  I love reupholstering chairs and benches but tearing off the old fabric just made me avoid starting.  And for good reason!  The chairs may have looked clean, but the fabric was old and brittle.  A million orange fibers floated in the air after I stripped the chairs.  And for some reason, the chair backs had the thin plasticy foam in between the fabric layers. The kind you’d use for wrapping glassware.  It was and odd upholstery material…

Chair redo

Strange eh?

Finally, the chairs are ready for the fun part, painting!!

Chair redo

For those of you who are screaming “Why are you painting these?!!!”  The wood may look nice in the pictures, but they’re scratched and have dents in the frame.  I wanted the chairs to have a nice finish so I filled in the dents and sanded down the scratches.

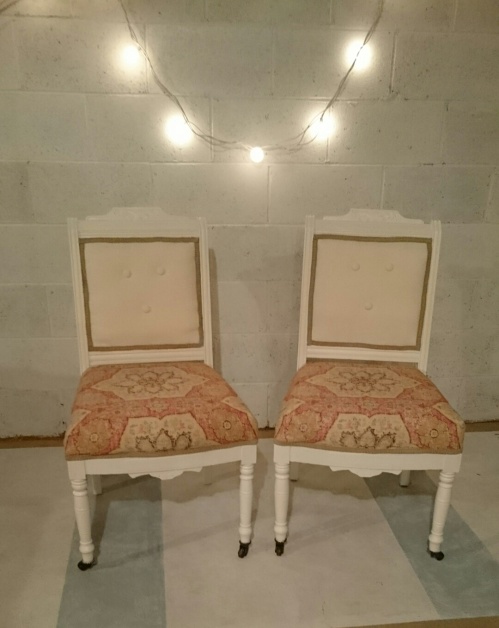
When I bought the Fusion paint for my coffee table, I also bought pints of Casement and Colour Block.  I painted the chairs first with Colour Block, to make sure the final colour had nice coverage.  I painted them 3 coats of Casement, which is a beautiful pure white.  Perfect update for the chairs.

Here are the painted chairs.  In retrospect I should have done two coats of Colour Block before painting with Casement.  In order to get the white without the wood showing through, I had to paint a few coats of Casement.

Chair redo

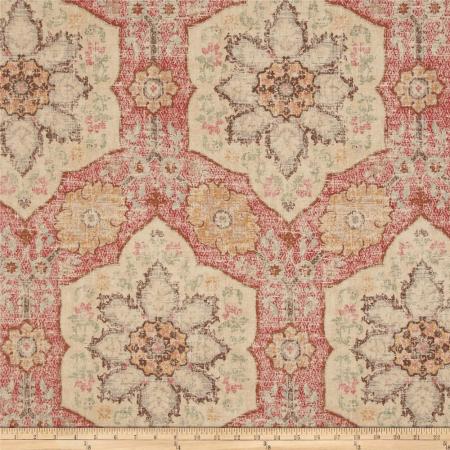
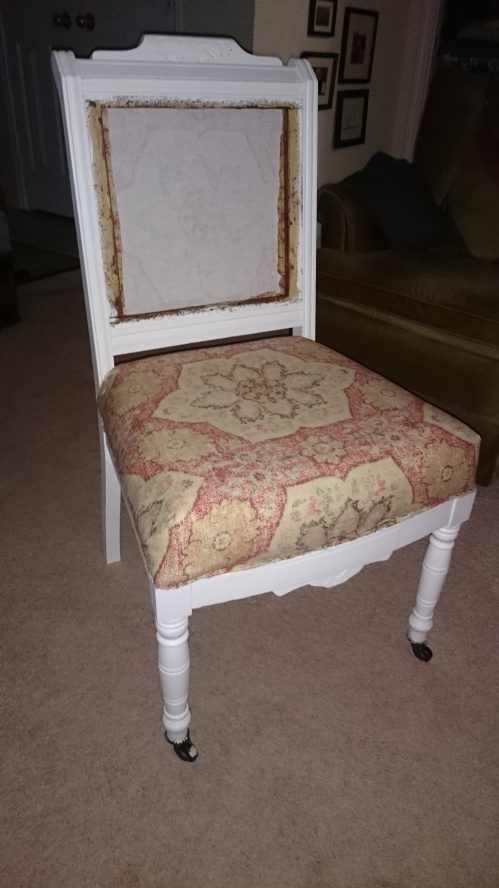
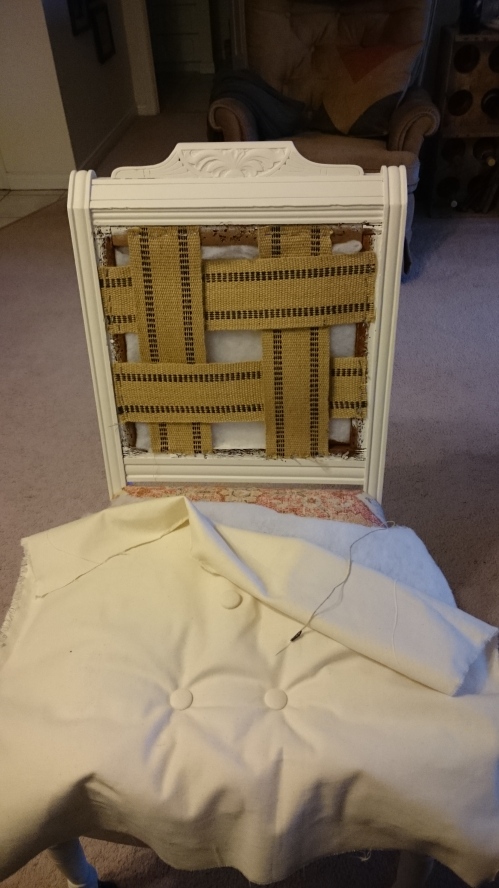
As for fabric I chose the one below along with a neutral fabric for the chair front, both from Fabric.com.  And I used gimp trim to hide all the staples.  As usual I burnt myself with the glue gun.  A regular event and tradition when I use the hot glue gun. Ugh!

p kaufmann toscana tile crimson

Half way there….

chair redo

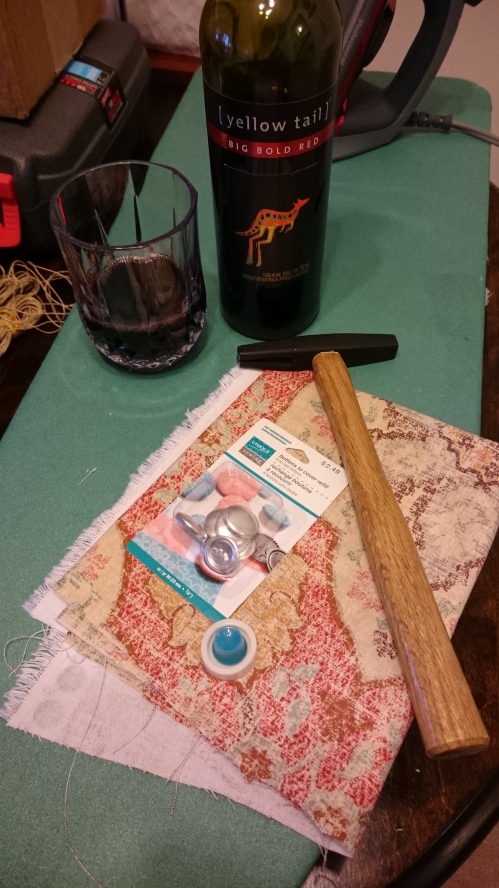
I attempted to add a tufting accent on the chair from.  It was fun to do, but I still need to perfect it.  Maybe next time on an ottoman.   Here are my supplies….wine is essential.

 chair redochair redo

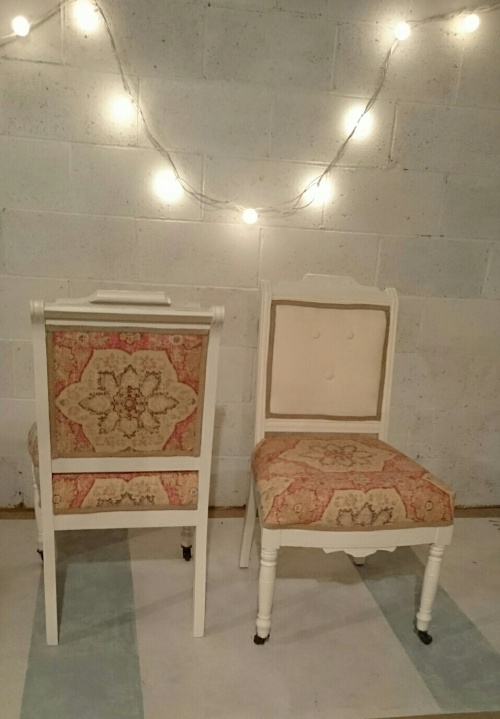
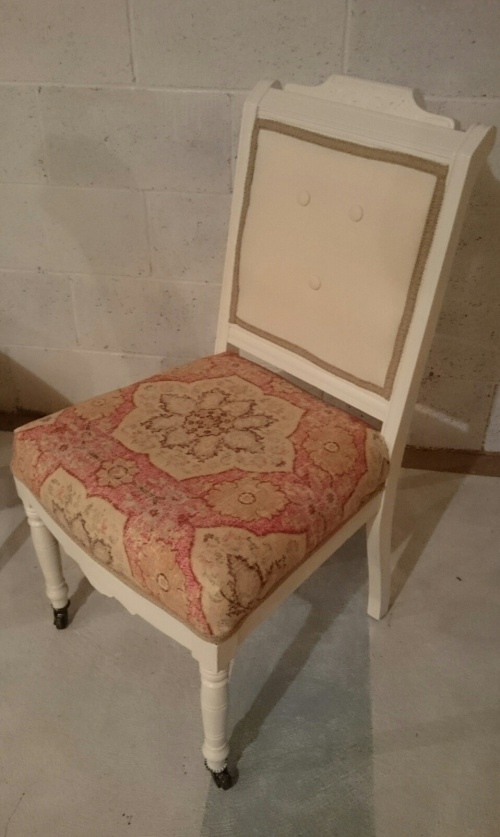
Here’s the after!!  I think it turned out well.  The reason I didn’t use the patterned fabric on the chair front, is so it wasn’t too ‘busy’ looking.  I think with the neutral fabric tones down the red/pattern.  I hope someone will like them!  And the chairs will find a new home. 🙂

chair redo

chair redo chair redo Til next time!

Laurena
Dining chair dilemma.

Since part of furniture refinishing is to find furniture to work on, I often stumble upon pieces that I love.  I buy them thinking I’d refinish and sell them.  But sometimes that’s not the case…I end up keeping them for myself!  Like this chair, the cute bench, and the small hutch.

Can you blame me though?

Chair @ Pivot~Paint~Create

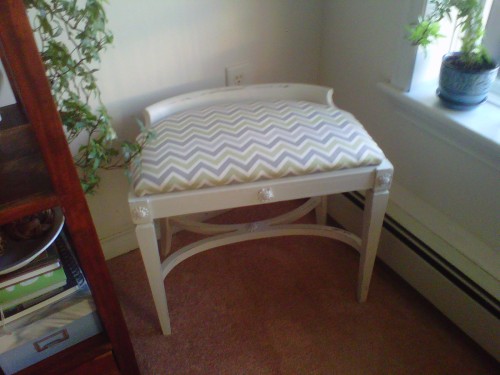
small bench @Pivot~Paint~Create

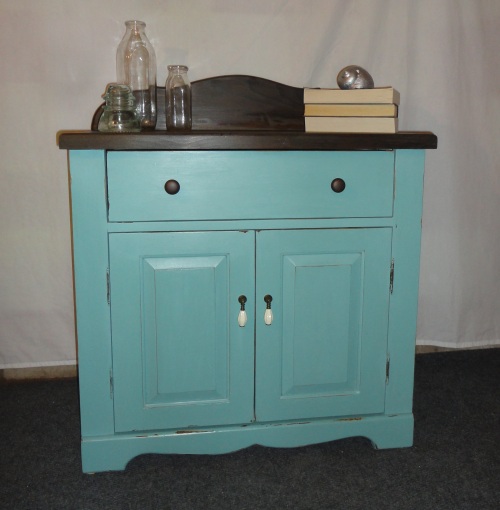
commode @Pivot~Paint~Create

Obviously I have a problem!  So I wasn’t shocked when I bought a set of dining chairs, brought them to my workshop…and decided to keep them!

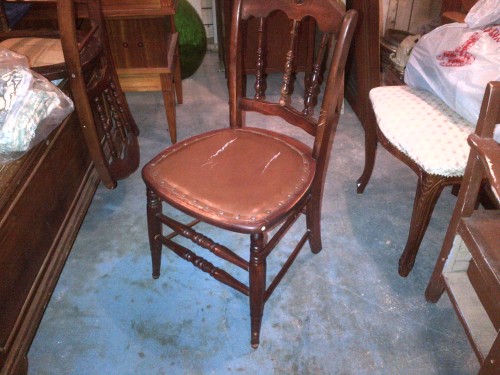
leather dining chair before @ Pivot~Paint~Create

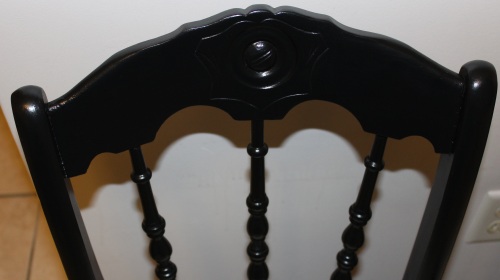
They have great character.  Nice curvy spindles on the chair back and nice legs!   I could see their potential.  A coat of paint and new fabric seats.  Sigh.  I can’t wait to redo them…(for myself, hehe).

I plan to start refinishing them soon.  But I need to figure out what colour to paint them.  I’m planning on using a neutral, drop cloth like fabric for the seats.  My dining table has a dark walnut top and white base (I did this post about it awhile ago).

The big question: Should I paint the chairs black, light grey or dark grey?

I’m leaning towards black…but let me know what you think!

‘Til next time!

Laurena
Eastlake chairs, redo in progress.

 Around Halifax, we don’t have a huge variety in furniture styles in secondhand stores or on Kijiji.  Its hard to find good quality furniture, unless you want to pay a lot.  Its important to a furniture flipper, like myself, to get the best bargain but still get quality pieces.  Occasionally I find a nice antique dresser or commode, and if I’m lucky, a Queen Anne chair.  I’ve been dying to find an Empire dresser or fun serpentine dresser.  Something with interest, and well…different.

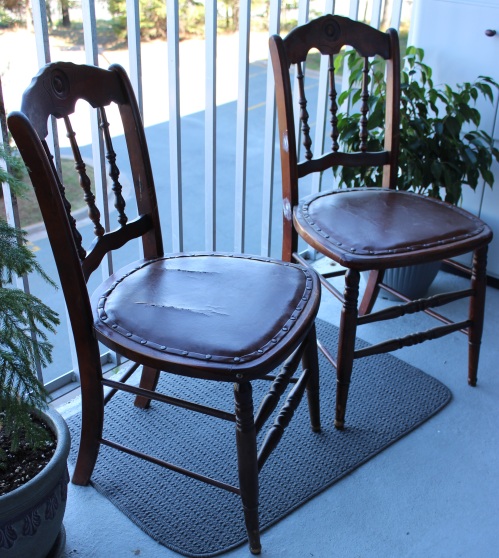
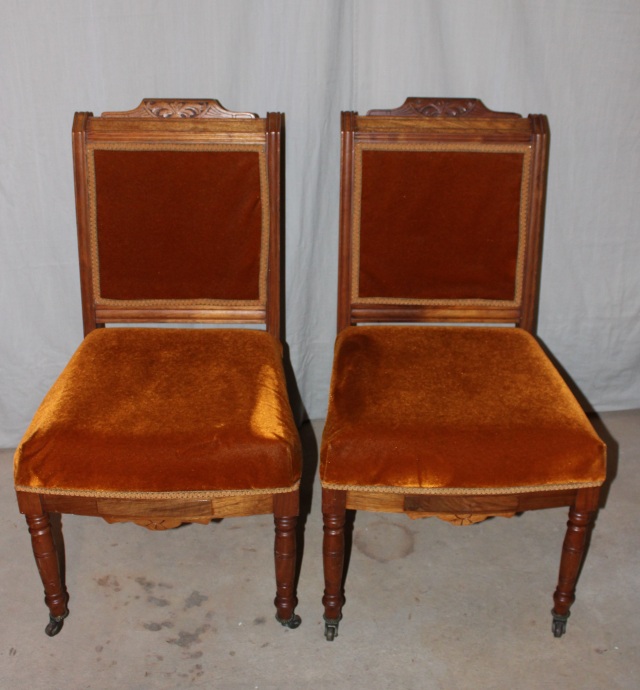
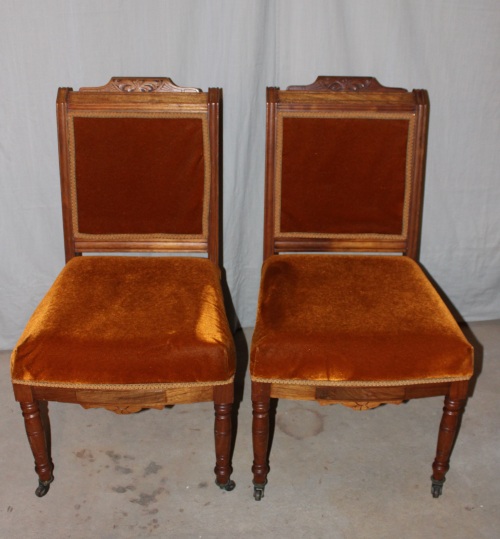
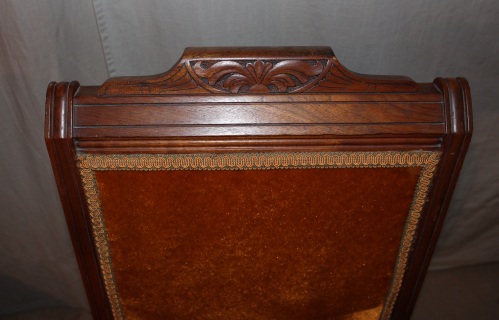
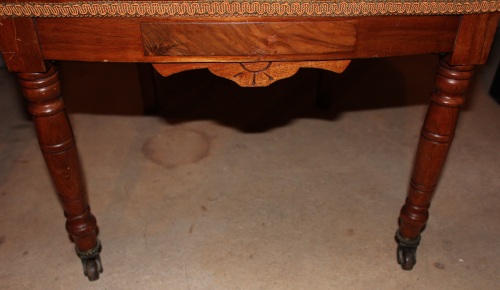
A few weeks ago, I saw some unique chairs on kijiji.  Two Eastlake dining chairs.  I was excited, but didn’t know what I’d do with them.  They had orange velvet fabric on the seats, which definitely had to go.  They had castors and looked in good condition.  But I wasn’t inspired yet.  Until I saw this post by Rachel from Shades of Blue Interiors.   I was in love!  The floral fabric with the masculine lines of the chair, it made me swoon!   It was a perfect way to update the chairs.

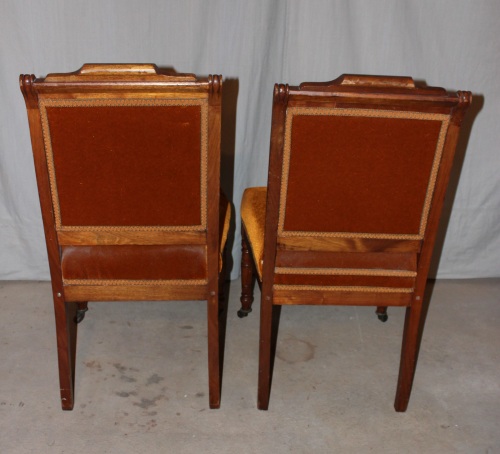
Unfortunately, when I saw the post and knew I had to get the chairs from Kijiji, I was in Montreal on vacation.  I was crossing my fingers the chairs wouldn’t be snatched up before I got back home.  After arriving safe and sound in Halifax, I contacted the guy about the chairs.  Lucky me, they were still available!!  Here are the lovely chairs.

Eastlake chairs before @ Pivot~Paint~Create

 Eastlake chairs before @ Pivot~Paint~Create

 Eastlake chairs before @ Pivot~Paint~Create

Eastlake chairs before @ Pivot~Paint~Create

Now that I had the chairs, I had to find the right fabric.  I try to plan a project by either picking the paint or a fabric first and go from there.  I couldn’t decide whether to keep the chair as is or paint them.  I had seen so many inspiring pictures on Pinterest.  But couldn’t decide how I wanted the chairs to look.  Finally I settled on a fabric, with beautiful reds, creams and tan colours from Fabric.com.

P Kaufmann toscana tile crimson

Now to decide…to paint or not to paint?  I was thinking I may paint the chairs a creamy white and use dark wax. Or should I go black or keep the wood or…..??  I’ll probably change my mind a few times before I start refinishing the chairs.  I still have to strip the old fabric off and I hope to start the chairs next week.  So stay tuned!

If you have suggestions on what to do with the chairs, feel free to comment!

Until next time!

Laurena


Sharing @

fffbutton2

Hand-me-downs

I must say, my favourite kind of furniture pieces are hand-me-downs.  Furniture can have so much history behind it.  The many houses they have sat in, the people who have used the pieces, and the memories made around them.  It means more to me having furniture with family history than to buy something new in a box store.

A couple of years ago my boyfriend’s parents were trying to declutter their home and were getting rid of some furniture.  Right away my ears perked up and I offered to take some. I love helping someone declutter! 😉

They had given me an old rocker, a couple of chairs and some tables, an old wooden shovel and a wooden tool box.  Of course, before I sell anything, I like to go through and weed out items to keep.  I kept the shovel, tool box, 2 chairs and a table.  All of them had family history attached to them or were just too unique to give up!

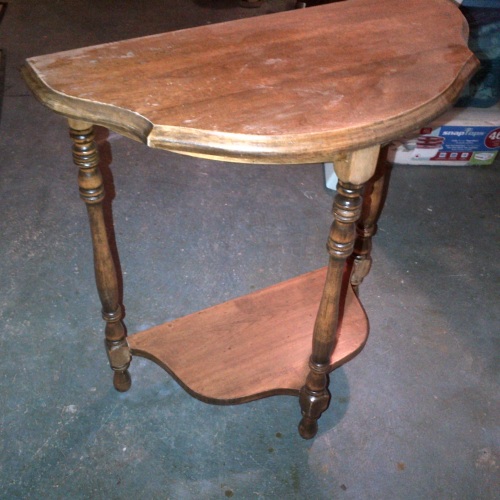
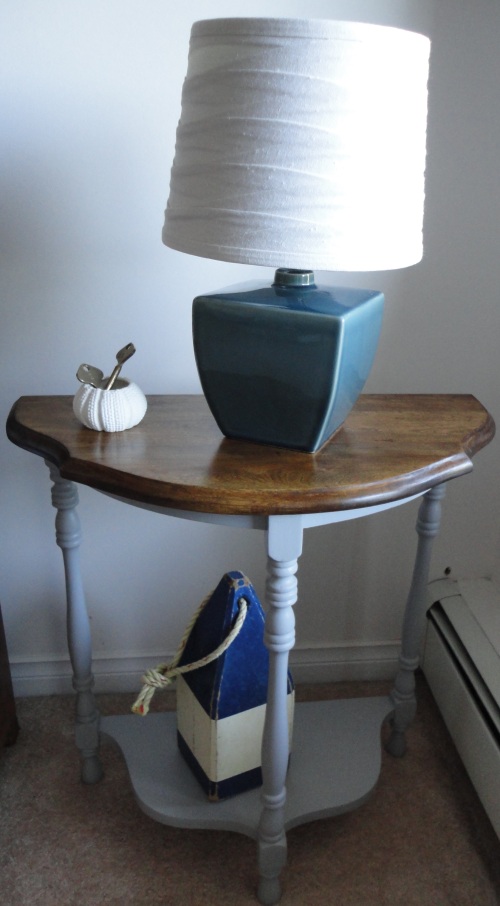
 I decided to refinish one of the chairs and a half moon table.  I loved their simple character and the fact they had been in their family for a couple generations.  So they deserved a pick me up!  Both were made of beautiful wood but the varnish was peeling and scratched.

Here’s the before of the chair:

Nicks chair before 1 Nicks chair before 2

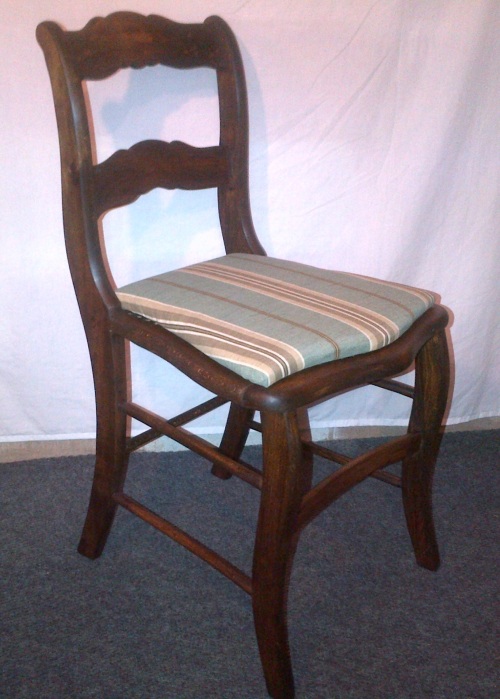
 I sanded down the chair and re-stained it in dark walnut (from Minwax).  The seat originally was caned but over time was damaged and replaced with fiber board. I made a new seat and upholstered it in a masculine stripe.  I planned to give the chair as a Christmas gift to my boyfriend.  Normally I would have chosen a cute floral fabric or grain sack but I chose colours he would like.  I’m such a nice girlfriend!  😉

Here’s the finished chair:

antique chair @ Pivot~Paint~Create Antique chair @ Pivot~Paint~Create

I’ve seen a few half-moon tables on kijiji or in antique stores, but not many had nice legs or wood grain like this one.

Half moon table @ Pivot~Paint~Create

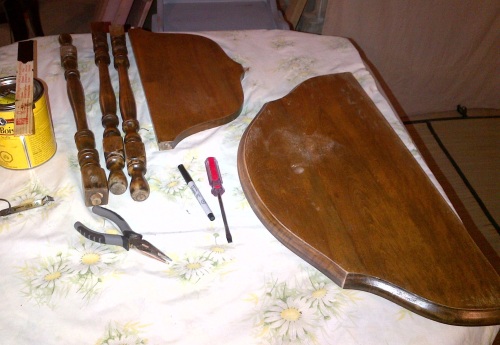
The table had quite the wobble to it so I took it apart and re-glued all of the joints with Gorilla glue (I love those commercials!).

half moon table @ Pivot~Paint~Create

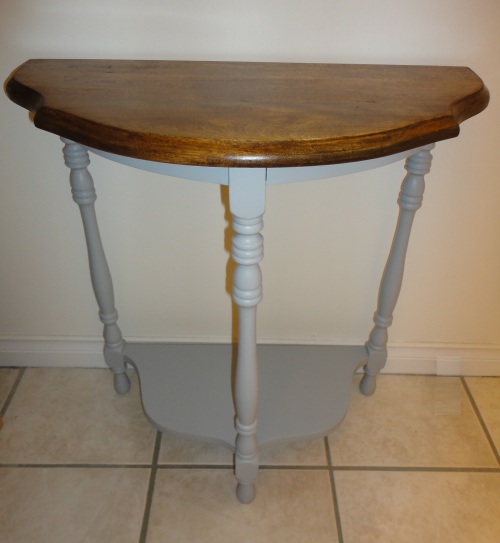
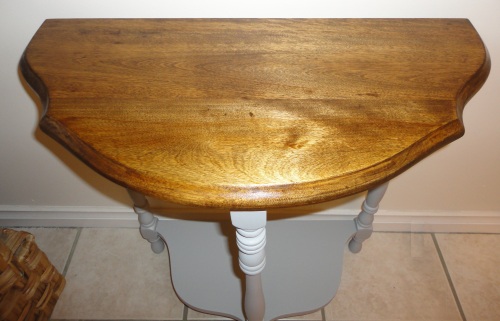
Since I loved the wood grain on the table top, I didn’t want to hide it.  I went with Special Walnut (from Minwax) which is a beautiful, mid-tone stain.   It was the first time using Special walnut, and I’m hooked. The base I painted using a custom mix of Lamp Black and Antique White milk paint (General Finishes).  I wish I had written the recipe down, the colour turned out awesome!  I sealed everything with Hemp Oil.  The wood was so old and dry, it need some moisture!  The hemp oil made the wood look so much better!  I love the grain even more.

Here’s the after!

half moon table @ Pivot~Paint~Create Half moon table @ Pivot~Paint~Create

half moon table @ Pivot~Paint~Create

Have you received hand-me-down furniture? Or do you have a favourite heirloom piece from your family?  Have you dared to refinish it or did you leave it untouched?

Thanks for stopping in!

Until next time,

Laurena


Sharing @

FFF.banner1

grabbuttonfeatured

Mix & match.

Happy Monday!  Just a quick post, since I’m working on this when I should be asleep.  It is a work night after all.  But when an idea hits me, I gotta write it down!

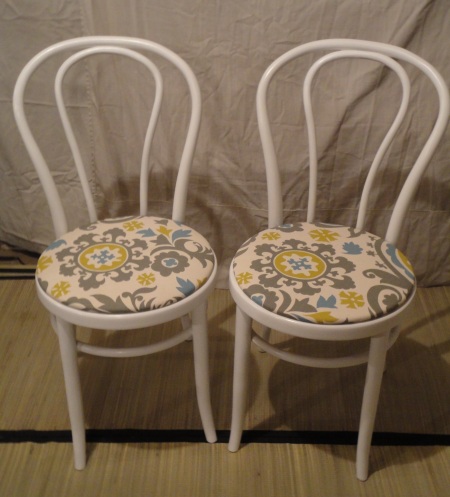
A couple years ago I refinished some chairs for a client, for her dining area.  Originally, she purchased two bentwood chairs.  I had painted them white and recovered the seats in a bold suzani print.  The bentwood chairs looked great in white.  I wish I had more of them!

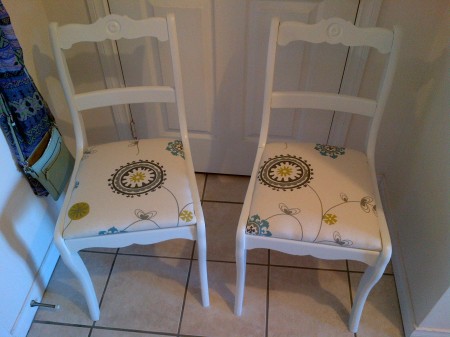
  After a couple weeks, my client contacted me asking if I had more chairs and more of the same fabric.  I didn’t have either…but I searched around kijiji and fabric.com.  I was able to find two chairs.  They weren’t bentwood but they had a feminine feel to them.  As for fabric, I lucked out and found a similar print in the same colours.  The two new chairs,  I painted white and recovered the seats.

 bentwood chairsFeminine dining chairs

The chairs may not match exactly, but keeping the paint and fabric colours the same, connects them.  I just loved the four chairs and wish I had been able to take a picture of them together.

Another lesson learned as a new blogger: take pictures of everything!

Thanks for stopping in!  Til next time!

Laurena
Sharing @ A Bowl Full of Lemons