Just a few…

Here are a few projects that I have worked on over the past year.  I’ve refinished lots and lots of tables, a few chairs and more to come!

First off, I kept this one.  Simple redo with Casement Fusion Mineral Paint and just sanded the top, kept it as is.  Beautiful!

side table 1

IMG_1086

IMG_1079

Side table refreshed with Heirloom Fusion Mineral Paint and Dark walnut stain.

side table 3

IMG_1094

End table refreshed with Mountain Haze Fat Paint and ebony stain.

side table 2

IMG_1126

Coffee table refreshed with Natural Grey Behr paint.

2017-07-19 12.38.51

IMG_1243a

Coffee table refreshed with Inglenook Fusion Mineral Paint.

DSC_8650

IMG_1247a

Old school side table refreshed and painted with Paris Grey ASCP and Heirlook interior.

_20170908_175640

IMG_1266a

IMG_1272

End table painted with French Linen ASCP and white wax on top. Love this look!

IMG_1277

IMG_1335

IMG_1336

End table painted with Paris Grey.

IMG_1289

2018-03-29 15.36.59

Half moon side table painted with a grey mix with Ash & Casement Fusion Mineral Paint.

demi moon table 1

demi moon table 2

ikea grey 1

ikea grey 2

Coffee table painted with a grey custom mix, and white wax on the top.

2017-06-12 15.37.36

IMG_1063

IMG_1068a

Coffee table turned bench, painted with Casement and a striped fabric.

2015-10-17 19.41.34

IMG_1347

IMG_1350

Coffee table, refreshed with Little Lamb Fusion Mineral Paint.

IMG_1280

IMG_1413

IMG_1411

Bringing sexy back: a story of a little chair.

I love reupholstering and refinishing furniture that have a story.  And of course,  working on a piece for a family member makes it even more fun.

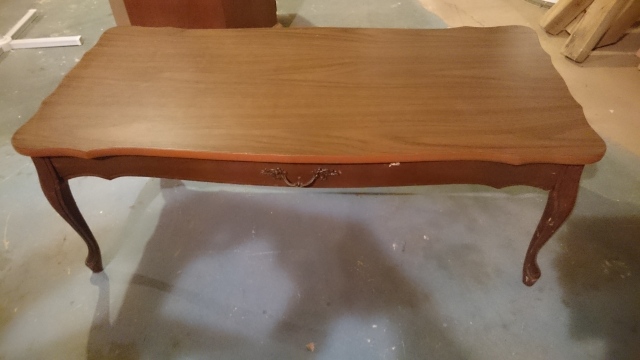
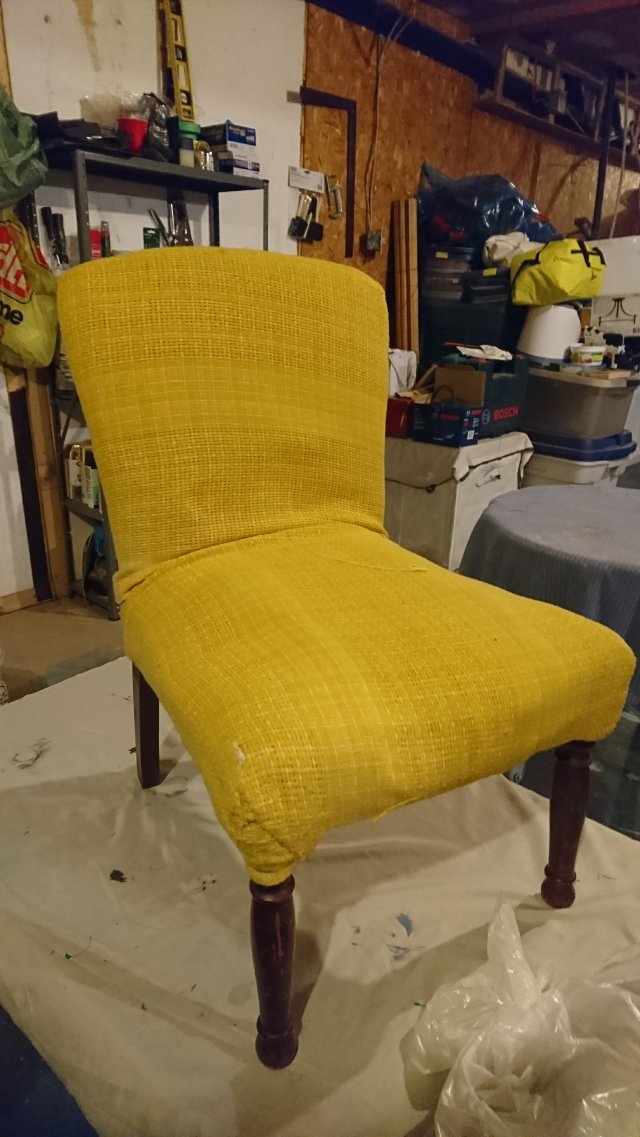
My aunt asked me to reupholster a chair she inherited from her mother in law Chris.  She had passed away just a few years ago and was quite the lady.  She may have been short in stature but she had a personality that was large in life.  The chair had been purchased after Chris and her husband married back in 1940.  It was a cute, low chair. Perfect for Chris.  😉

Over time the little chair was recovered and well loved.  Once I started working on it, I found four layers of fabric!  Lots of work and love went into the chair over the years.

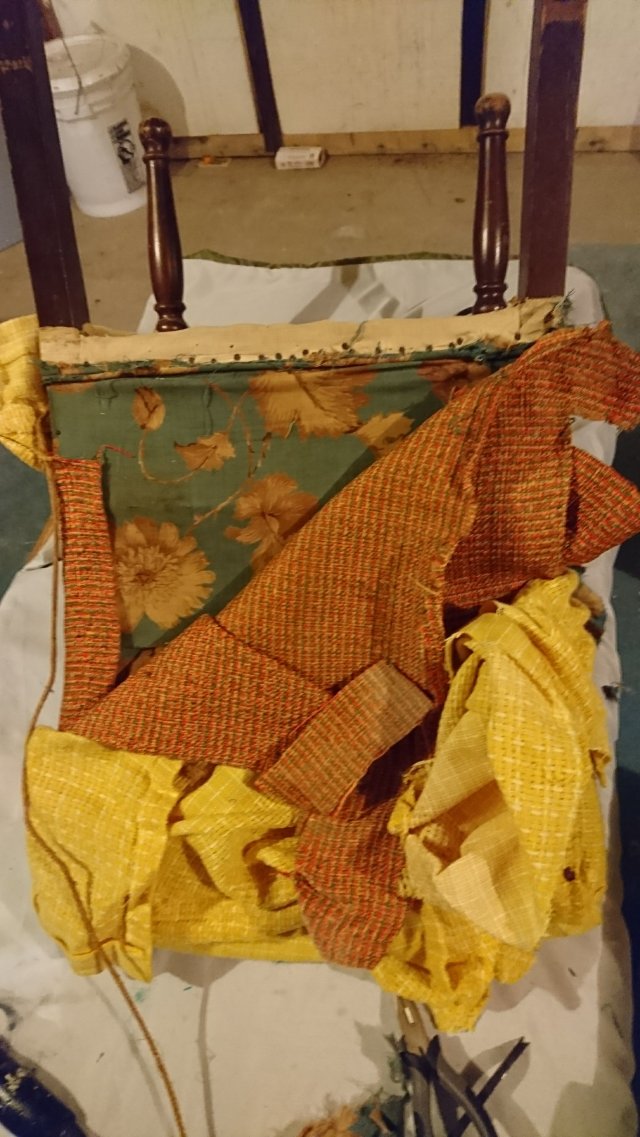
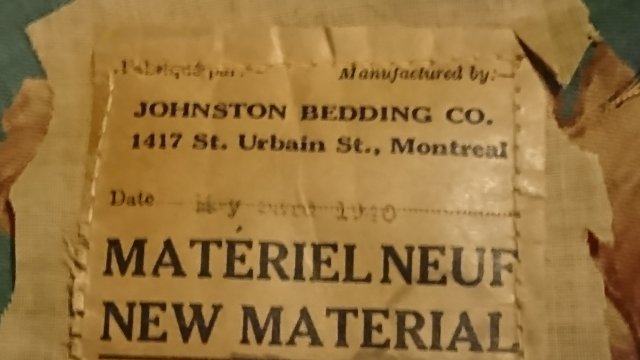
I started to take the first layer of fabric off and noticed that the stuffing and some of the fabric was easily falling apart. Its amazing how long everything held together.  There was a manufacturing label on the chair from May 1940!

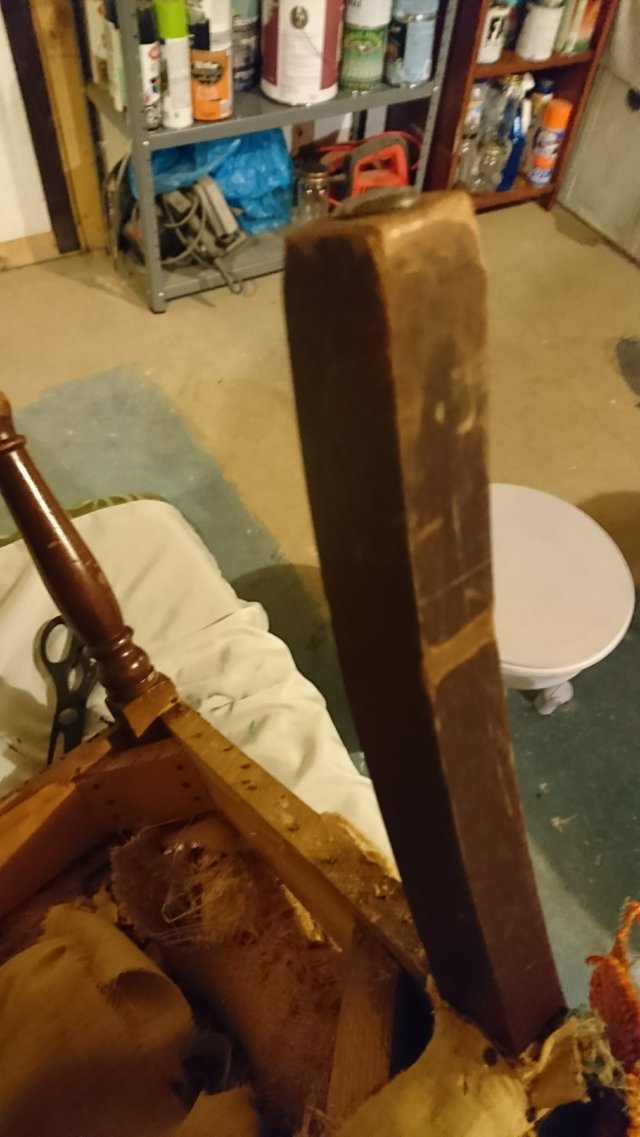
I had a messy job ahead.  I removed the fabric, hay stuffing, padding and old batting.  And a million old nails, tacks and staples.

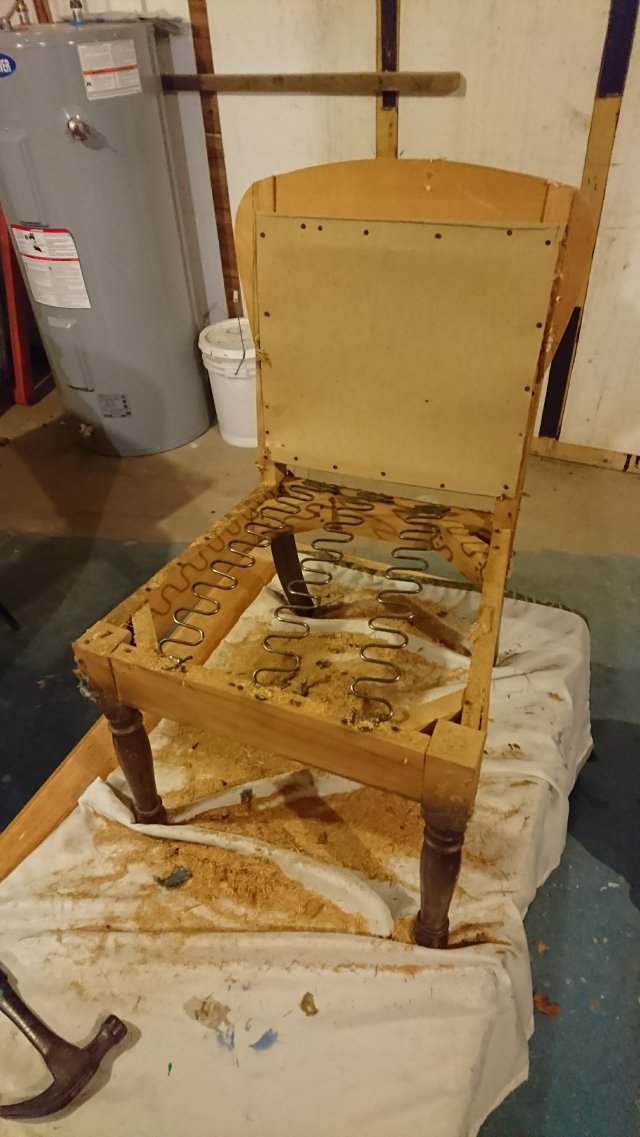
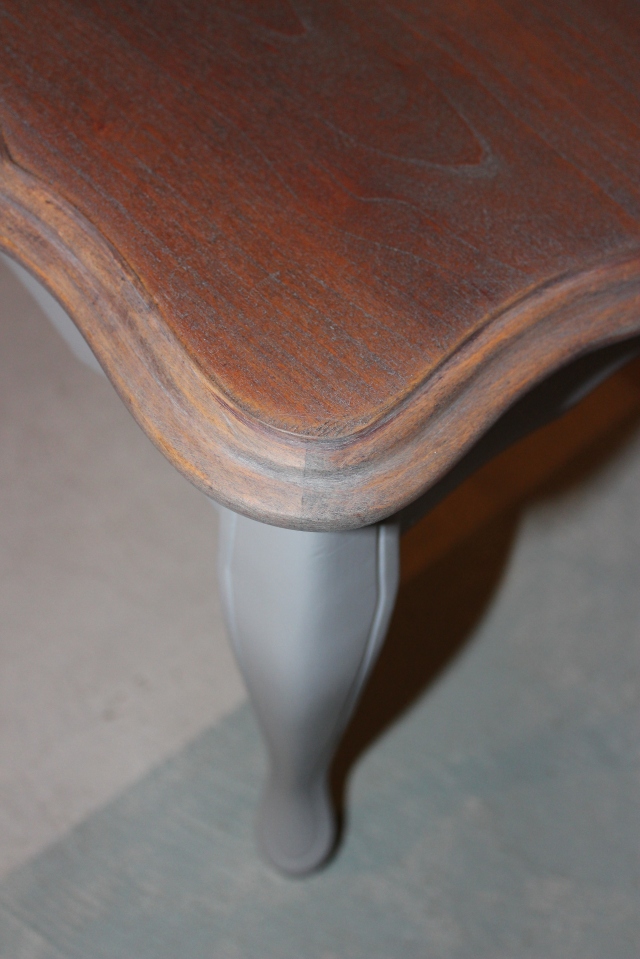
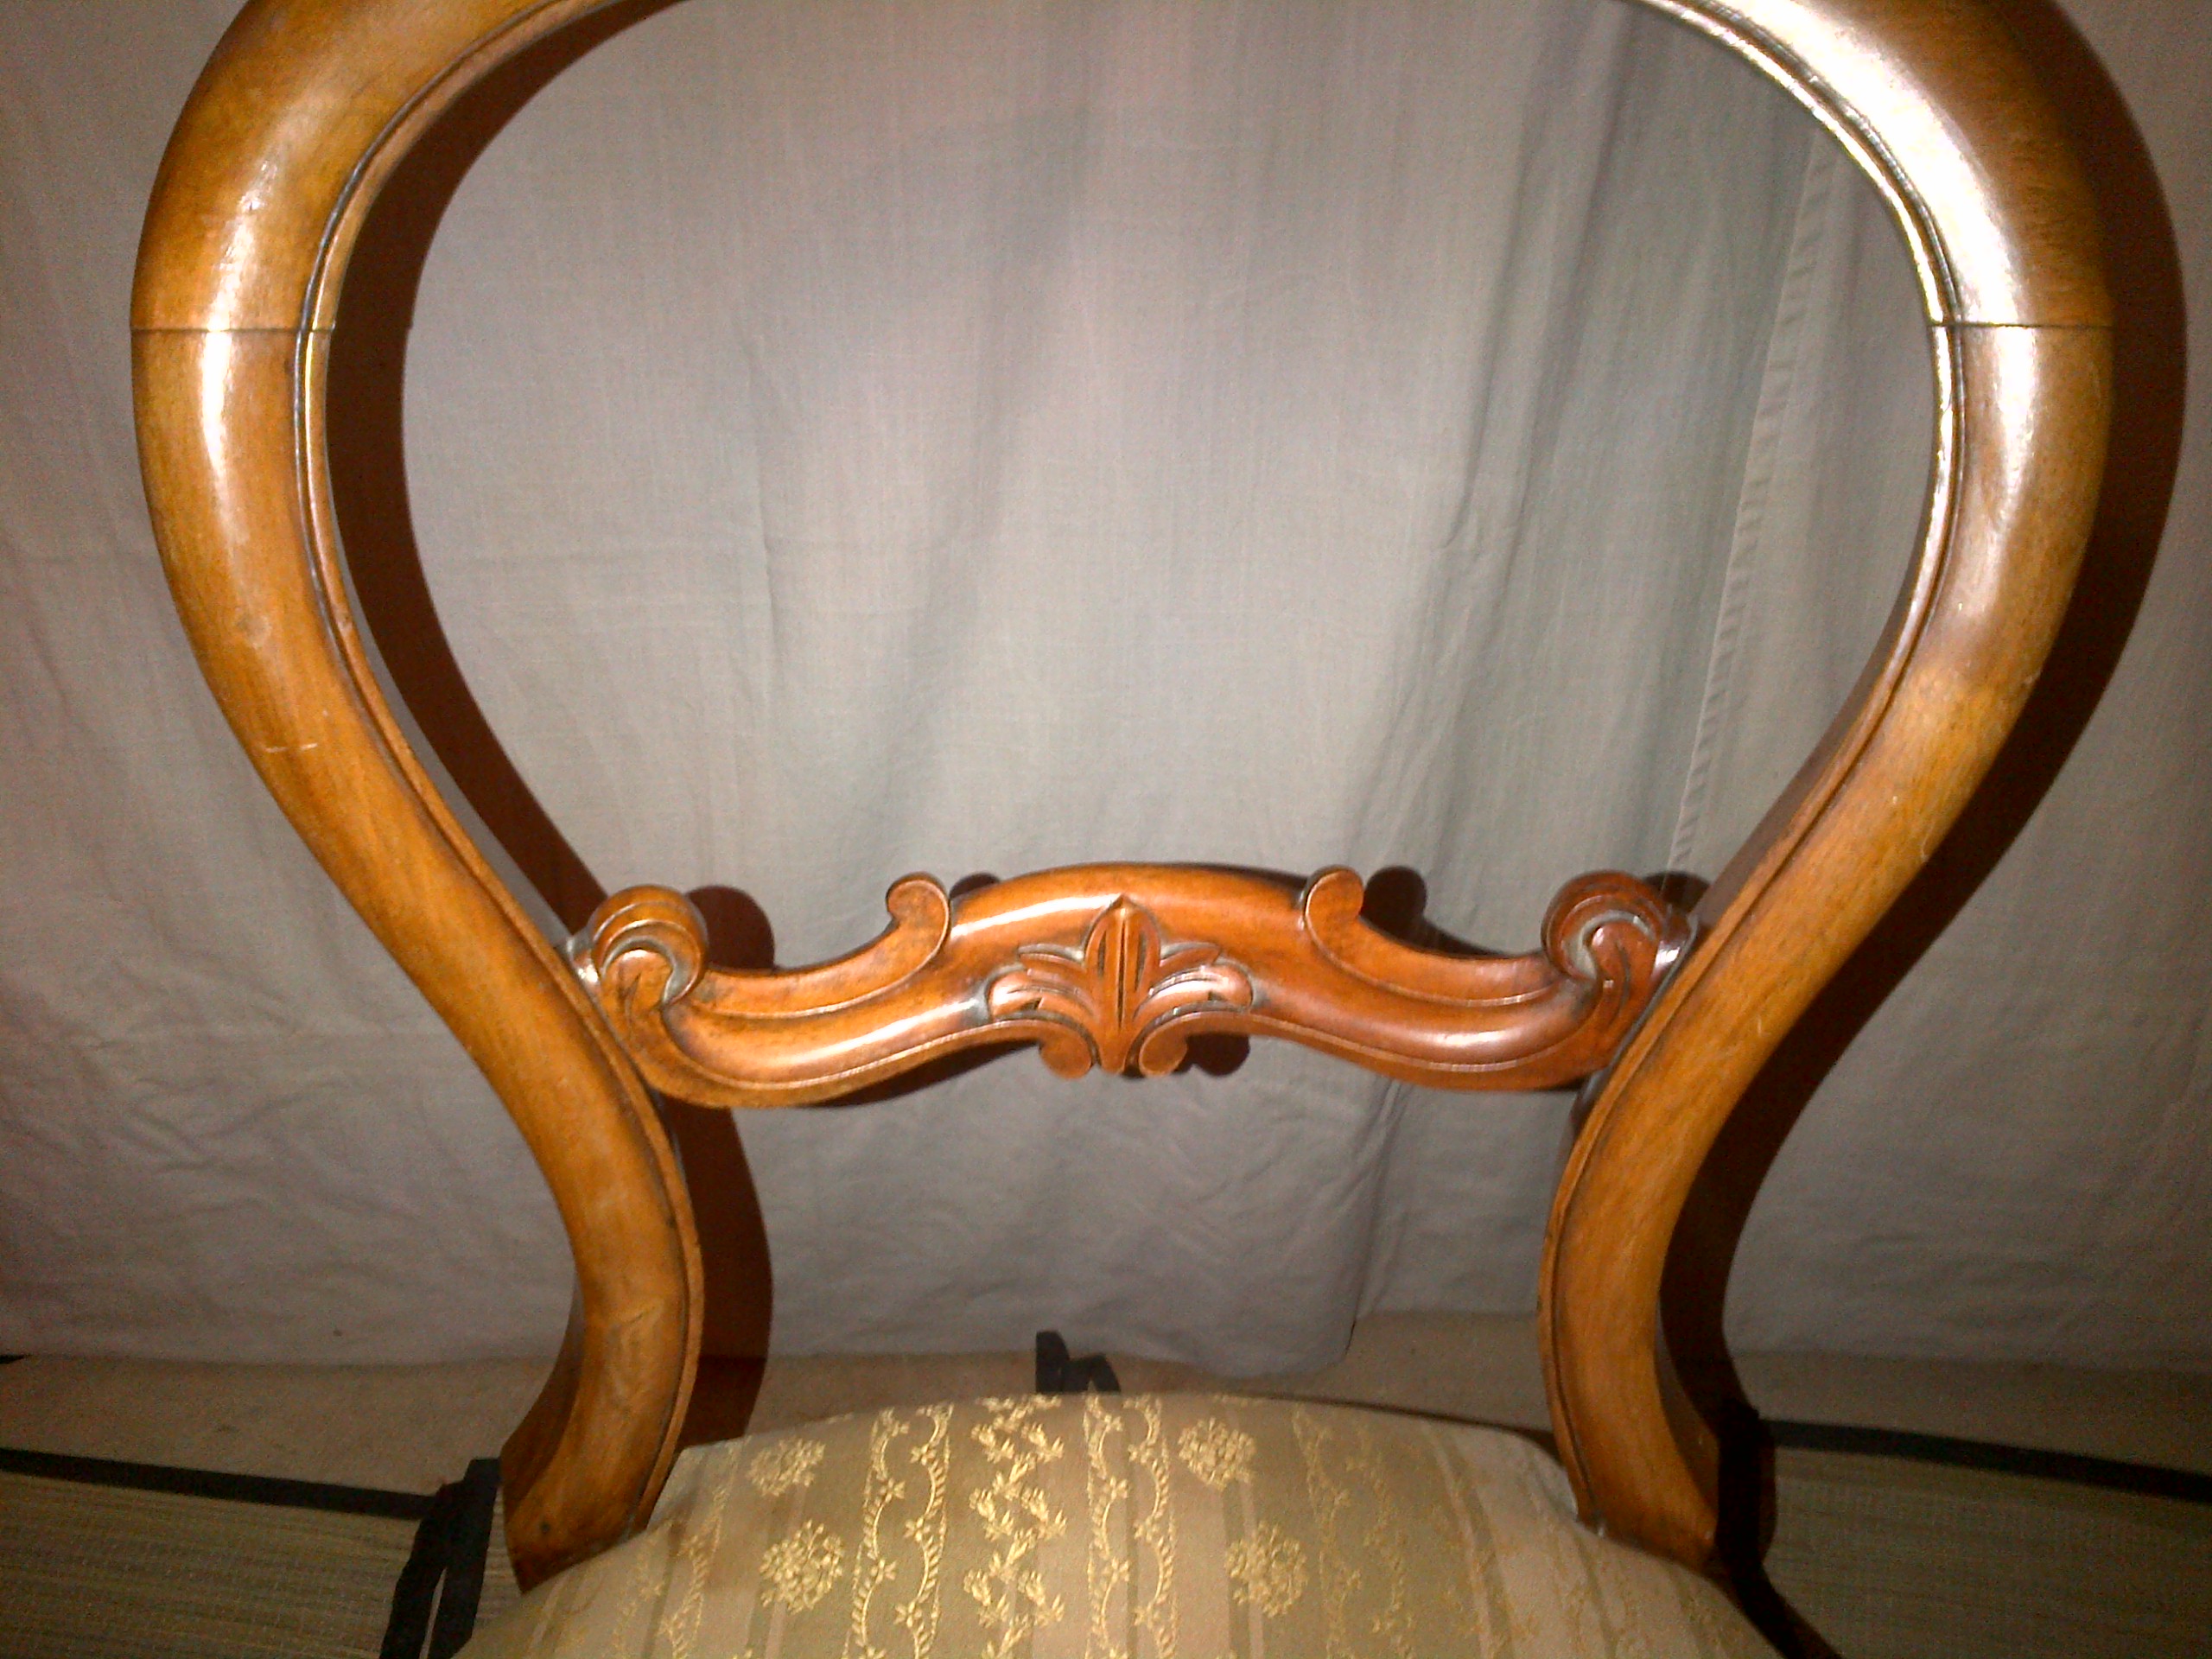
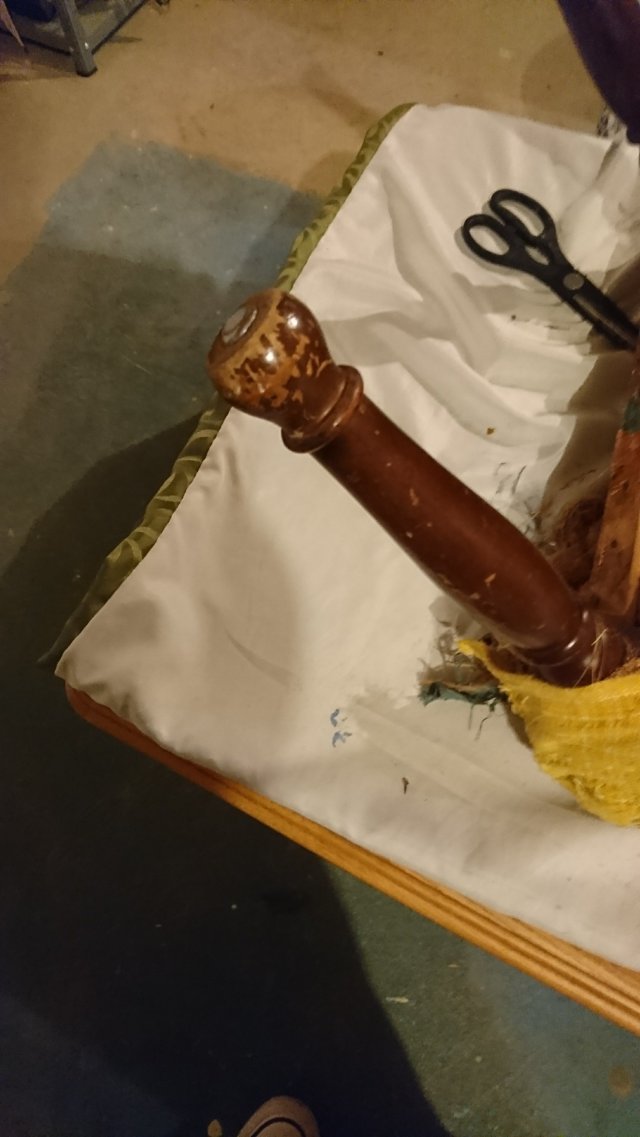
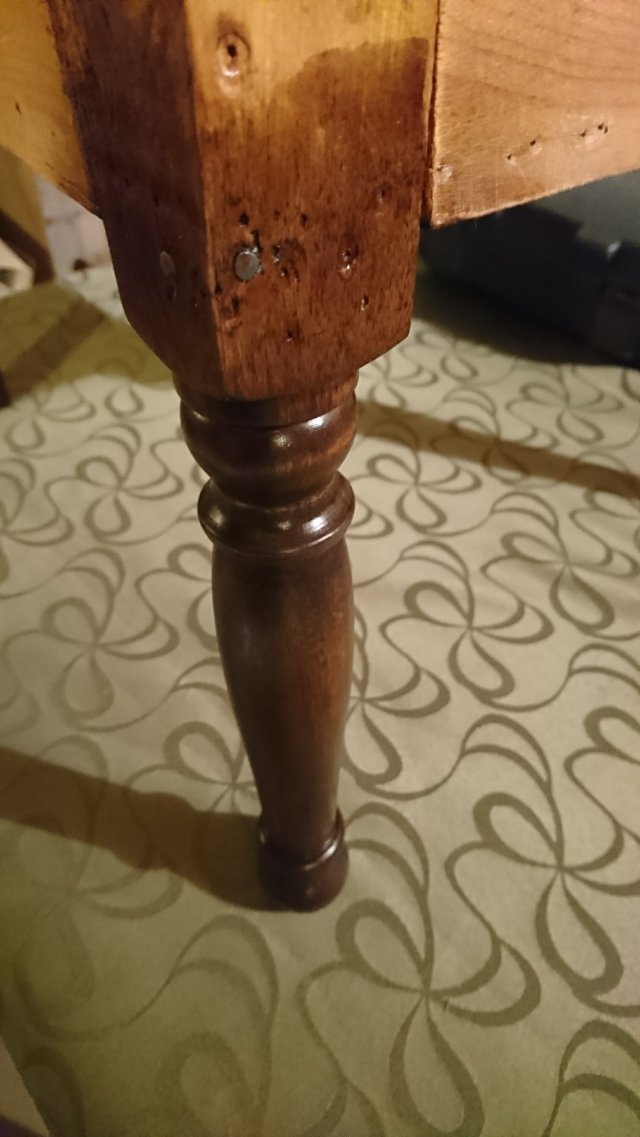
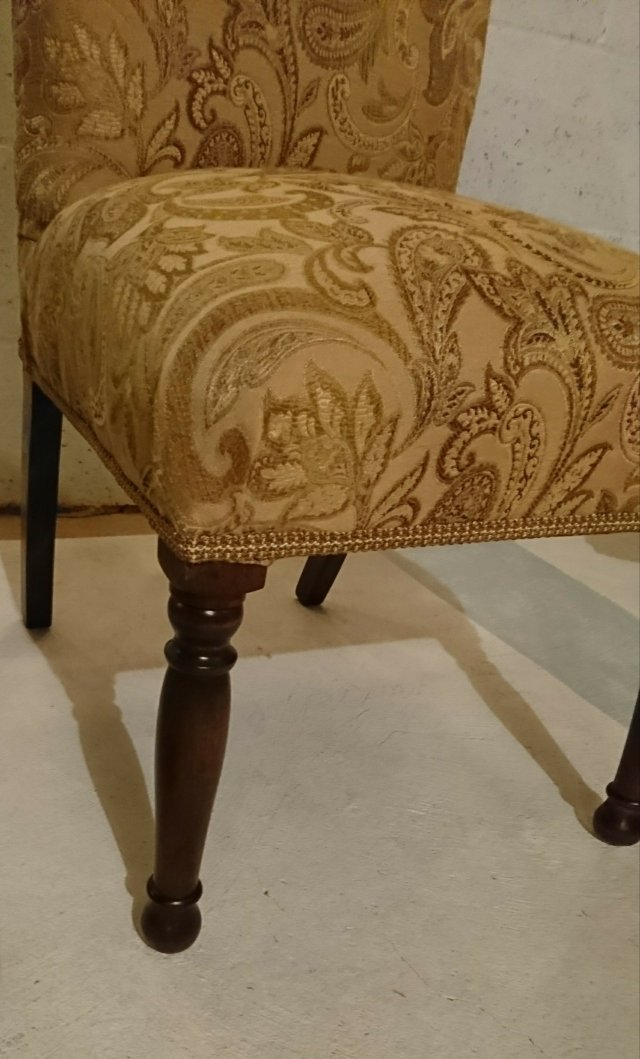
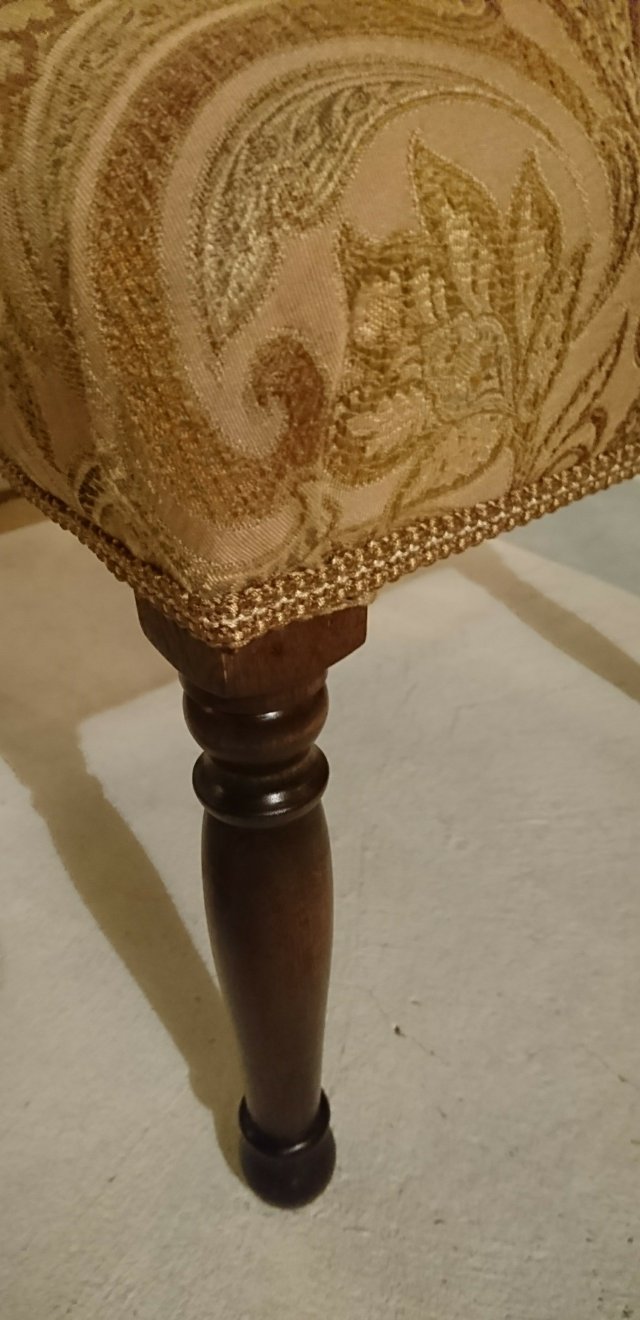
After the chair was down to the bare bones, I sanded down the chair legs.  They had been scratched up over time and lost their luster.  A couple coats of Minwax dark walnut stain and General Finishes top coat, the legs looked fantastic!

Before reupholstering the seat, I did some research and watched a few youtube videos to get some tips and tricks.  I’ve done a few chairs previously but I try to check out what the professionals use for tools and materials.  I’m always trying to learn more!  Here are some great videos that I found helpful (here & here).

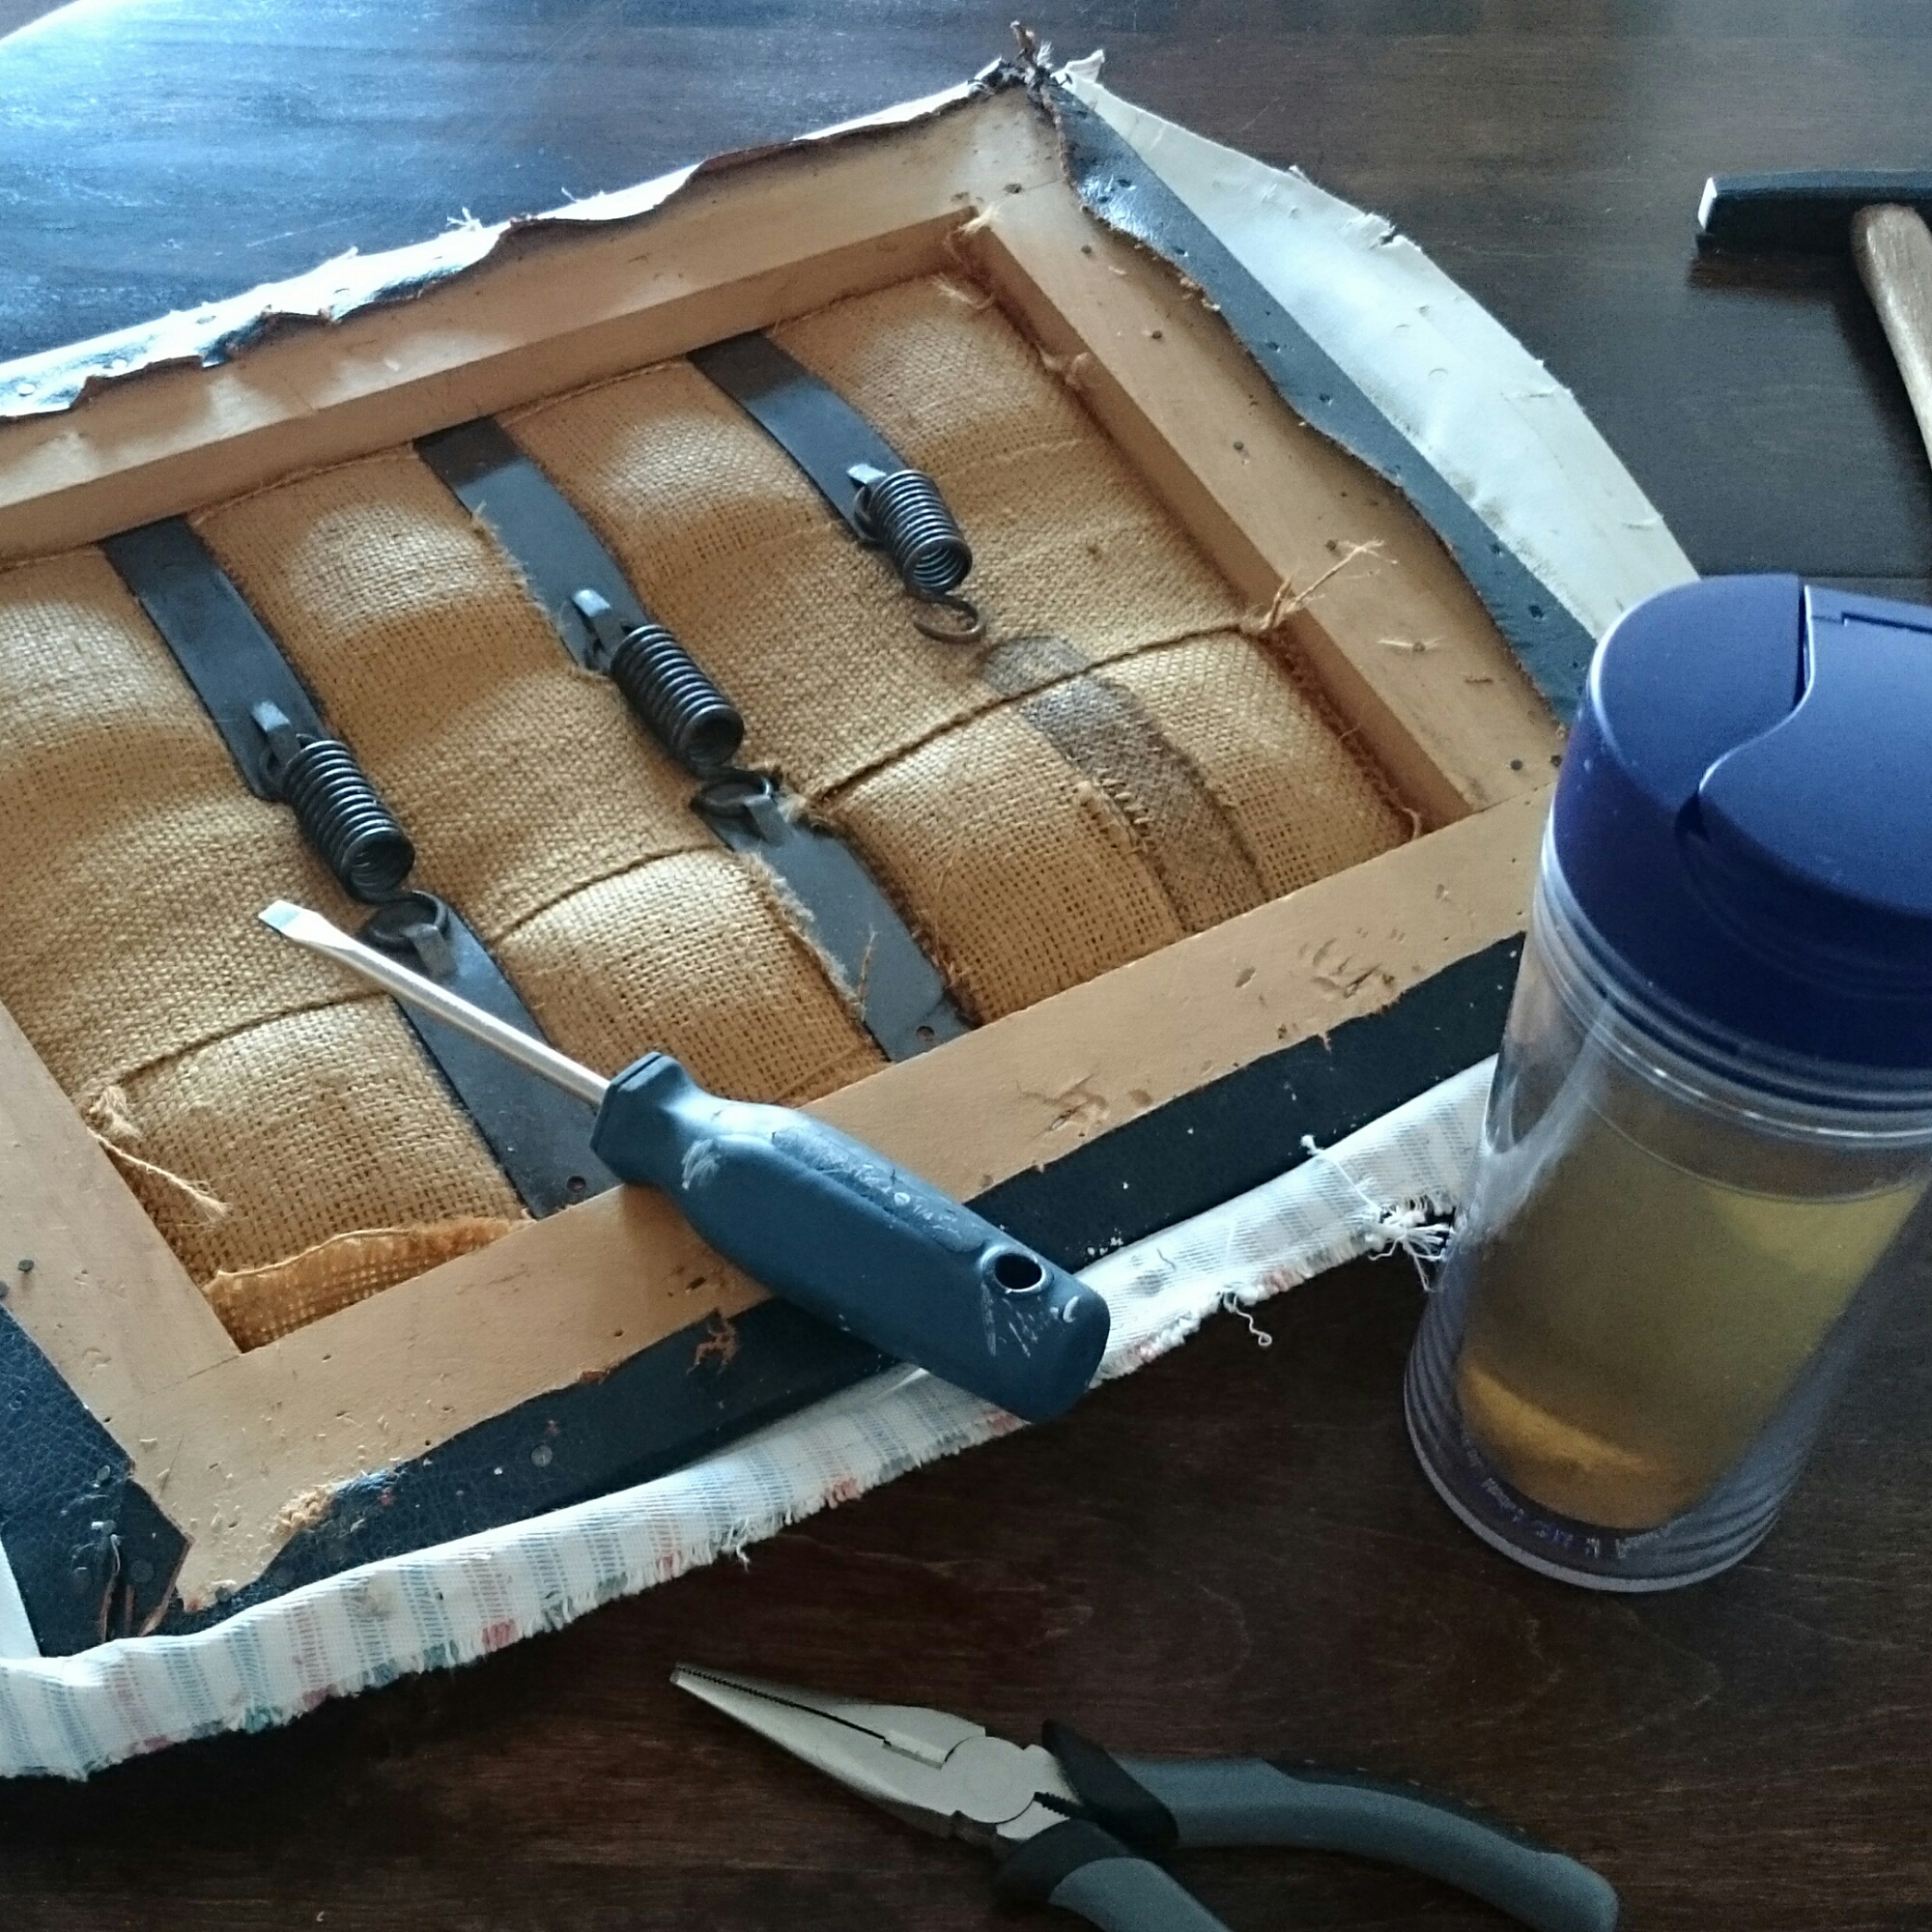
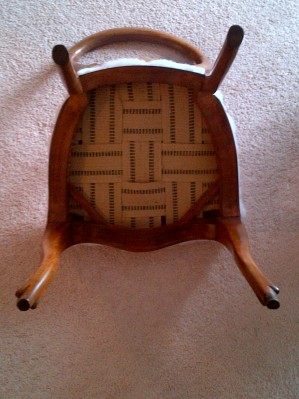
 The chair seat had old zig zag springs that were in great shape, not bent or broken.  To make sure that the chair didn’t sink m too low, I stapled burlap binding underneath the springs.  I also tied the springs with strips of fabric remnants to make sure they didn’t shift.  I stapled a piece of fabric remnant over the springs to make sure there were no squeaks and to allow the foam padding to sit on something ‘solid’.   I cut the 2″ padding to size and shaped it to fit the seat shape (cutting the edges to make it not as square or cube shaped).  I covered that with a couple layers of batting and stapled that down.

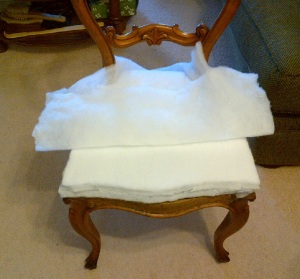
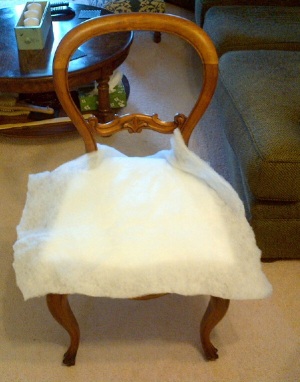
The chair back was a little easier, as it didn’t have springs and had a solid back.  I cut foam to fit and covered it with a couple layers of batting.

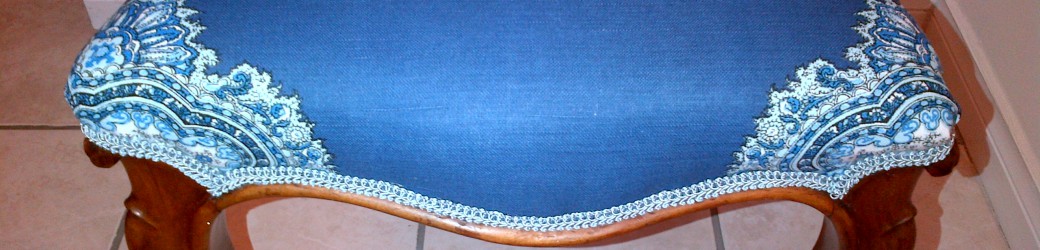
Now the fun begins!!  I started with the seat, cutting the piece of fabric a few inches larger than needed.  Since I had to cut the fabric to fit around the chair back supports I wanted some leeway in case I made mistakes.  Luckily my aunt found a great deal on fabric and I had lots of room for error!

After reupholstering similar chairs I’ve learned a few things.  Here are some tips:  Take your time. Staples can always be taken out as long as you are careful with the fabric and wood.  Always cut around chair arms in small snips,don’t be too snip happy and avoid cutting too much around the arms.  Make sure the staples are somewhat in a straight line so if you are using piping or gimp as trim, you can make a straight trim line.  Don’t pull the fabric too tightly as you staple, it will look bumpy.  Hope this post helps, upholstery is fun to do!

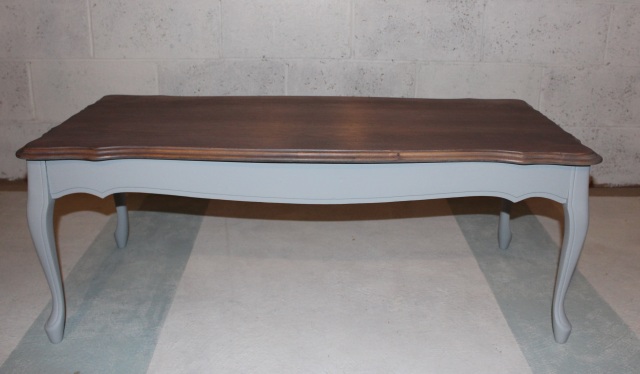
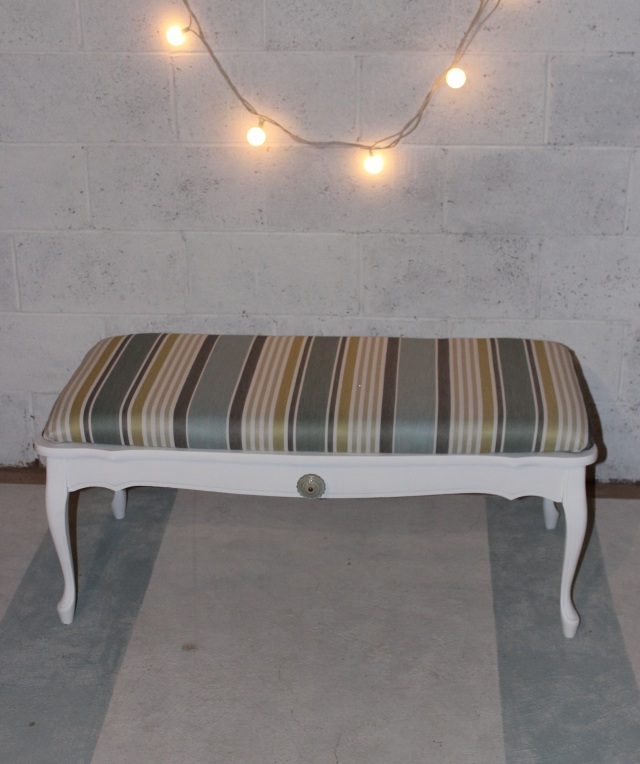
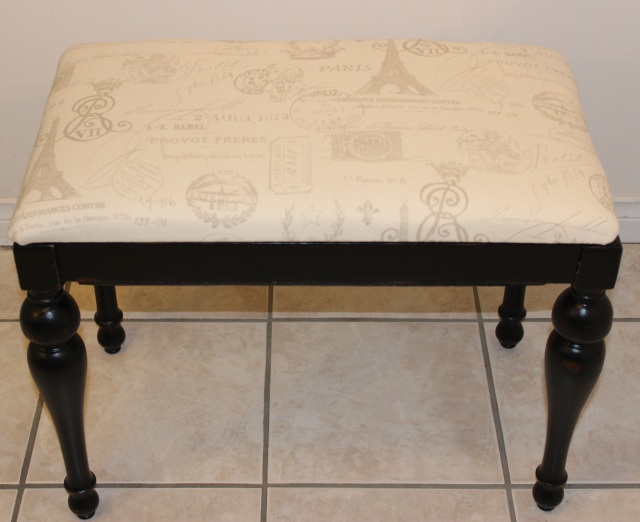
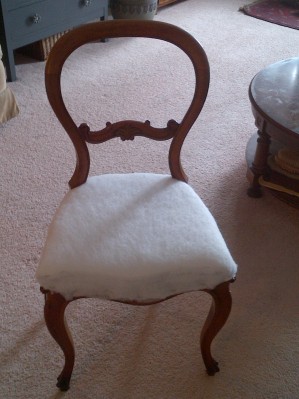
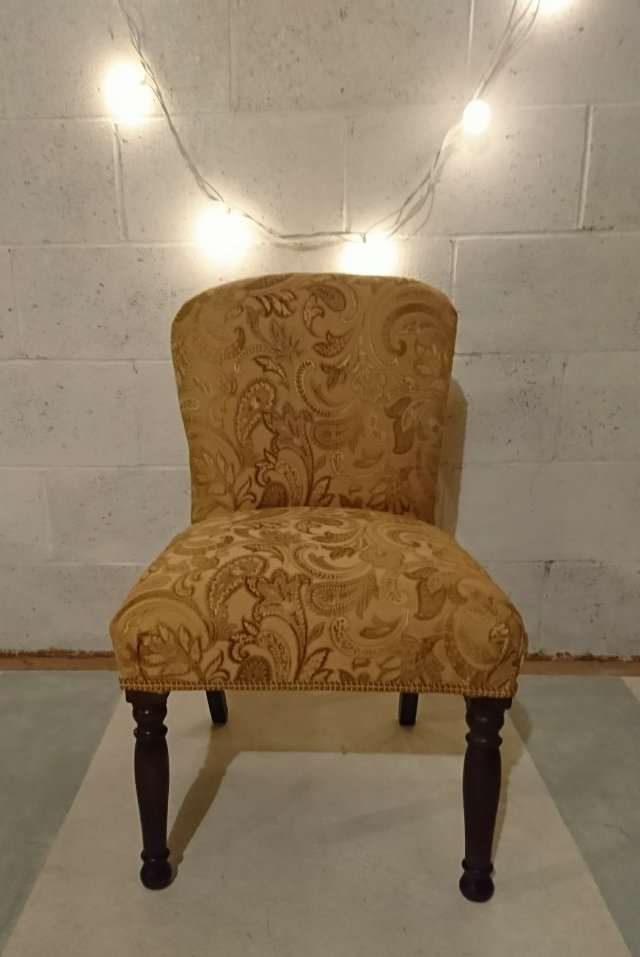
Here she is in all her glory!  My aunt was happy with her little chair.  I think Chris would have loved the chair redo too.  Now the chair will be ready for another 90+ years 😉


Thanks for stopping by!

Laurena

Chair refresh. 

A month ago I was asked if I could reupholster some chairs for a new client. The dining set was her grandmother’s and 100 years old.  She had the chairs reupholstered years ago but it was time for a refresh.

The chairs were going to look awesome with new fabric.  I was looking forward to redoing the chairs.   I picked up the chair seats and had planned on working on them a couple days later.  It was going to be a storm day,  which is a perfect day for reupholstering!  Unfortunately, I started getting sick with a chest infection and was useless for a couple weeks.

So fast forward two weeks and another storm day. (We’ve had a few!!)  I was able to tear off the old fabric and start on reupholstering.  The biggest part of the job was to remove the two layers of fabric and lots of staples and nails.


Underneath the fabric, the old padding was in good shape.  The padding was still cushy and wasn’t damaged by liquids.   I covered the seats with two layers of batting.


My client found some beautiful teal fabric for a great price.   When I finished the seats I couldn’t wait to reunite them with the frames.  I loved the result and my client and her family did too!

Love this before and after!

It was a simple redo and I got to meet a nice family!  I’m so happy to have been able to refresh her grandmother’s dining set.  A treasure for sure!

Laurena

Classic polka.

This weekend I finished a cute chair for a client.  I mentioned the chair in this post about Bar Keepers Friend.  The frame cleaned up beautifully!  There are still a couple of imperfections in the metal, but it looks so much better!

Here’s the before…

DSC_0686 DSC_0681

And the chair frame after cleaning…

DSC_0702

Now that the frame is sparkling, I started working on the chair seats.  There were three layers of vinyl on them.  It’s always tedious to take the old fabric off and to remove the staples.   But its a necessary evil to make the chair look like new.  After removing the fabric and old padding, I sprayed the wood with a deodorizer and let it air out on my balcony.   Luckily, we’re having a very mild November here in Halifax.  So being able to work outside is great!  What a change from last fall!  I think I was in hibernation mode this time last year.

Reupholstering the chair was pretty basic. I used a few layers of batting as the new padding and stapled on the new fabric.  I used upholstery tacks to cover up the staples on the back of the chair.  Before attaching the seats to the frame, I marked out the spots where the screws would go in.  I then snipped through the fabric and batting to make it easier to put the screws in.

Here’s the final result!!

image

image

image

image

I love the result.  And even better, my client was over joyed with the chair.  The polka dot fabric was the perfect choice.  I hope the chair will continue to be a treasured hand-me-down for years to come.

No matter how many pieces of furniture I work on, I am in awe what some paint or new fabric can do. Sometimes I hear a song when I look at the final piece. Stevie Wonder’s “Isn’t she lovely!” comes to mind, especially for this chair. So sweet!

This chair is one of my favourites!

Laurena

Finally, Eastlake Chairs are finished!

So it has been 4 months since I posted these two Eastlake chairs were ‘in progress.’

eastlake chairs @Pivot~Paint~Create

 Obviously I got a little side-tracked.  I blame it on the two month labour disruption and trying to catch up on sleep.

The sad thing is, I knew what I wanted to do with the chairs but I just didn’t get around to starting.  I love reupholstering chairs and benches but tearing off the old fabric just made me avoid starting.  And for good reason!  The chairs may have looked clean, but the fabric was old and brittle.  A million orange fibers floated in the air after I stripped the chairs.  And for some reason, the chair backs had the thin plasticy foam in between the fabric layers. The kind you’d use for wrapping glassware.  It was and odd upholstery material…

Chair redo

Strange eh?

Finally, the chairs are ready for the fun part, painting!!

Chair redo

For those of you who are screaming “Why are you painting these?!!!”  The wood may look nice in the pictures, but they’re scratched and have dents in the frame.  I wanted the chairs to have a nice finish so I filled in the dents and sanded down the scratches.

When I bought the Fusion paint for my coffee table, I also bought pints of Casement and Colour Block.  I painted the chairs first with Colour Block, to make sure the final colour had nice coverage.  I painted them 3 coats of Casement, which is a beautiful pure white.  Perfect update for the chairs.

Here are the painted chairs.  In retrospect I should have done two coats of Colour Block before painting with Casement.  In order to get the white without the wood showing through, I had to paint a few coats of Casement.

Chair redo

As for fabric I chose the one below along with a neutral fabric for the chair front, both from Fabric.com.  And I used gimp trim to hide all the staples.  As usual I burnt myself with the glue gun.  A regular event and tradition when I use the hot glue gun. Ugh!

p kaufmann toscana tile crimson

Half way there….

chair redo

I attempted to add a tufting accent on the chair from.  It was fun to do, but I still need to perfect it.  Maybe next time on an ottoman.   Here are my supplies….wine is essential.

 chair redochair redo

Here’s the after!!  I think it turned out well.  The reason I didn’t use the patterned fabric on the chair front, is so it wasn’t too ‘busy’ looking.  I think with the neutral fabric tones down the red/pattern.  I hope someone will like them!  And the chairs will find a new home. 🙂

chair redo

chair redo chair redo Til next time!

Laurena

Small Bench Makeover

I recently bought a few items from a guy emptying out his grandmother’s house.  He had a lot of stuff and he told me ‘Feel free to take what you want!’  I negotiated a good price and took home 2 dining chairs, nesting tables, a side table and a small bench.   My Corolla was packed…it’s amazing what I can get into that car!

I love seeing the potential in a piece of furniture. The small bench was well made and real wood.  It had a few scratches on it, an uncomfortable, ugly seat and it had ‘old house smell.’  At first I was going to paint it….but then I changed my mind. That happens a lot throughout the planning stages of  furniture refinishing!!  I had a cute floral fabric that would look great with a natural, wood base.

I sanded down the base and stained it in Special Walnut, sealing with hemp oil.   For the seat I added new foam and recovered it in the floral fabric.

Here’s the before:

image

image

And the after :

image

image

image

I just love the wood with the colourful fabric.  I’m happy I chose not to paint. Sometimes paint enhances a piece, especially if there are details and carvings in the wood.  But other times when the piece is made of good wood, simple is better.

Thanks for stopping by!  Til next time!
Laurena

English country to Paris chic.

Every now and then, I vow to stay away from Kijiji and avoid buying more furniture.  I keep telling myself, “You have enough furniture to work on!”  or “You should save money for some new clothes!” But it happens every time, I last a day or two…then I get bored.  I go on Kijiji, “just to look” and I see something that’s calling for a redo!

That’s what happened the day I found this bench.  The bench had a few things going for it, great legs, a flip top with storage and was sturdy.  But the wood was scratched up and looked tired.  It also had an English country motif on top.  Not my style, for sure….but look at those legs!

I love a nice, curvy leg. 😉

small storage bench before @ Pivot~Paint~Create

small storage bench before  @ Pivot~Paint~Create

small storage bench before @ Pivot~Paint~Create

small storage bench before  @ Pivot~Paint~Create

At first I wasn’t sure if I should paint it or sand the wood and restain it.  After I started sanding, I noticed the base of the bench was made out of poor quality wood.  It wouldn’t take the stain the same as the legs and it would look odd.  I decided to paint it black and distress it, to hide any imperfections.  I used my go-to black, Lamp Black from General Finishes and sealed with polycrylic (this one from Varathane).

For fabric, I used this french script print.  I had removed the heavy chain, and replaced it with a piece of gimp trim to keep the top from flipping over.

Here she is!  Less country, more chic.

small storage bench after  @ Pivot~Paint~Create

small storage bench after  @ Pivot~Paint~Create

small storage bench after @ Pivot~Paint~Create

And another shot of those legs!

small storage bench after  @ Pivot~Paint~Create

I just love the finished bench.  It amazes me how paint can change a piece of furniture.  Within an hour of posting this on my Facebook page, it sold!   A good friend (and repeat customer!) will soon have this charmer in their home!

I can’t say it enough, I love my friends and family!  They have supported me through this furniture adventure and keep me going with their kind words.

Thanks for stopping in!

Until next time,

Laurena


Sharing @

That-DIY-Party-link-party-button

grabbuttonfeatured

Ooo La La! French chair makeover.

The past couple of months, I was trying to avoid buying furniture to redo.  I have a few pieces waiting to be refinished in my workshop.  BUT after seeing this chair, I couldn’t pass on it.  My friend saw it on kijiji, sent me the link…and I was smitten. Looking at the before picture, it needed some work.  I knew it would be a fun chair to work on.

 Before:french chair before  @ Pivot~Paint~Create french chair before  @ Pivot~Paint~Create

At first, I had planned on changing the wood colour, but after the first coat of the darker stain, I didn’t like it.  I’m not one to paint wood just because it’s dated looking.  I think a little change in stain colour can do wonders.  But not in this case.  The carvings in the wood and the shape of the chair wasn’t being shown off like it could.  So I grabbed a can of ASCP Paris Grey and started painting.  I’m happy I changed my mind.  I applied a couple of coats of Paris Grey and then waxed with clear wax and dark wax.  Since I changed my mind on keeping the wood, I also had to rethink my fabric choice.  Luckily I had some fabric in stock that would go perfect with the painted chair.  I chose a whimiscal suzani print with grey, citron, and blue.  And finished with ivory gimp trim.

I just love how the chair turned out!  Another piece sold…that I almost kept myself.  I’m happy to see the chair go to a good home.  🙂

After:french chair @ Pivot~Paint~Create french chair @ Pivot~Paint~Create french chair @ Pivot~Paint~Create french chair @ Pivot~Paint~Create french chair @ Pivot~Paint~Create french chair @ Pivot~Paint~Create

Thanks for stopping by!  Until next time!

Laurena

Sharing @: Miss Mustard Seed

Rags to Riches: Bench redo

Hey there!  Its been awhile since my last post.  The past month has been a tough one after a loss of a family member.   Needless to say, I didn’t have a chance to work on furniture or the blog.  But, the past week I was able to finish some projects.  A few of you probably would agree…working on furniture is very therapeutic!  Nothing beats picking up a paint brush (or staple gun) and changing something ugly into something pretty!

One of the projects I finished was a bench.  It was a nice piece, neat X-shaped legs.  But it didn’t scream “Sit on me!”  I didn’t want to just paint it and call it finished.  So I refinished the wood and upholstered the seat.  I love how it turned out.  The fabric is from Fabric.com.

Before:

bench before @ Pivot~Paint~Create

bench before @ Pivot~Paint~Create

After:

Striped bench @ Pivot~Paint~Create

Striped bench @ Pivot~Paint~Create

My Mom loved the finished bench…so she bought it!  My favorite customer!

After dropping my old laptop I was scared I lost all my pictures…but luckily I have a tech savvy friend!  She was able to recover everything!  She also had a good laugh at how smashed up the laptop was. (I told her…”it went boom!”)  So once I load the pictures onto my new laptop I will share some other finished pieces! 🙂

‘Til next time!

Laurena

Rags to riches: Chair redo

I found this Victorian chair in one of my favourite second-hand shops in Halifax.  Bonus, it’s near the hair salon I go to.  I had a few minutes to waste before my hair appointment so I went ‘window shopping’.  I saw this chair and fell in love. I thought “I really need a desk chair!” and this was perfect.  The chair was in need of a redo; ripped and saggy seat, dull wood frame…but in great shape.  And it was $20!  So I bought it and carried it down to the salon.  Don’t think my hair stylist was surprised I brought furniture to his salon.  😉

Before I get to the before pictures, I apologize for the phone pics!  I didn’t have my camera ready when I needed it.  If you’re looking for a full tutorial for reupholstering a chair, here is a great one to check out from Design Sponge.

Here’s the chair in all its shabby glory!

Balloon back chair @ Pivot~Paint~Create Balloon back chair @ Pivot~Paint~Create Balloon back chair @ Pivot~Paint~Create Balloon back chair @ Pivot~Paint~Create

Once I got it home and started tearing it apart, I noticed it was a great find.  Gotta love chairs that haven’t been refinished before.  It had the original seat and horsehair fill.  It was pretty dusty and messy!  I always tend to cut myself when I work on a chair.  This redo was no exception!

 After getting the dirty work done I was ready to start the fun part.  I had sprained my ankle at work, and was off for a few days.  Luckily, I could work on this chair while sitting down!  Once I had the chair down to the frame, I cleaned up the wood with Restor-a-finish.  I don’t mind painting wood, but I thought paint wouldn’t suit this chair.  It looked much better after cleaning it up.  I replaced the seat with new webbing, foam and batting.  I chose navy fabric that would go great with the wood.  I just love how it turned out!

    Balloon back chair @ Pivot~Paint~Create  Balloon back chair @ Pivot~Paint~Create

Balloon back chair @ Pivot~Paint~Create   Balloon back chair @ Pivot~Paint~Create

Here she is!

Balloon back chair @ Pivot~Paint~Create Balloon back chair @ Pivot~Paint~Create

Thanks for stopping in,  ’til next time!

Laurena

Sharing @ Miss Mustard Seed

That-DIY-Party-link-party-button