French Linen Hutch

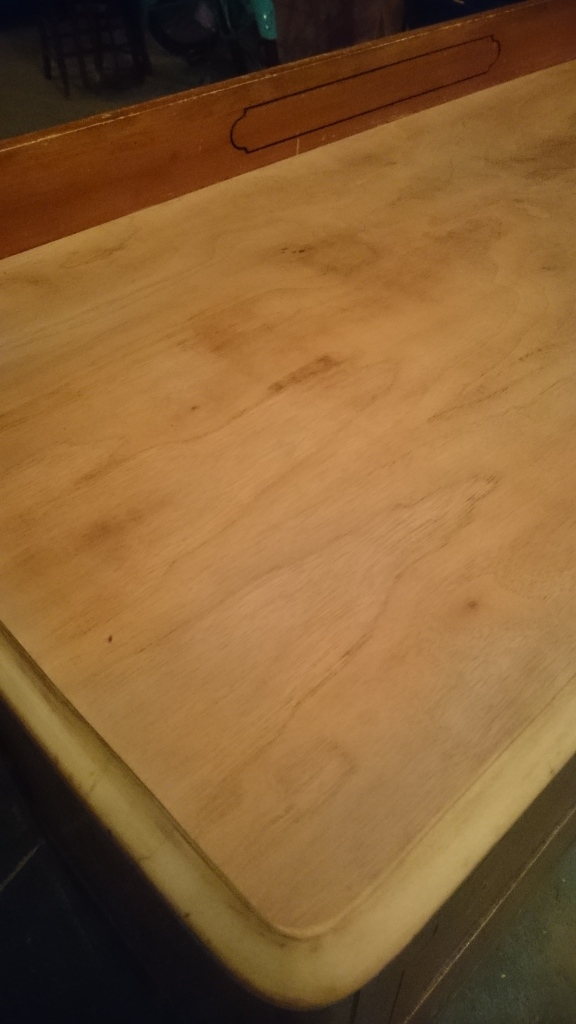
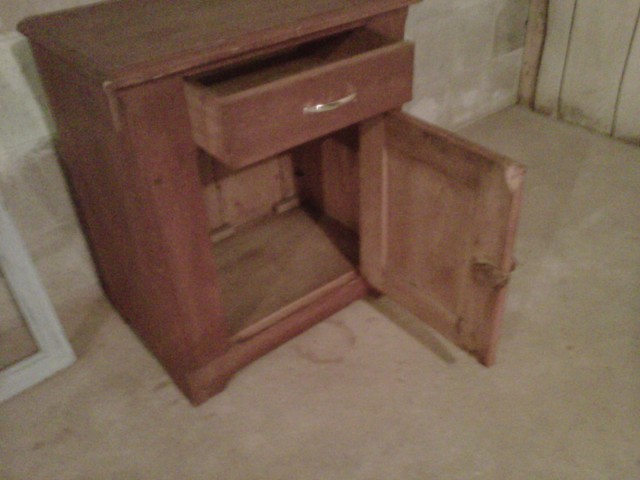
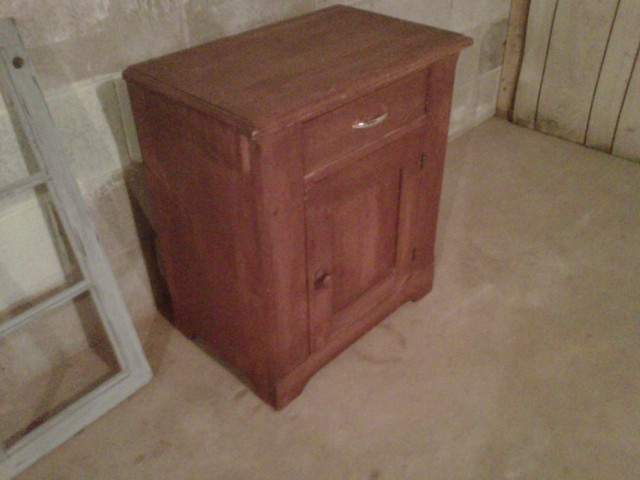
A friend asked me if I wanted to buy a hutch from her.  She sent a picture and I couldn’t pass it up!   It was a beautiful piece but it needed some TLC.   The surface was scratched and the drawers needed repair.

wp-image-2117497047jpg.jpg

wp-image-1557226227jpg.jpg

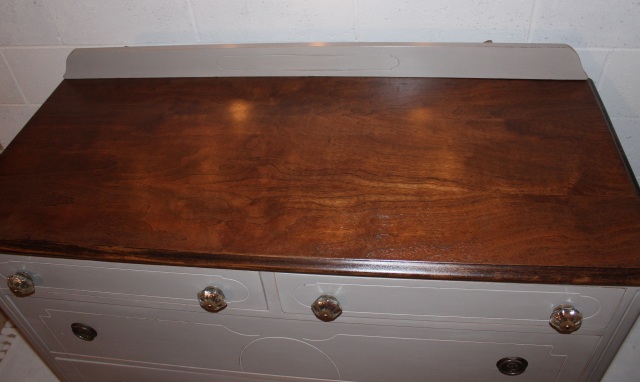
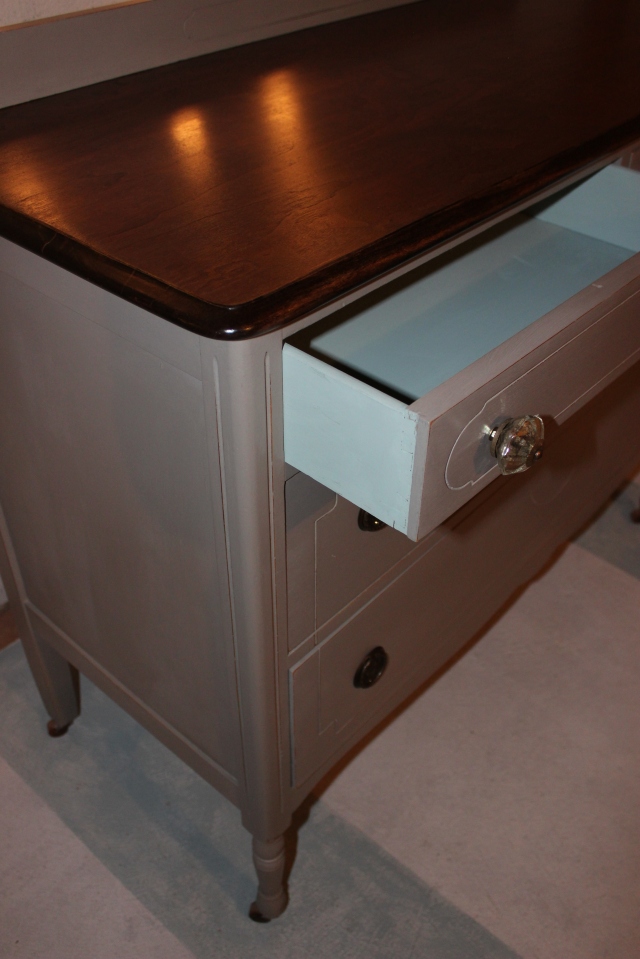
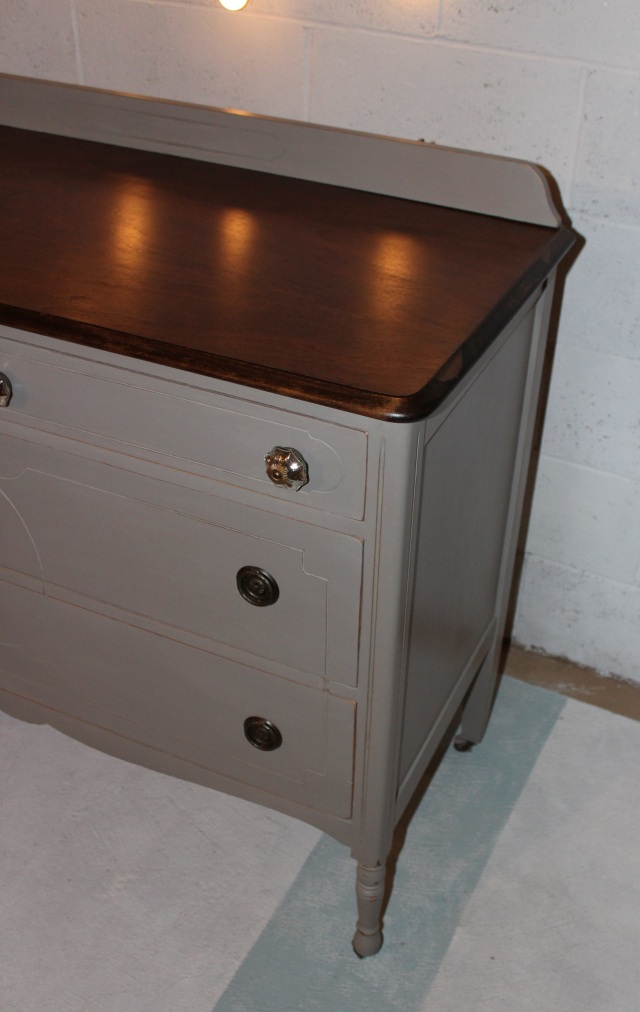
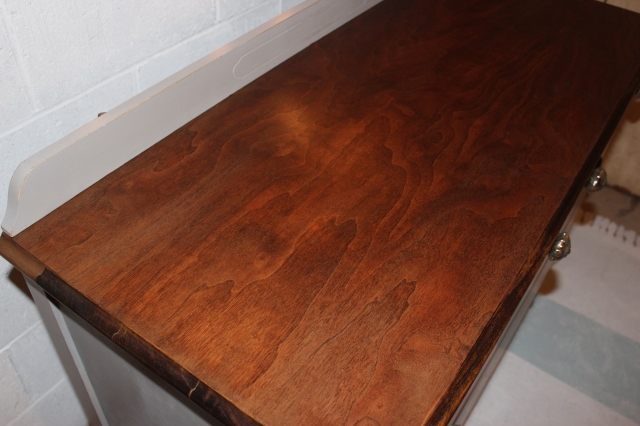
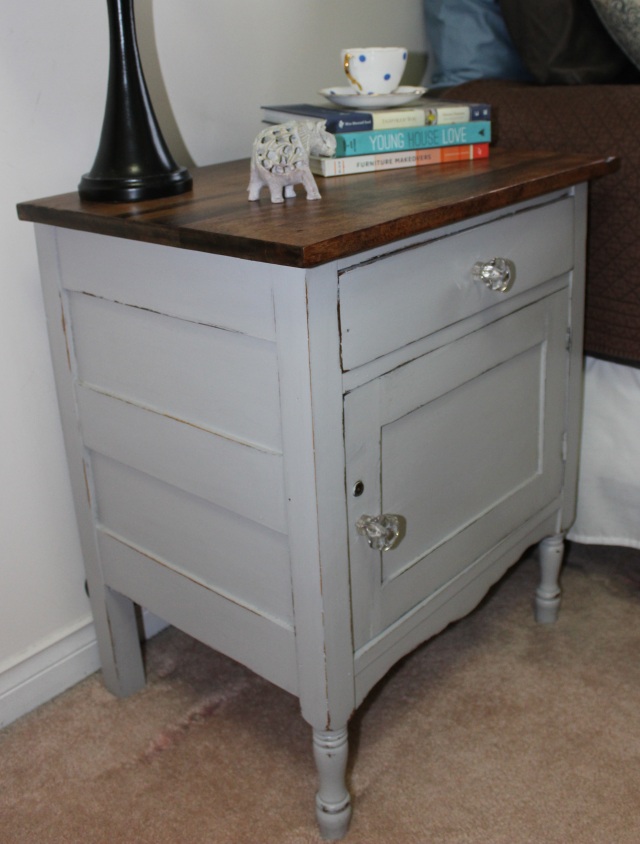
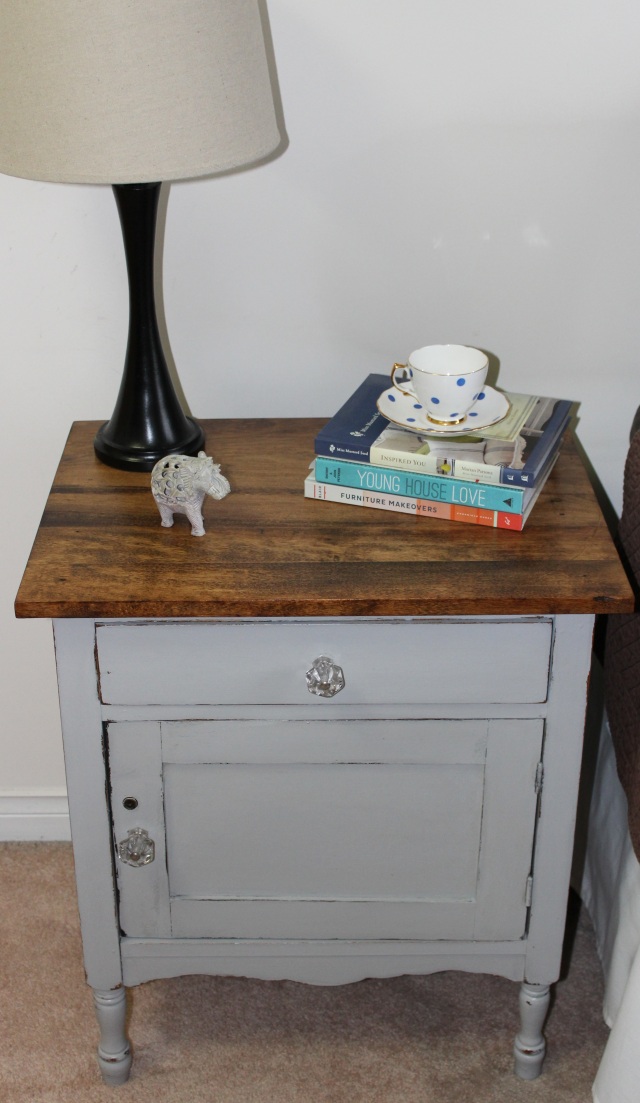
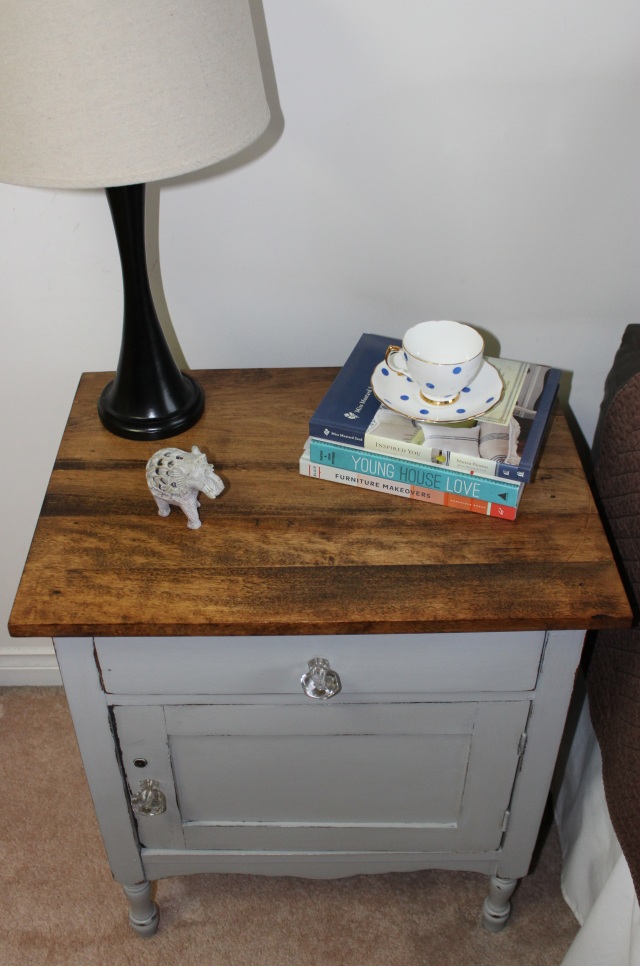
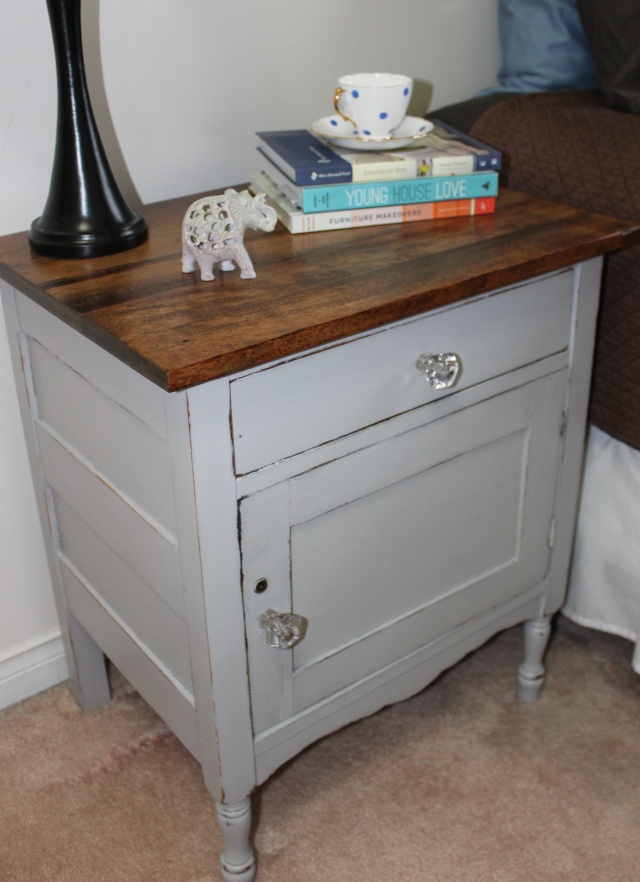
I sanded the top down, applied a coat of wood conditioner and one coat of Minwax Provincial stain. The wood top drank up the stain and turned out a bit reddish than expected.  The plus side,  the stain showed off a beautiful wood grain.

2017-03-08 13.31.19

2017-03-08 13.53.47

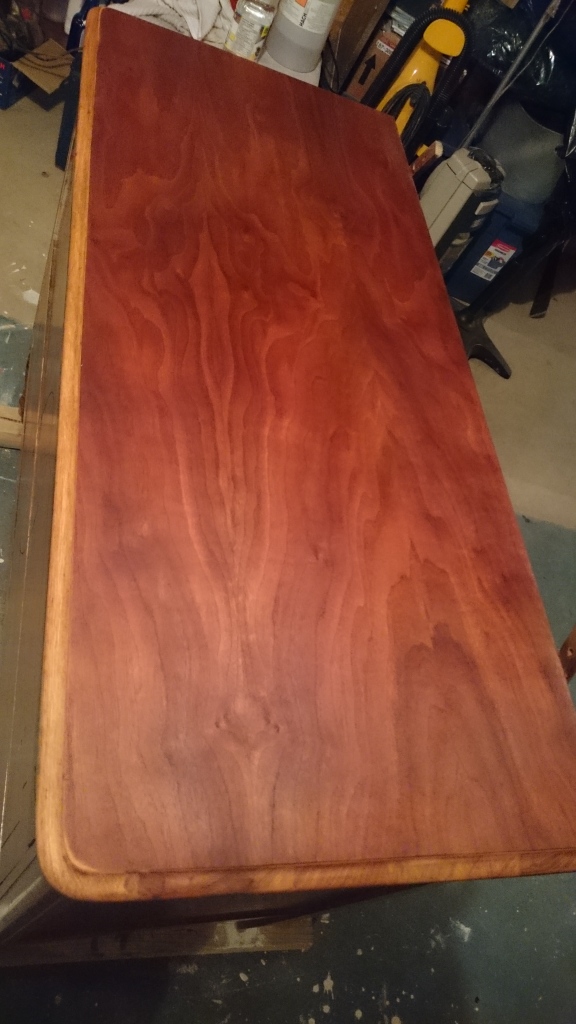
I’ve had a General Finishes top coat on my wish list at Lee Valley for awhile and finally ordered some.  I tried it out on this hutch and I love it!  General Finishes high performance top coat is a little different from other polyurethanes.  You just brush it on, careful to not overbrush, and wait 48 hrs between coats.   I lightly sanded before applying the second and third coats. No fuss and easily applied.  The top coat turned out beautiful!   It gave a nice finish and will be pretty durable for whatever the hutch is used for.   I’ll definitely use the product again.

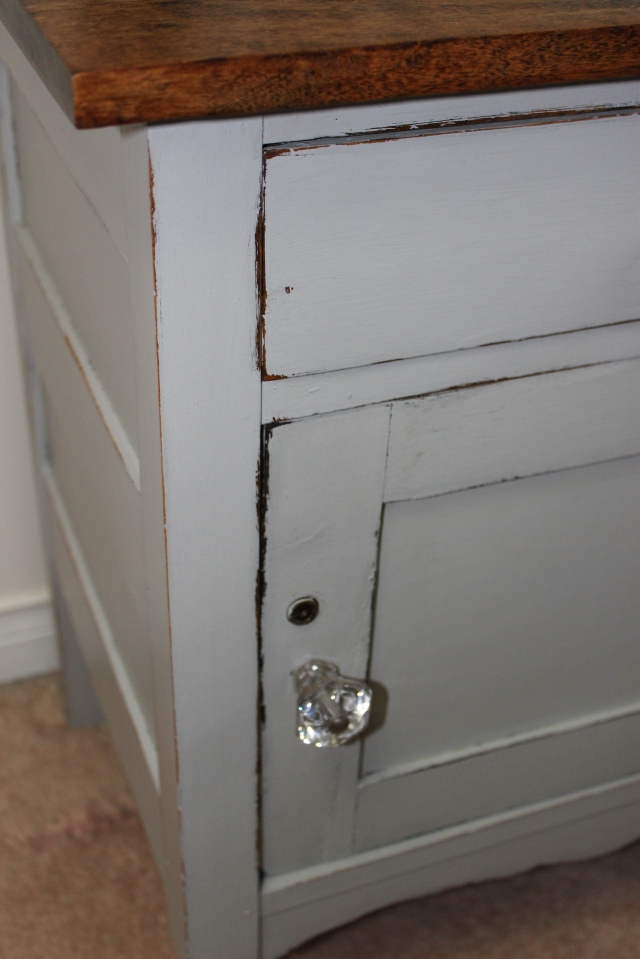
I tried to pick paint colours that would appeal to everyone,  so I tried out Fusion Mineral Paint in Coal black, General Finishes Milk Paint in Coastal Blue, and Annie Sloan Chalk Paint in French Linen.  I painted swatches on the back plate so I could visualize it better with the wood. Once it was dry, I compared the 3 colours to the wood colour.  I was aiming for a colour that complimented the reddish hue in the wood,  and not compete with it.

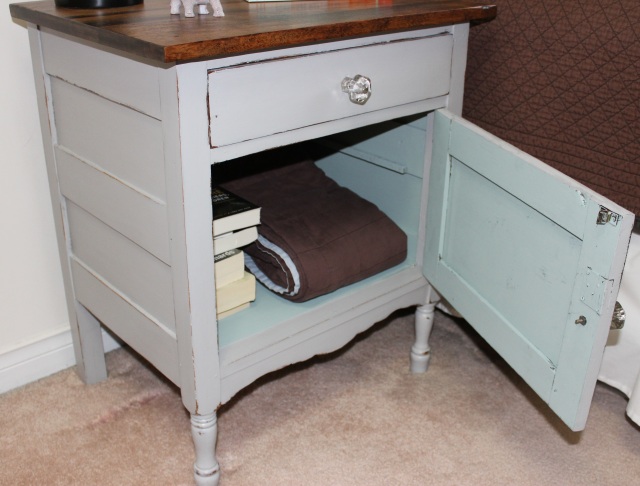
I found the black and blue were both too dark and on the colder side.   So, I chose French linen,  It’s a nice warm grey and complimented the wood.  After 3 coats, I lightly sanded and distressed then waxed. The inside of the drawers were painted Duck Egg Blue to make them look clean and new. Some new knobs mixed in with the old,  made the hutch look refreshed!

hutch 1hutch 4hutch 7hutch 10IMG_1046

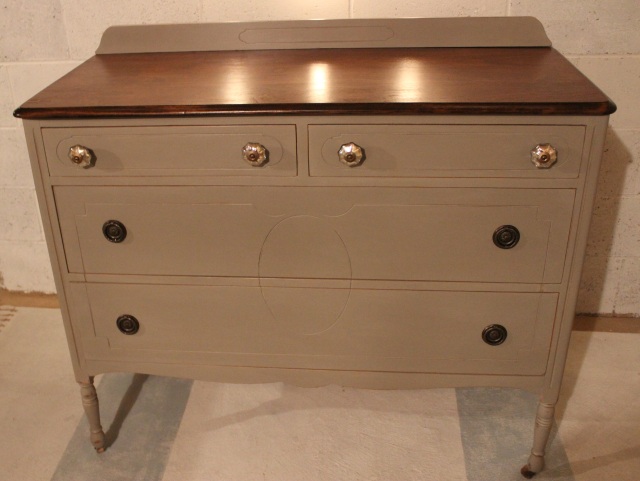
I love the wood top!!  Another project done!

Thanks for stopping by!

Laurena

Blue Slate side table

I found this side table at the Habitat for Humanity ReStore. I couldn’t pass it up.  Great price and loved the shape.

I wanted to use a new paint colour I just bought.   Fat Paint in Blue Slate.   A nice blue grey.

I sanded the top down and stained it with a dark stain.   There must have been a wax or oil applied on the wood, the stain didn’t absorb too much.  But luckily it was a happy accident.  It looked rustic and less orange.  I loved the result.

The stained top with blue slate looked awesome.   Here’s the finished piece!

It didn’t take long to find a home for this one.  One of my lovely cousins grabbed it up.  I love keeping my furniture pieces in the family!

Laurena

Finally, I found THE one! Antique commode redo

I’ve been searching for an antique commode for a lonnnnnggg time.  My grandmother had a couple in her home and I loved the cute little cabinets.  I’ve searched kijiji, antique stores, roadside freebies, yard sales…everywhere.   Most were either too much work (covered in old paint, falling apart) or over priced (more than $100).    A couple weeks ago,  I finally found one on kijiji. Great price and in good shape.  Sign me up!  I didn’t bother bartering and gave full asking, $60.  Since I was refinishing it for myself, it was a great deal.

Here’s the before…

image

image

image

There wasn’t much work to be done structure wise.  The door wasn’t attached but the hardware was included.  I would have had to take the door off to paint the base, so it worked out.

I wanted to do a two-toned look; painted base, wood top.  So I started by sanding down the top.  Its always a crap-shoot refinishing an old piece of furniture.  You don’t know what the wood grain looks like underneath or if there are stains in the wood.  But imperfections in wood add character!  So I try to work with what I uncover.

Side note:  I dislike the sanding part.  Recently, I bought a new sander…and it was a great purchase!  It has made sanding so much easier.  The hard-cased dust collector is my favourite feature.  I’ve had a couple of sanders with cloth bags and they always get a hole in them.  Dust everywhere.  This time, sanding was quick and painless and there was only a little bit of dust clean up.  I definitely recommend the Bosch!

image

Before, the old finish was blotchy.  I lucked out, the wood grain underneath was beautiful.  I wanted to show it off.    These days, I love using a mid-tone stain colour, so I chose Minwax Provincial.  Something like dark walnut or expresso would be too dark on this piece and hide the grain.

Here’s a reminder of the before…

image

And now….

image

It looks more yellowish in this picture,  the top is more of a warm brown.

I chose to do the base with my favourite ASCP colour,  Paris Grey on the outside and Duck Egg Blue for the inside.  I did little distressing around the edges and corners.   When painting with ASCP, I like to use a green scrubby sponge for wet distressing.  It doesn’t make a mess and it’s a quick way to get the job done.   I finished up with satin Varathane, hung the door and added two new knobs.  And the beauty is done!

I love how it looks.

IMG_0813IMG_0809IMG_0795IMG_0791IMG_0803IMG_0790

It’s always fun hunting for a special piece of furniture.   Since the commode is finished and sitting pretty in my room, I must go watch hockey!  Playoffs started this week and my team is playing tonight.  Oh my nerves!  I should go pour myself some wine. 😉

Thanks for stopping by!  I’ll be back next week with some more makeovers!

Go Caps go,

Laurena 🙂

Hard to let go.

One of the hardest things for a furniture refinisher, is to sell the furniture.  I know, that’s a huge part of the whole process, to sell furniture and get money.  But after spending so much time and effort, its hard to let certain pieces go!  Every piece has a lot of thought go into it.  I scan kijiji and antique shops for just the right piece to work on, bring it to my work shop, then brainstorm the possibilities!  Transforming the furniture from the ugly duckling into the swan feeds my passion.  When I love the end product, I find it difficult to sell.  But I’m happy that whoever buys it, loves it as much as I do!

A while back I found a small cupboard on kijiji.  It looked pretty boring, but I loved the simple shape.  For some reason I love working on hutches and cupboards, so I was looking forward to working on this one.  I usually try to keep the wood top and restain instead of painting.  But the wood grain wasn’t nice enough to show off.  So I custom mixed a fun grassy green colour and distressed it after painting.  I painted the inside a light grey,  a new drawer pull and the cupboard looked great!  I wanted to keep it, but the logical side won out (“I have no room in my home for more furniture!”).  I hope the home it’s in now loves it! 😉

 Before

Wash basin before @ Pivot~Paint~Create

wash basin before  @ Pivot~Paint~Create

After

Lil green cupboard @ Pivot~Paint~Create

Lil green cupboard  @ Pivot~Paint~Create

 Lil green cupbaord @ Pivot~Paint~Create

Seeing the grassy green colour, reminds me that we may never see the grass again!  haha.

Another snow fall last night…oh to live in a hut on a beach.

Sigh. 😉

‘Til next time!

Laurena


Sharing @ Miss Mustard Seed