Just a few…

Here are a few projects that I have worked on over the past year.  I’ve refinished lots and lots of tables, a few chairs and more to come!

First off, I kept this one.  Simple redo with Casement Fusion Mineral Paint and just sanded the top, kept it as is.  Beautiful!

side table 1

IMG_1086

IMG_1079

Side table refreshed with Heirloom Fusion Mineral Paint and Dark walnut stain.

side table 3

IMG_1094

End table refreshed with Mountain Haze Fat Paint and ebony stain.

side table 2

IMG_1126

Coffee table refreshed with Natural Grey Behr paint.

2017-07-19 12.38.51

IMG_1243a

Coffee table refreshed with Inglenook Fusion Mineral Paint.

DSC_8650

IMG_1247a

Old school side table refreshed and painted with Paris Grey ASCP and Heirlook interior.

_20170908_175640

IMG_1266a

IMG_1272

End table painted with French Linen ASCP and white wax on top. Love this look!

IMG_1277

IMG_1335

IMG_1336

End table painted with Paris Grey.

IMG_1289

2018-03-29 15.36.59

Half moon side table painted with a grey mix with Ash & Casement Fusion Mineral Paint.

demi moon table 1

demi moon table 2

ikea grey 1

ikea grey 2

Coffee table painted with a grey custom mix, and white wax on the top.

2017-06-12 15.37.36

IMG_1063

IMG_1068a

Coffee table turned bench, painted with Casement and a striped fabric.

2015-10-17 19.41.34

IMG_1347

IMG_1350

Coffee table, refreshed with Little Lamb Fusion Mineral Paint.

IMG_1280

IMG_1413

IMG_1411

Sad to FAB, table refresh.

One of my followers from my Facebook page contacted me to see if I wanted to buy a table. For $20. Ummm, yes please!! It was a fun and unique piece. It had chippy yellow paint and messy stained top. But such a fun shape. So much potential.

I loved the shape of it. Those legs! I couldn’t wait to transform it. But, the table sat in my workshop for awhile. I didn’t know what colour to go with. After a couple of months, I finally decided to use special walnut stain on the top and Inglenook Fusion Mineral Paint for the base.

I love how it turned out. It took awhile to sell but it found a happy home. Thankfully… ’cause it was going to be mine!

Side note, I ordered a light kit to help me with my furniture pictures. Since my workshop and staging area are in an unfinished basement, good lighting is lacking. Here’s a couple pics to show how the light kit improves photos. The first photo, taken without the light kit, the wood top doesn’t shine. Everything is yellowed. With the light kit, the wood looks so much better, the colour is on par and the photo is much better.

I got mine from Amazon and it was worth the $45!

Back soon with some quick before and afters!

Laurena 😉

Side tables, refreshed

I was MIA on the blog for a few months, so I figured I will do a couple more posts.

A friend of mine who I’ve known since junior high school, contacted me to redo a couple of side tables. Of course I said yes, it’s a good excuse to catch up. We hadn’t seen each other in almost 10 years (when we were in junior high… Lol, I wish!). She gave me free rein when choosing colours and what to do with the tables.

Here are the two tables, before and after! I used my favourite colours, little lamb and Inglenook Fusion Mineral Paint. Love the grey and the colour combo.

Can’t wait for her to see them in person next week!

Laurena 😉

Chair refresh. 

A month ago I was asked if I could reupholster some chairs for a new client. The dining set was her grandmother’s and 100 years old.  She had the chairs reupholstered years ago but it was time for a refresh.

The chairs were going to look awesome with new fabric.  I was looking forward to redoing the chairs.   I picked up the chair seats and had planned on working on them a couple days later.  It was going to be a storm day,  which is a perfect day for reupholstering!  Unfortunately, I started getting sick with a chest infection and was useless for a couple weeks.

So fast forward two weeks and another storm day. (We’ve had a few!!)  I was able to tear off the old fabric and start on reupholstering.  The biggest part of the job was to remove the two layers of fabric and lots of staples and nails.


Underneath the fabric, the old padding was in good shape.  The padding was still cushy and wasn’t damaged by liquids.   I covered the seats with two layers of batting.


My client found some beautiful teal fabric for a great price.   When I finished the seats I couldn’t wait to reunite them with the frames.  I loved the result and my client and her family did too!

Love this before and after!

It was a simple redo and I got to meet a nice family!  I’m so happy to have been able to refresh her grandmother’s dining set.  A treasure for sure!

Laurena

Bye bye bunny

In the fall, I worked on 3 pieces for a client.  Two side tables and a pine chest.

One end table would be painted Paris Grey, the other Paloma, both ASCP.  Originally she wanted the table tops to be refinished and stained but the wood  was not great for refinishing.  The tables had great character and would look beautiful painted and updated.  I just simply painted the tables and sealed with Varathane with a satin finish.  And replaced the knobs.

The pine chest looked like it would be an easy redo….but those darn bunnies threw me off!  I sanded down the top and got rid of the tole painted bunny.  There was a clear outline left underneath.  I was skeptical and nervous that stain wouldn’t cover it up.

I used wood conditioner and let it soak for a over 15 minutes.  Then applied two coats of Provincial stain, allowing the first coat to soak in for 15 minutes at least.  My client didn’t want the top to be stained too dark, so the second coat i only left on for less than 10 minutes.  Luckily, after just one coat of stain, the bunny was barely there!  Now after staining and varathane, it’s totally transformed.  The base of the chest was painted in French Linen ASCP.  Love that colour.  Especially with a stained wood top.  Beautiful!

I love all of the finished pieces.   What a difference a little paint makes. Hoping to post more projects I’ve worked on so far this winter.   So stayed tuned in the next couple of days! 
Laurena 

Refreshed set of tables

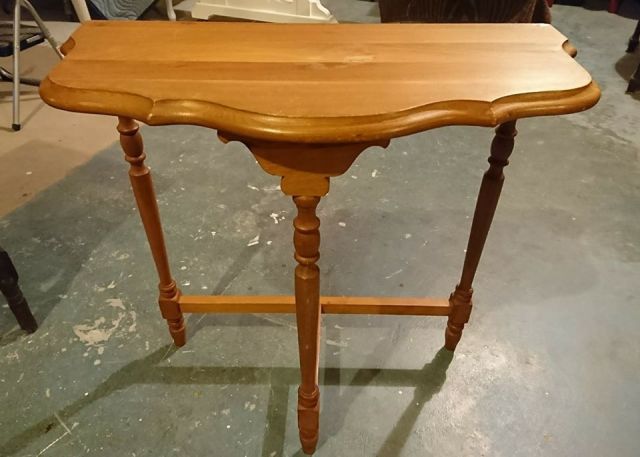
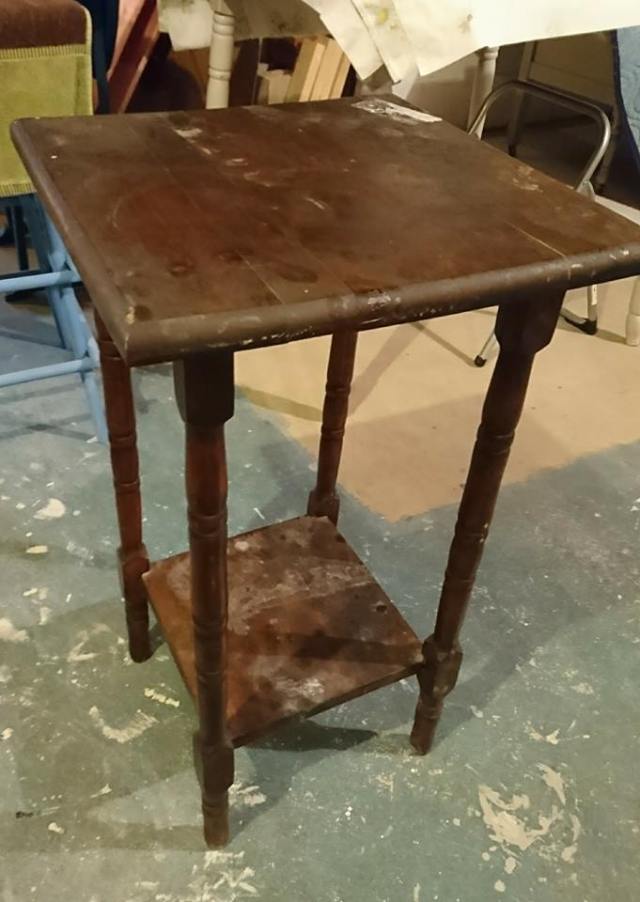
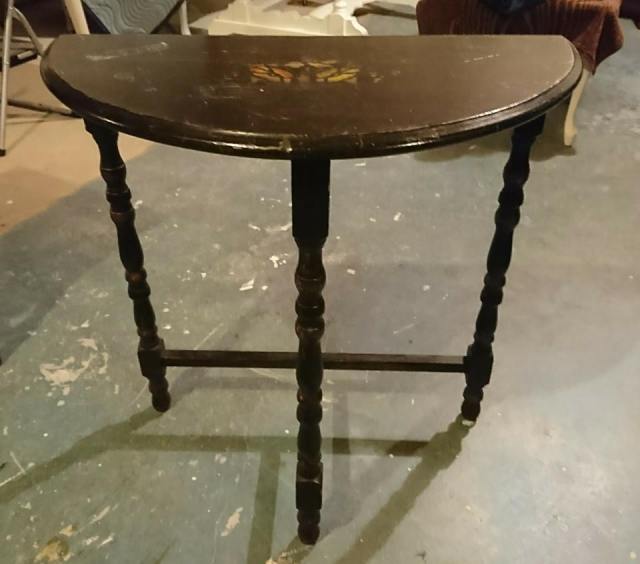
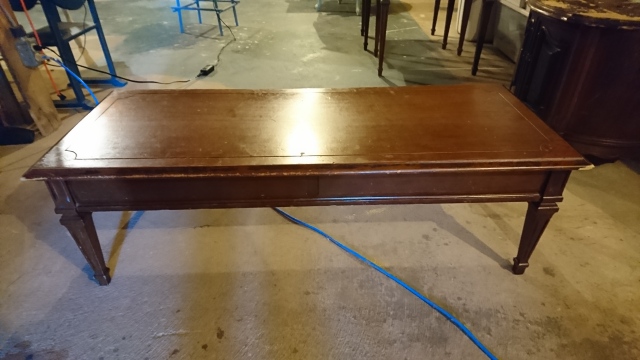
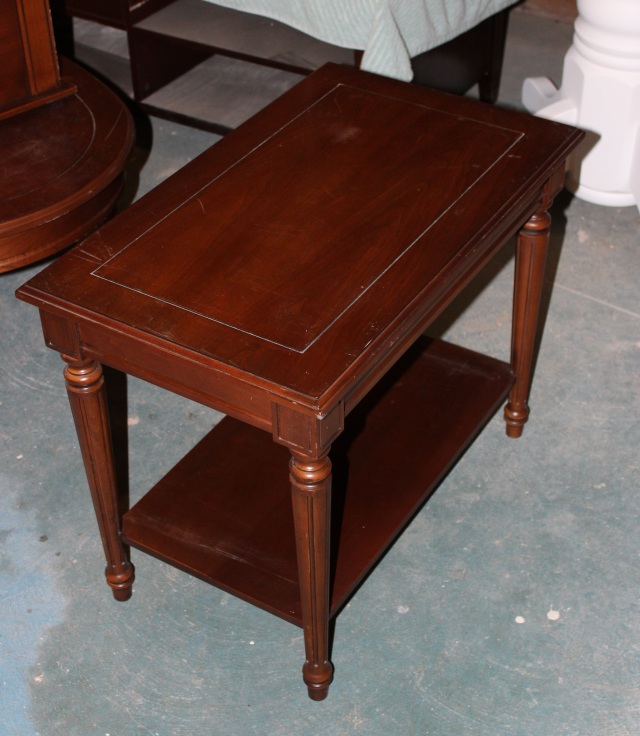
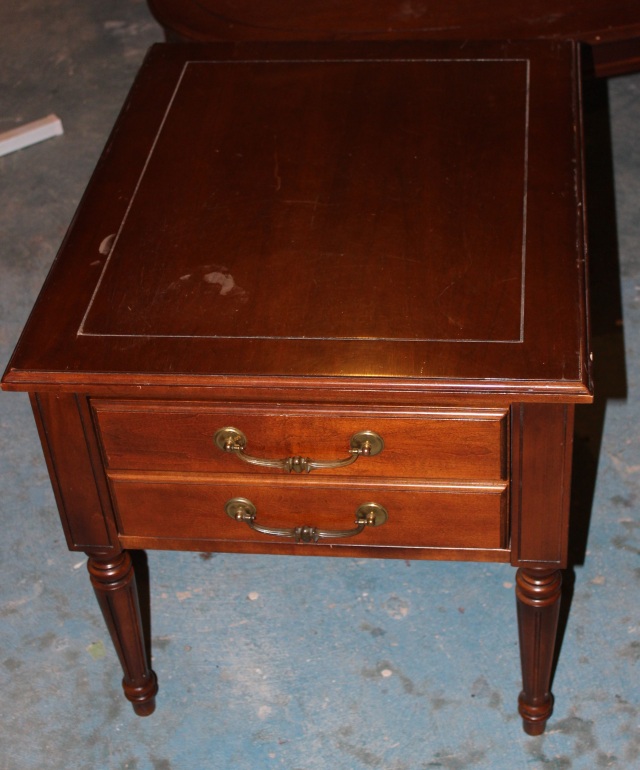
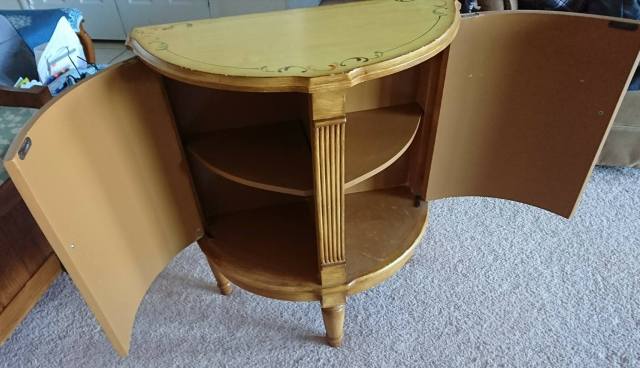
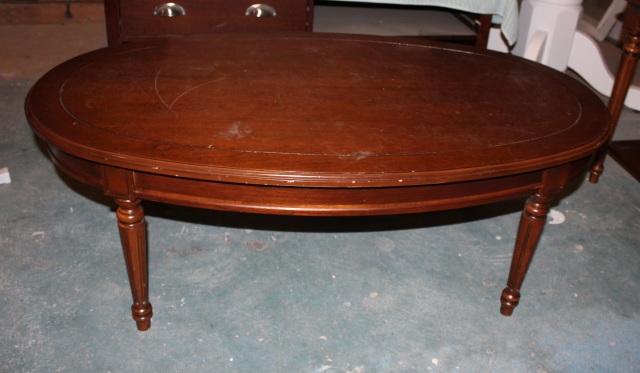
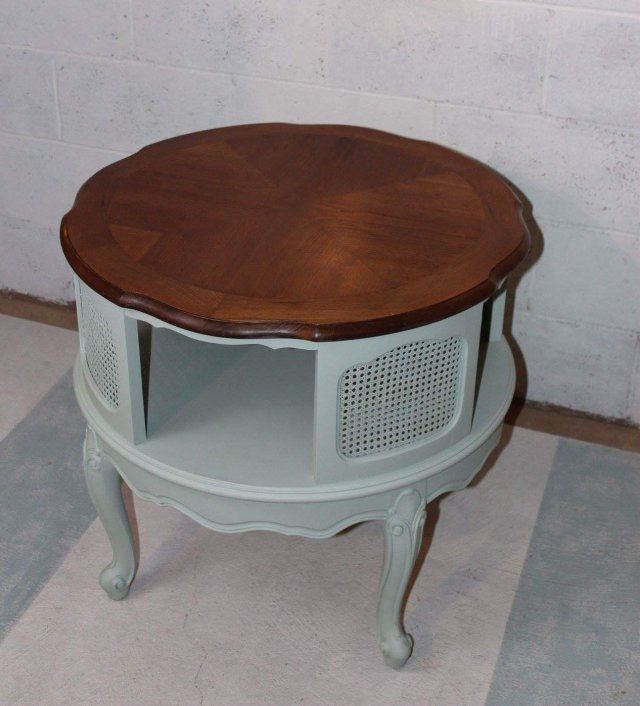
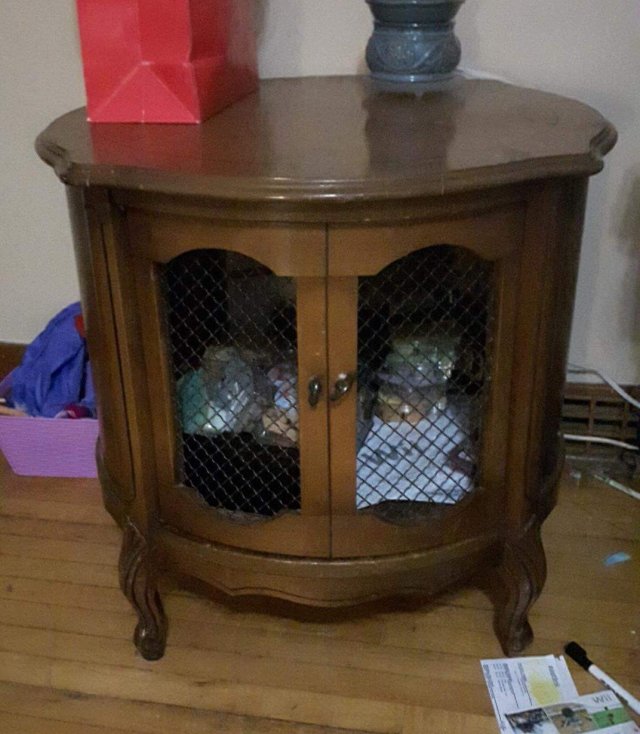
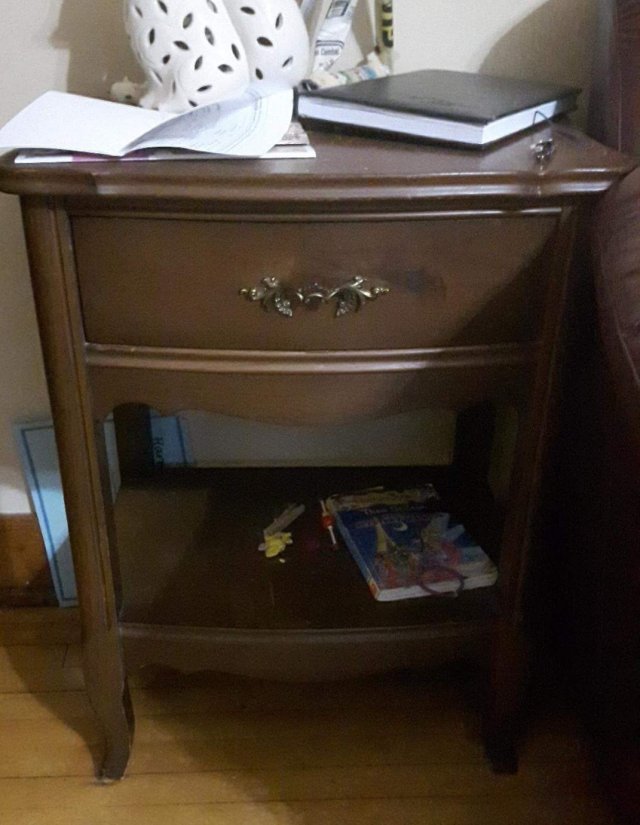
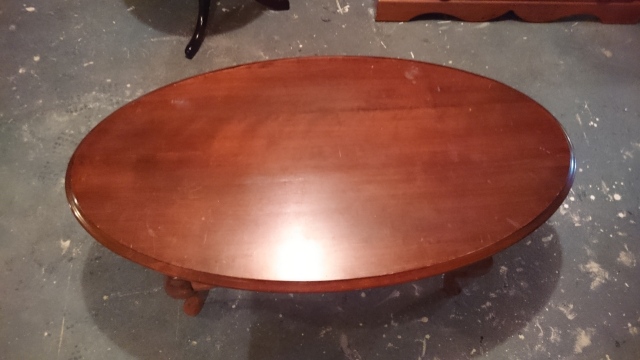
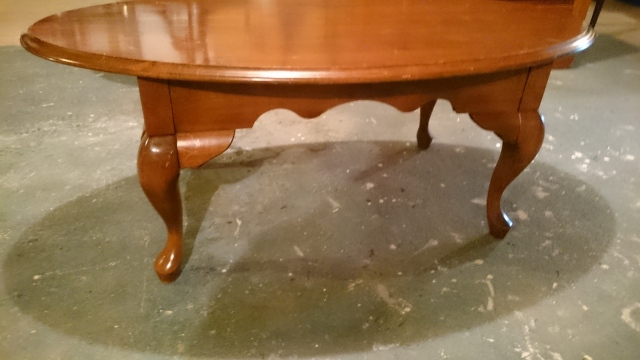
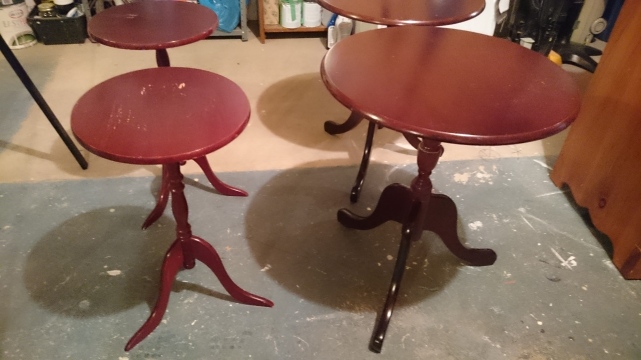
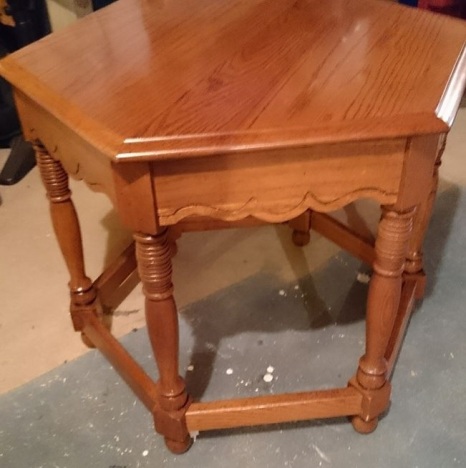
I recently was asked to redo a set of tables, a coffee table and two side tables.  A fellow furniture refinisher had passed along my name to one of her clients and I am grateful for that!  I knew the tables would be a fun project.  I just loved the shape and details on the legs.  They definitely had potential to be pretty again!

m

g

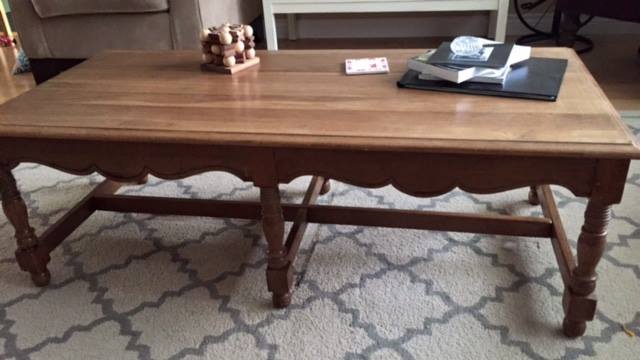
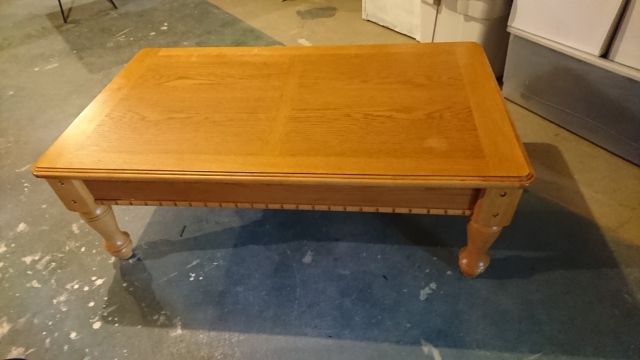
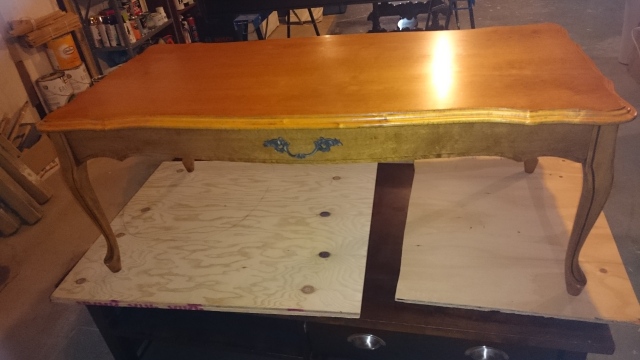
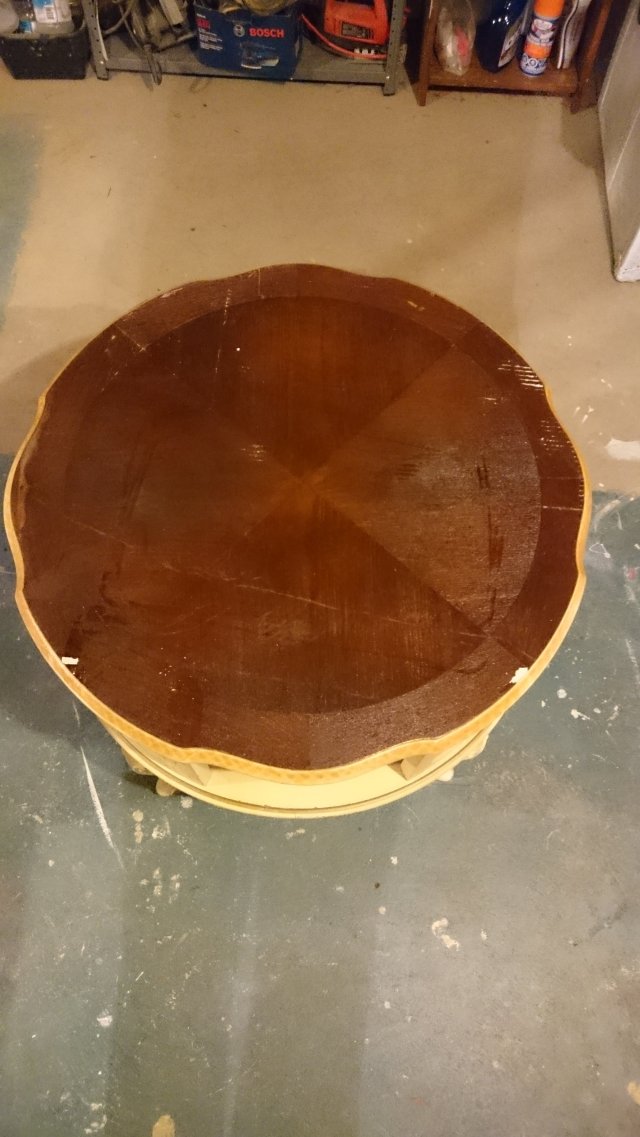
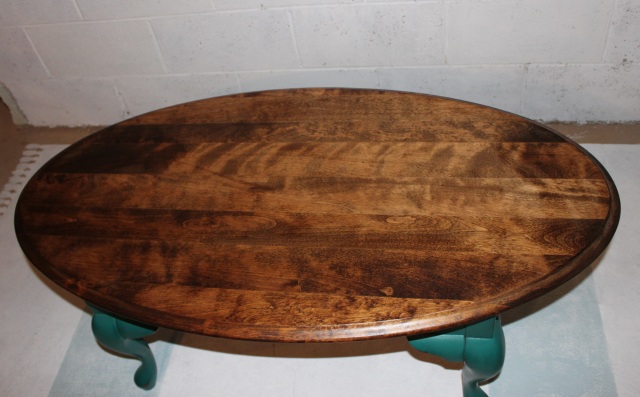
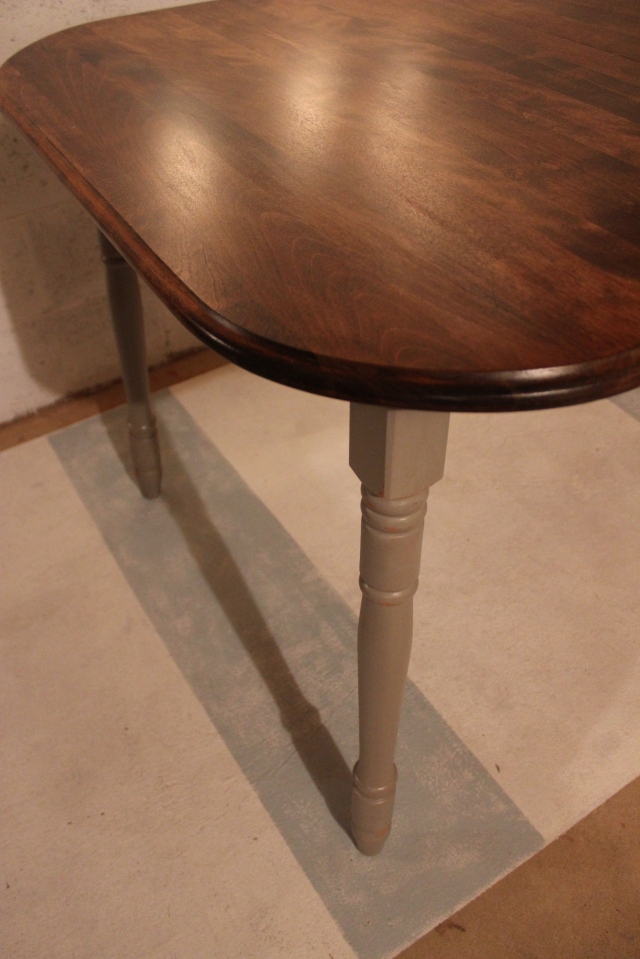
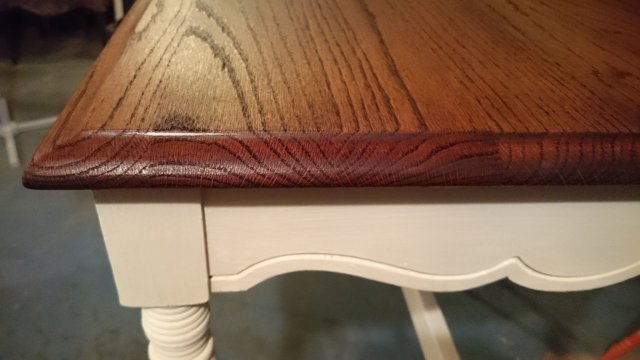
 I was a little bit nervous whether the wood top on the coffee table could be refinished.  But I sanded the top down, the wood grain was beautiful!

image

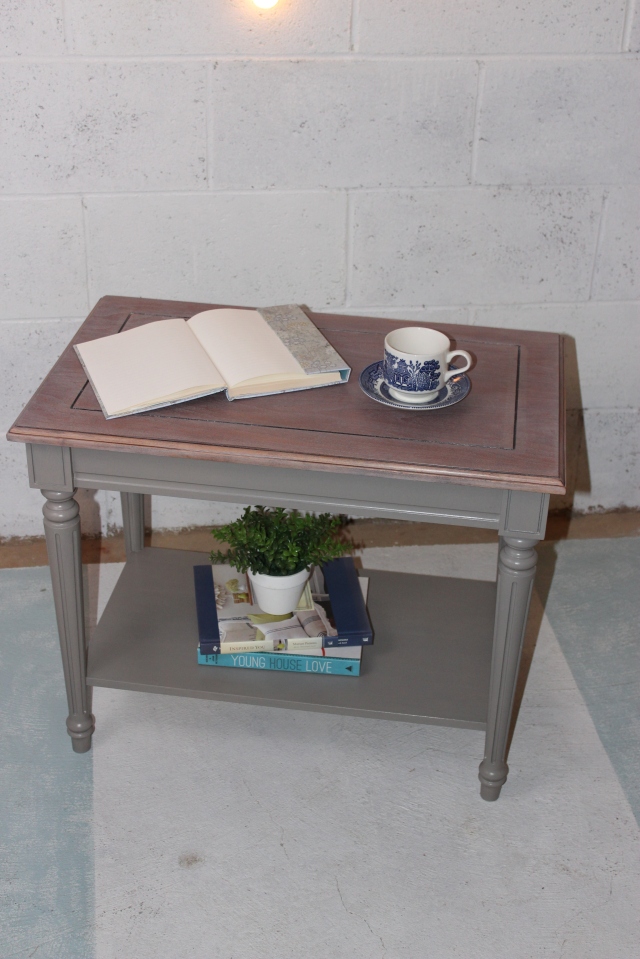
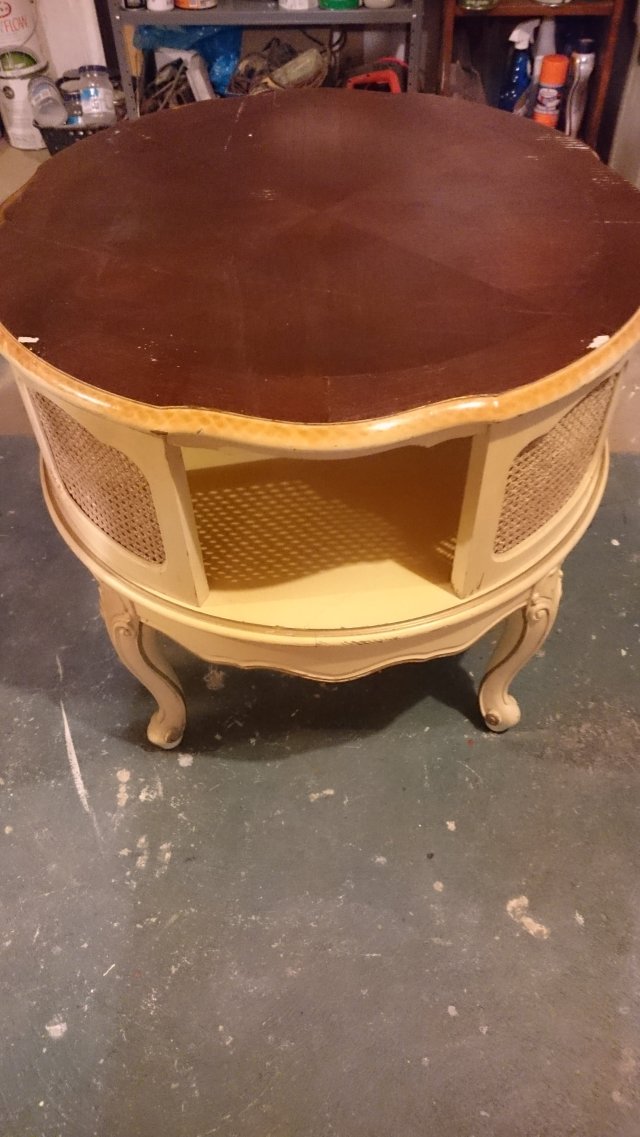
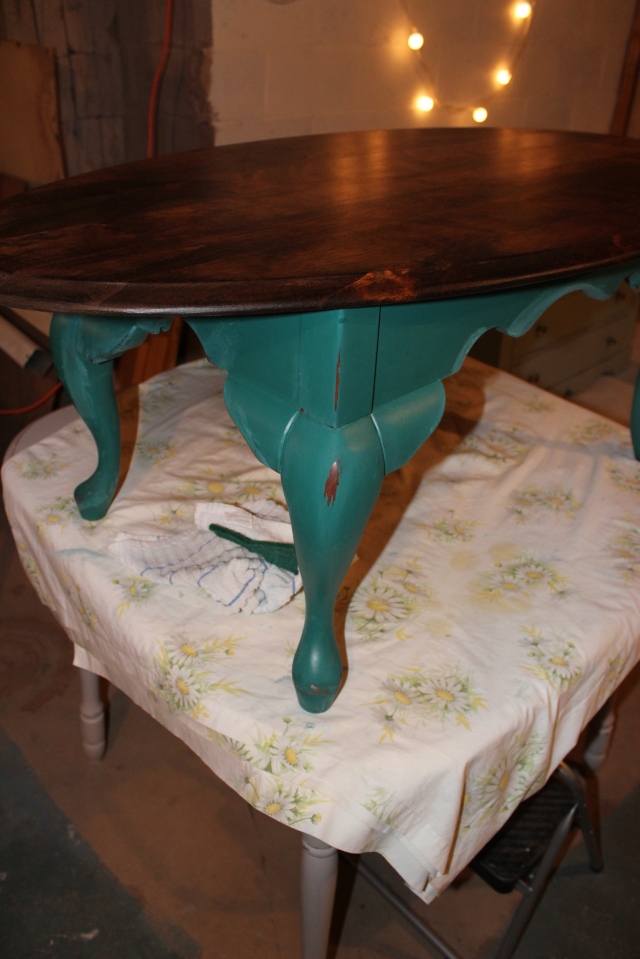
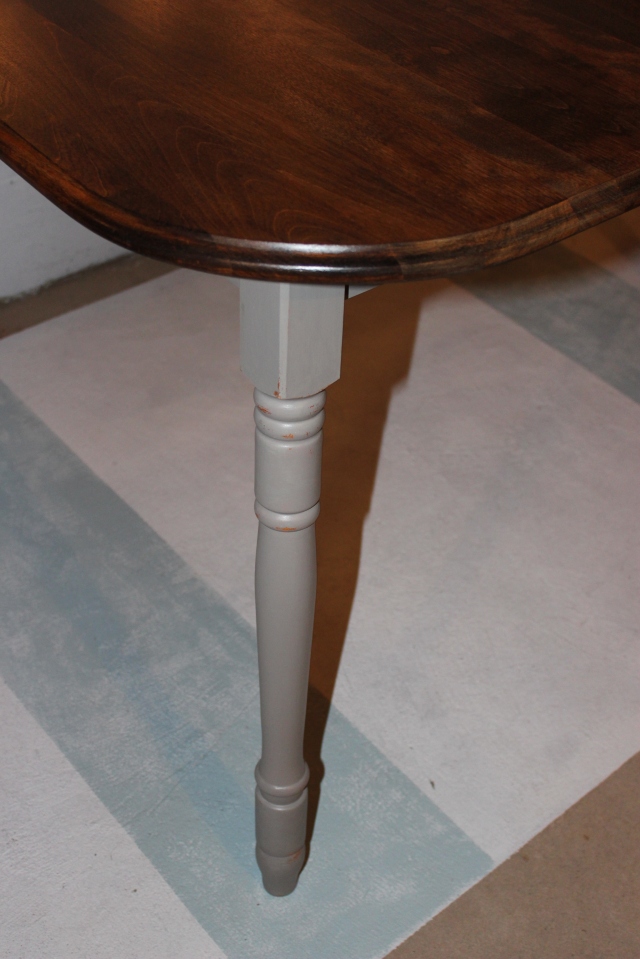
After one coat of paint on the base and the coffee table was starting to shape up!   The raw wood looked nice with the painted base.  Since the plan was to stain the wood, I was inspired to search for a piece of furniture that I could redo in the future and leave the top bare wood.  That style is beachy and fresh.  And something I haven’t done yet.  I just love the look!

image

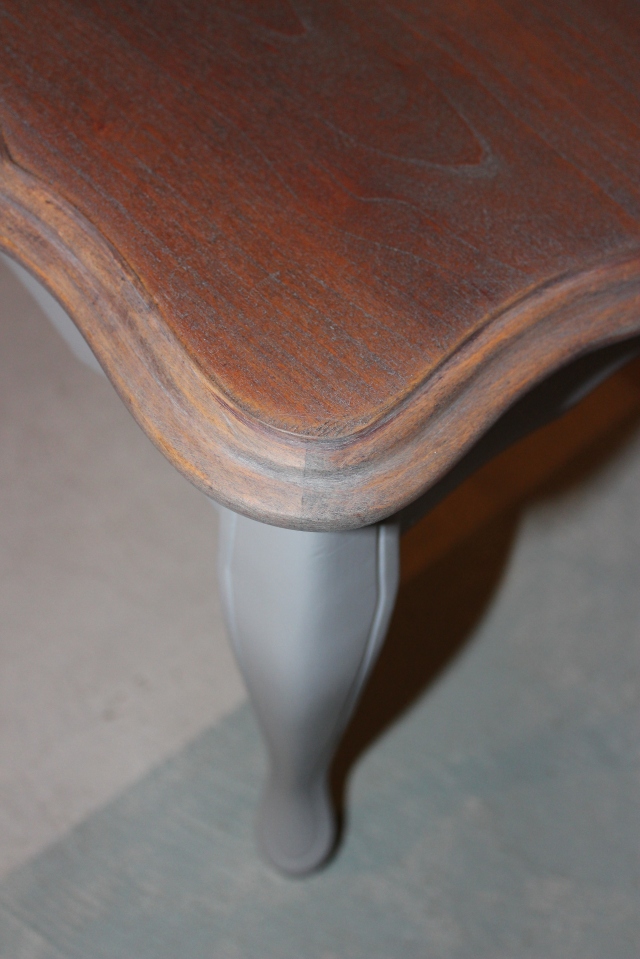
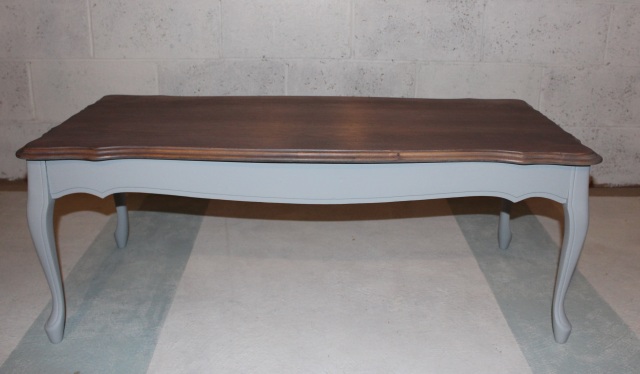
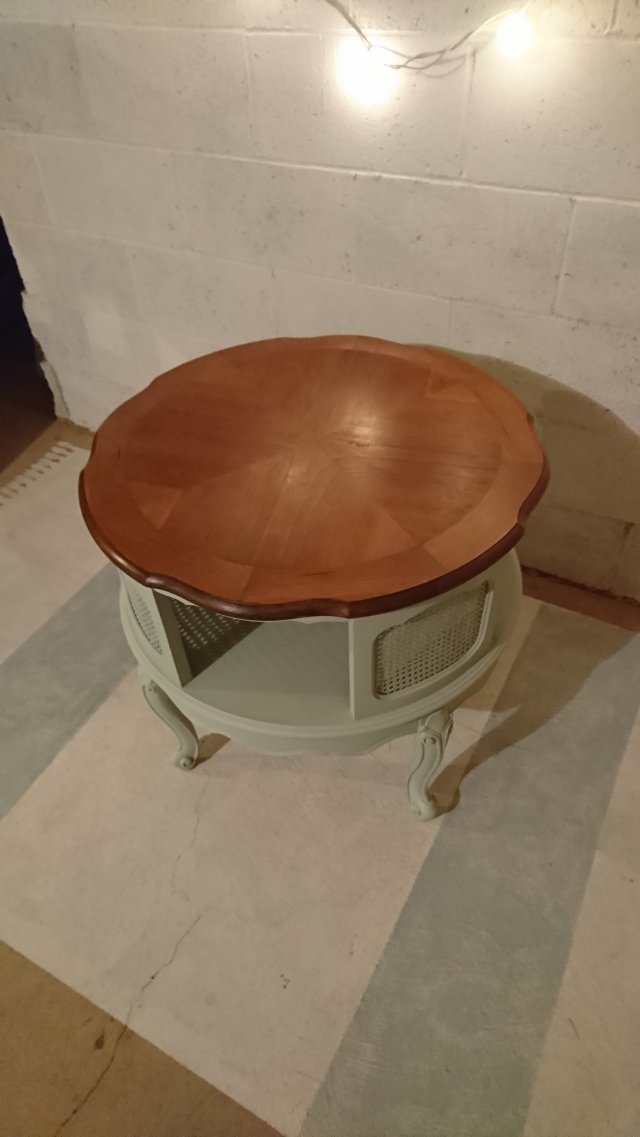
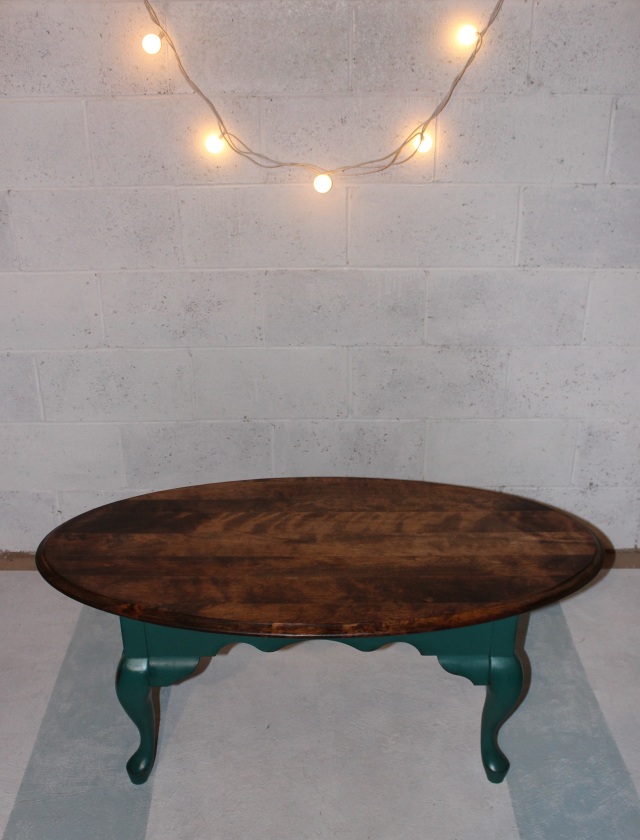
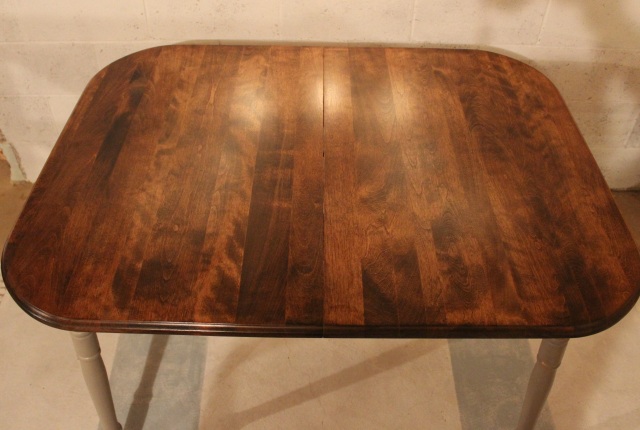
Anyway, back to the coffee table… on this table the wood grain wasn’t shining without stain, so I was excited to see how it would look once stained.  After a coat of Provincial, it looked pretty good!  I just love that wood grain.

image

image

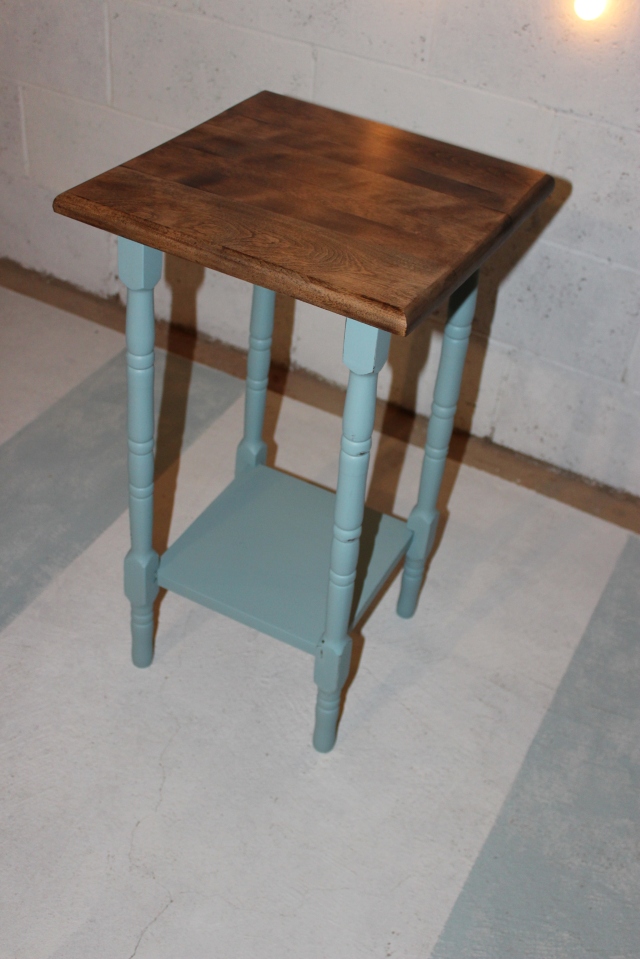
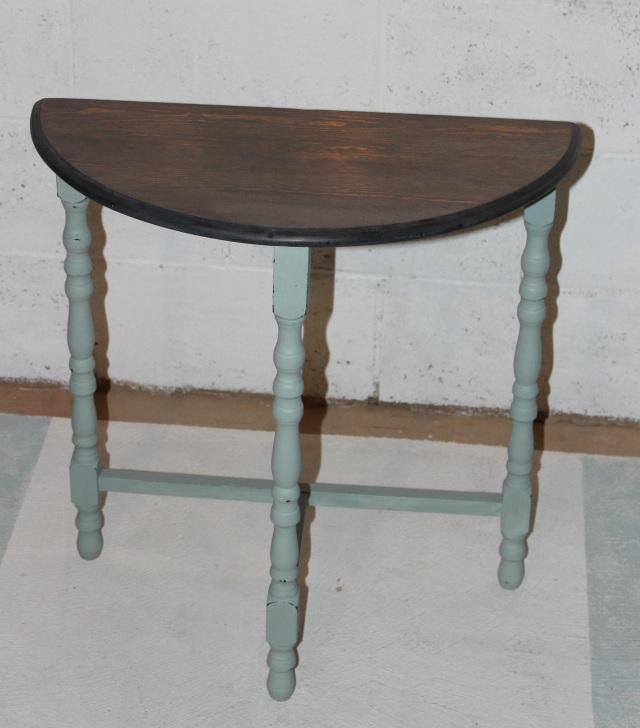
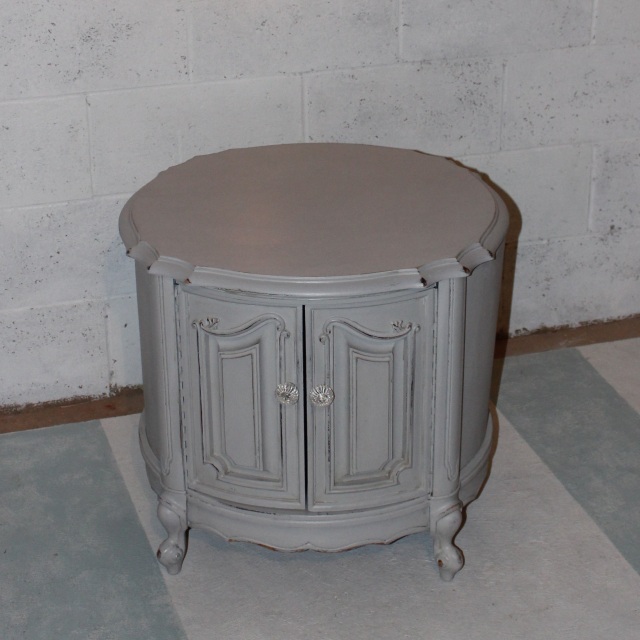
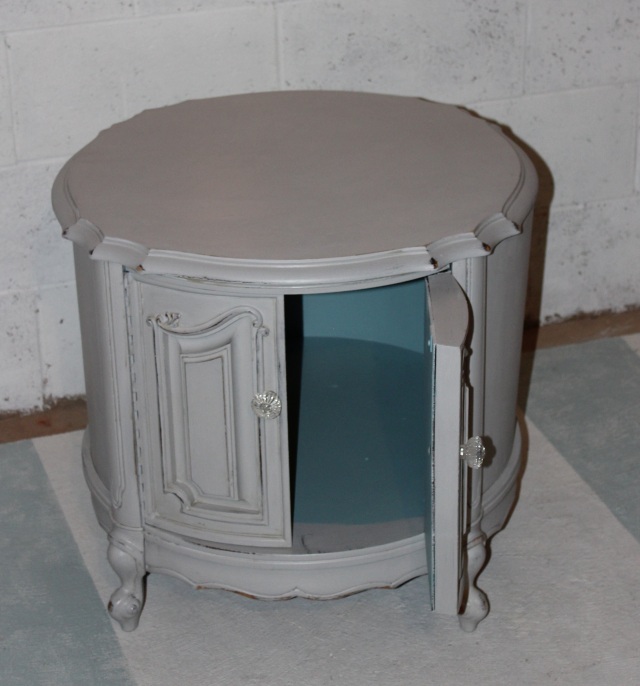
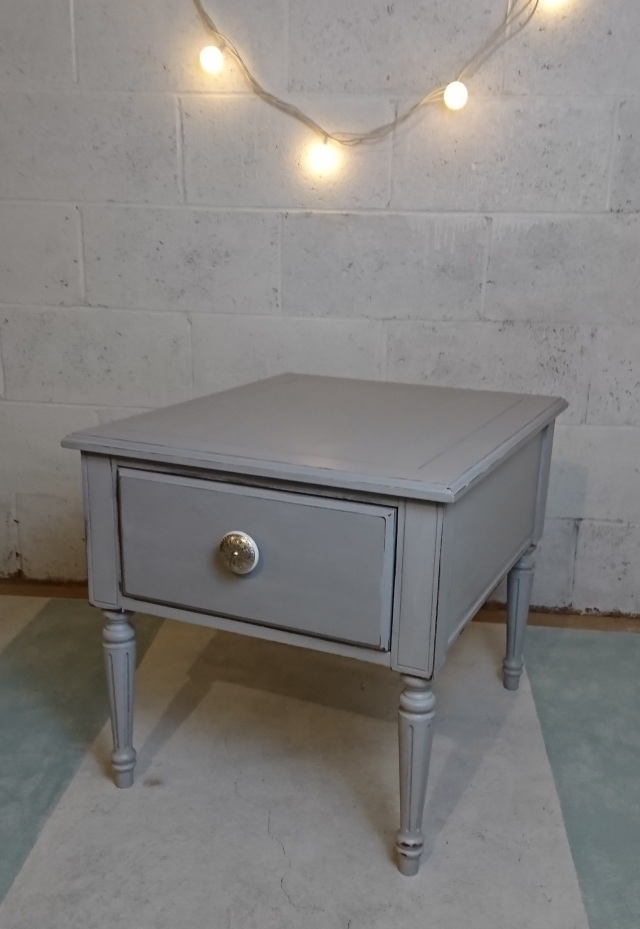
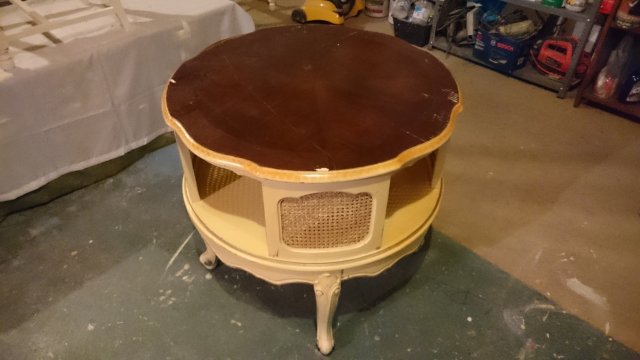
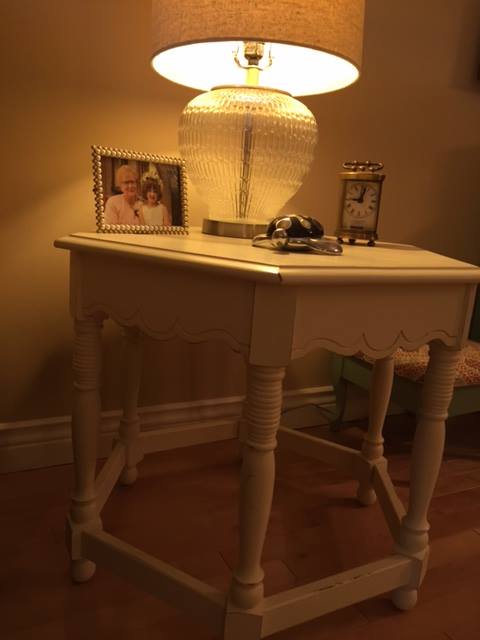
Even the side tables were looking better with just one coat of Old white!

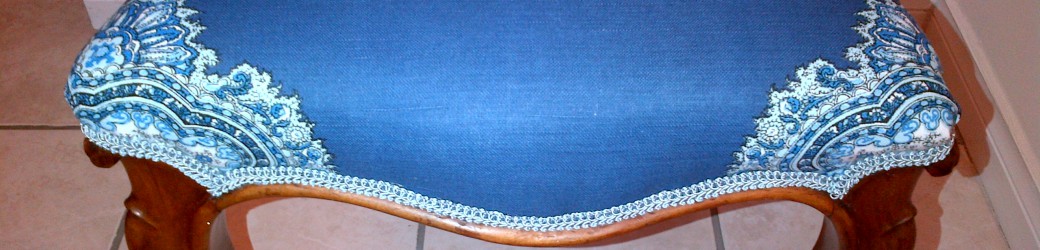
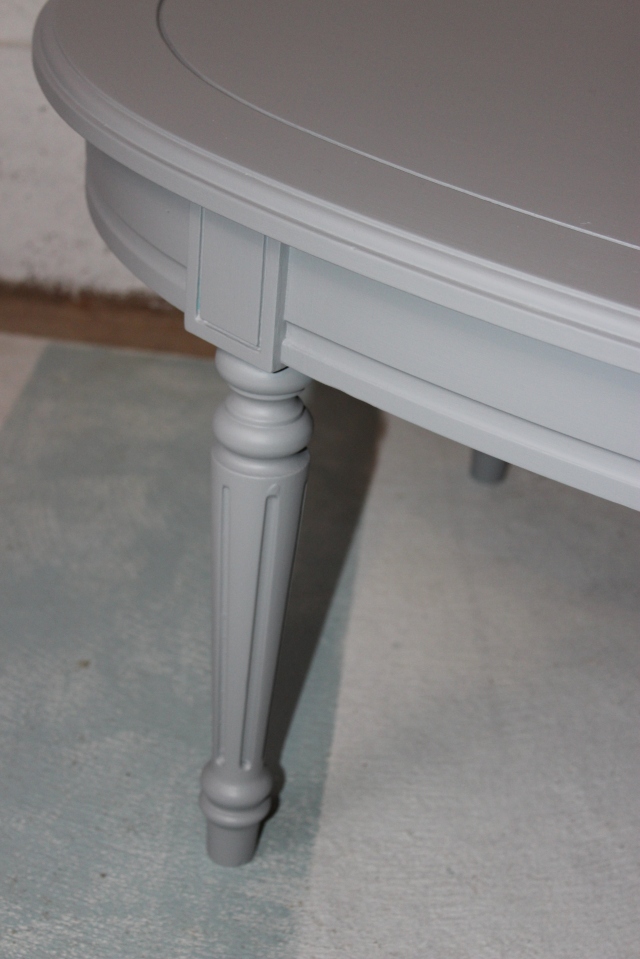
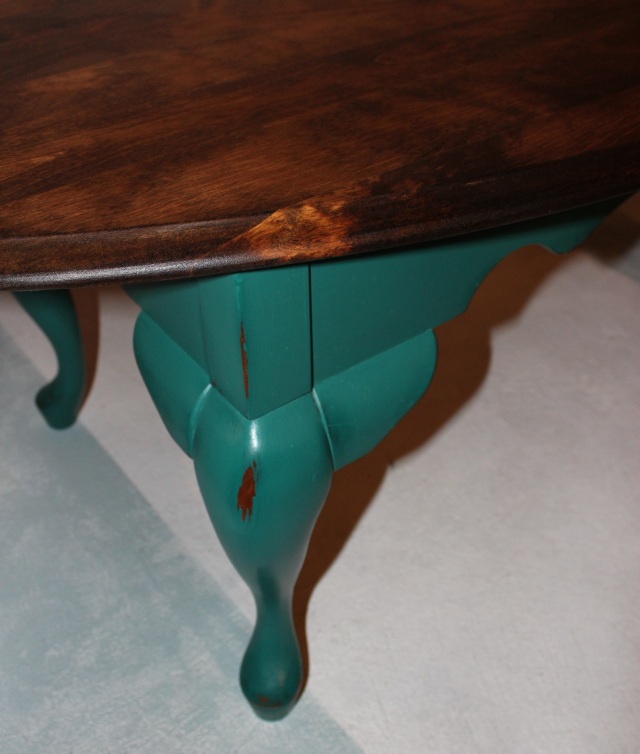
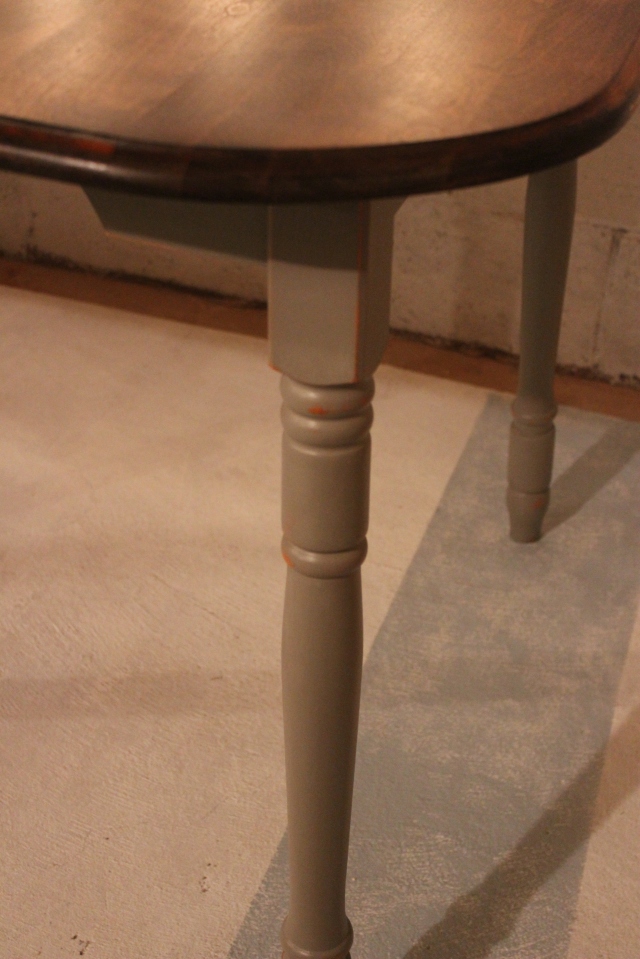
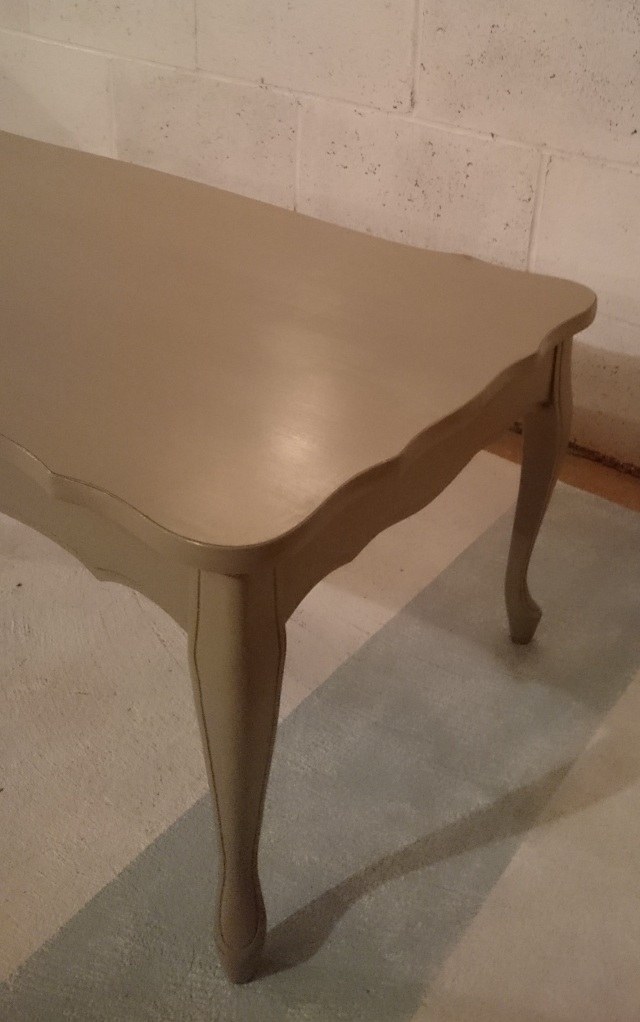
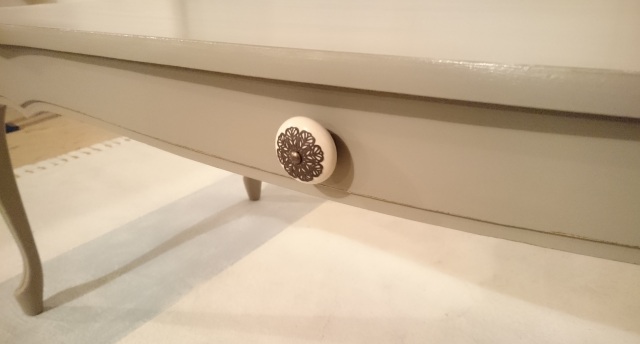
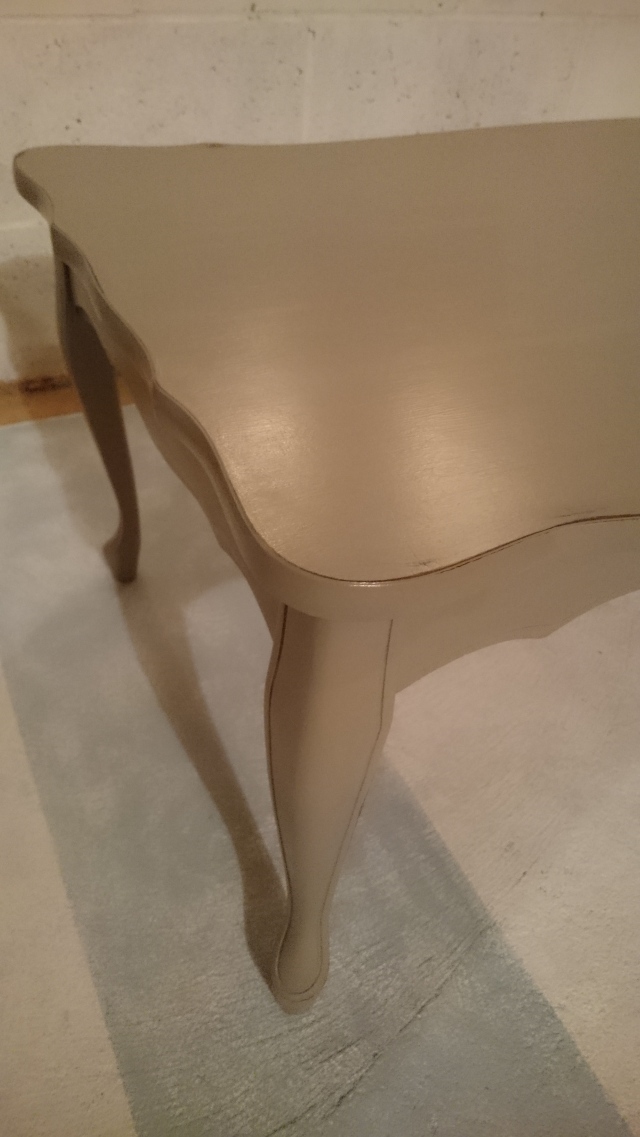
 Love all the curves!

image

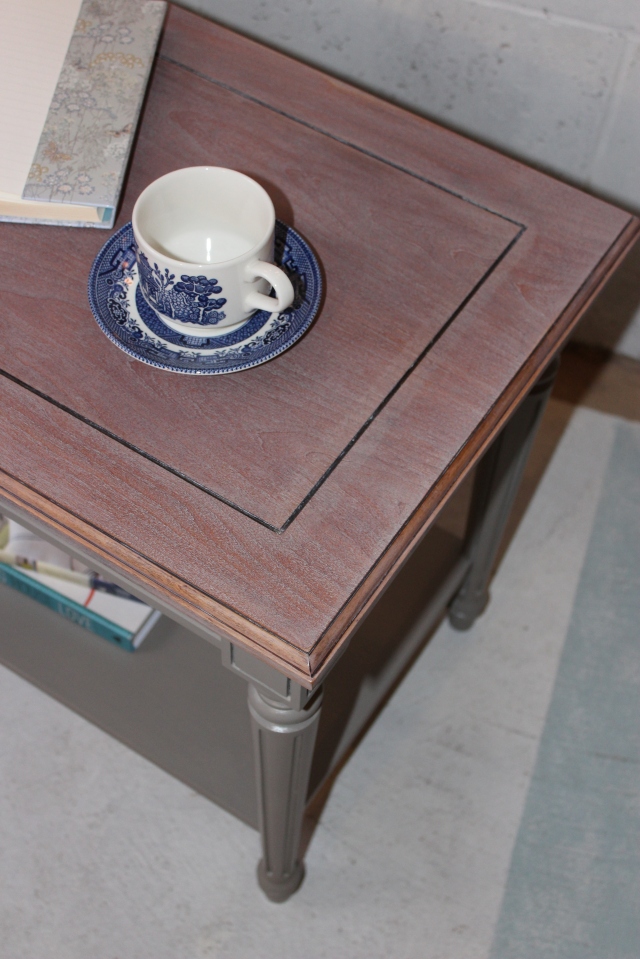
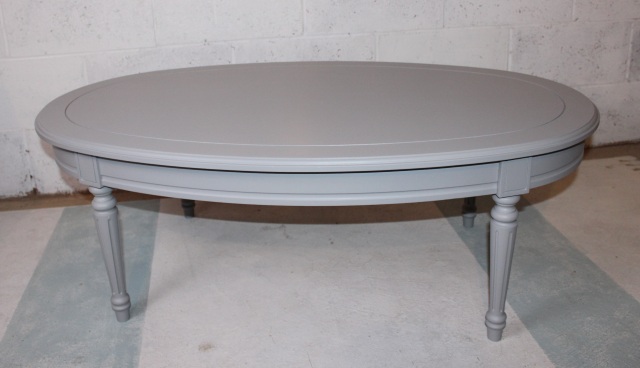
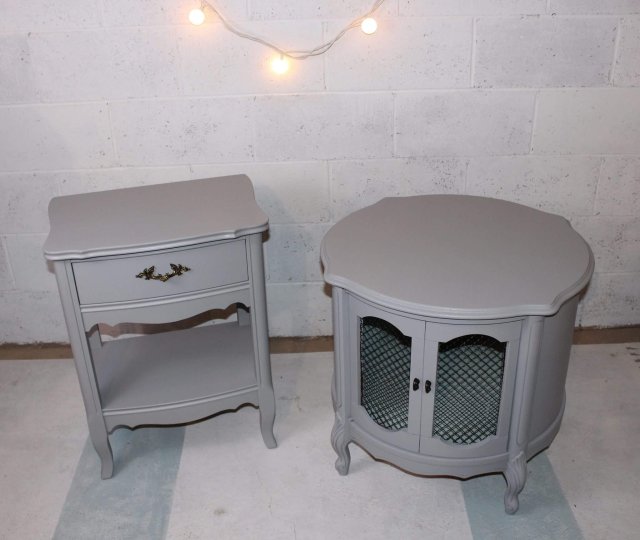
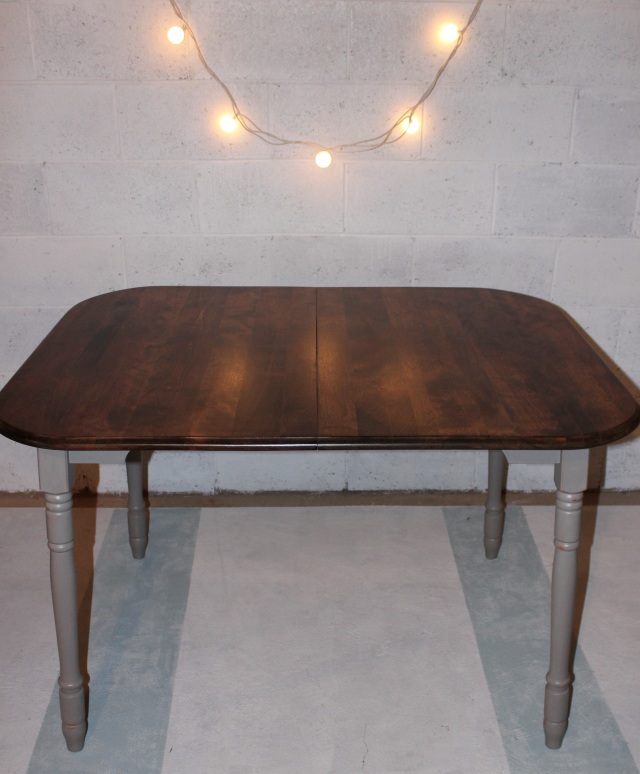
I did a couple coats of Provincial minwax stain on the coffee table top, leaving the stain on for 20 mins each time.   I painted a few coats of Old White ASCP on the table base and end tables.

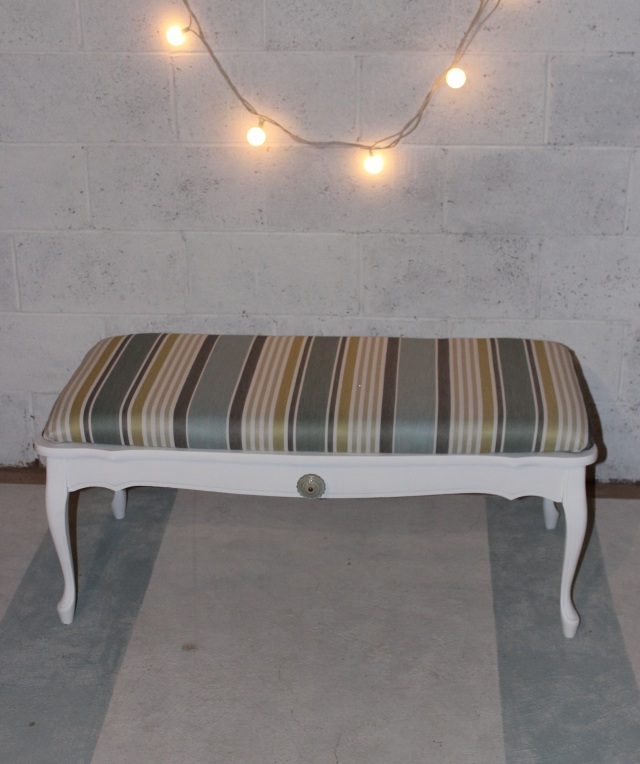
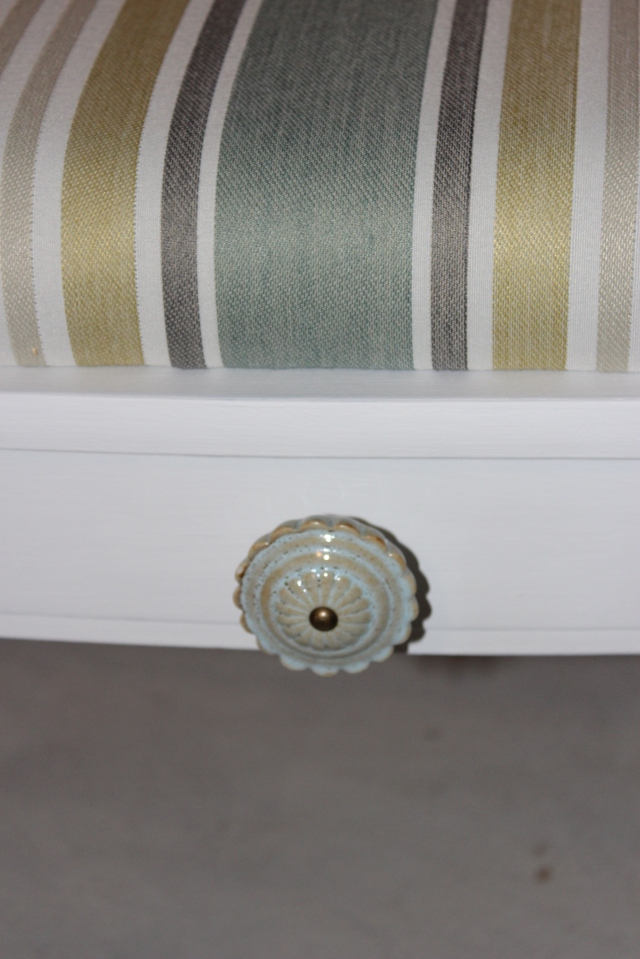
I love the look of white furniture, but painting them white is a little painful.  No matter how light the wood is, it seems there’s always a little peaking through the paint.  I made sure to do 3 coats of paint and a touch up coat.  I also had some bleed through on the coffee table, but I used Shellac on those spots and painted over with the Old White.   Shellac works like a charm!

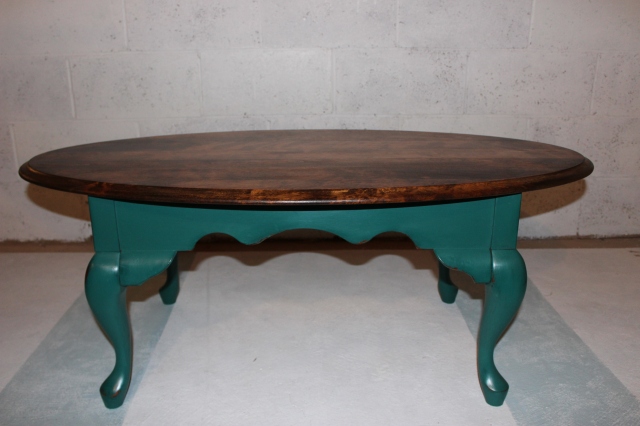
After lightly sanding the chalk paint so it was smooth like buttah and antiique the edges, I applied a coat of wax.  On the wood top I did 3 coats of Varathane in satin finish to make sure it was durable.

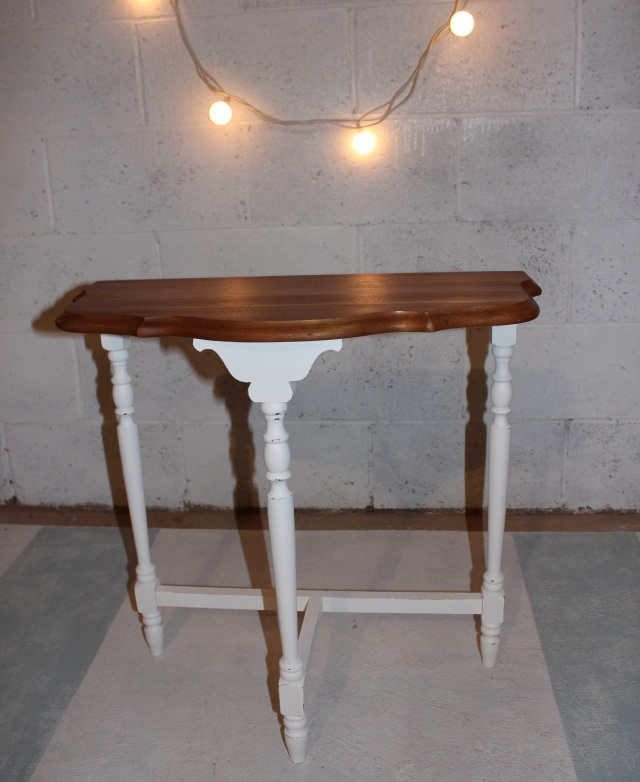
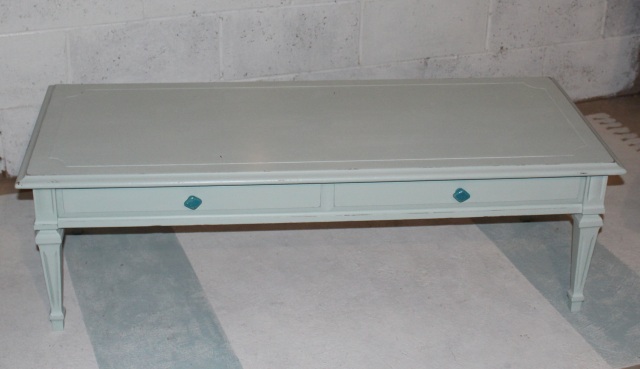
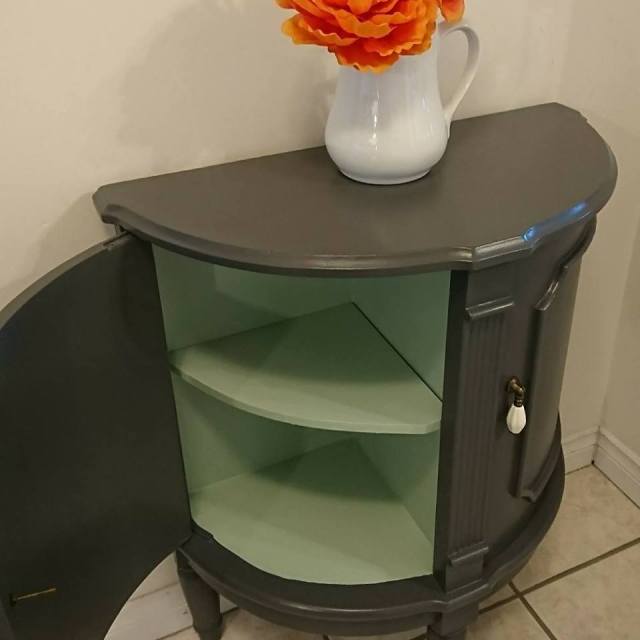
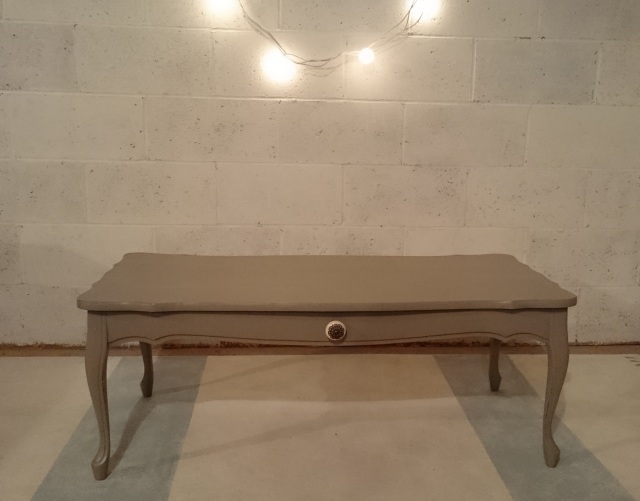
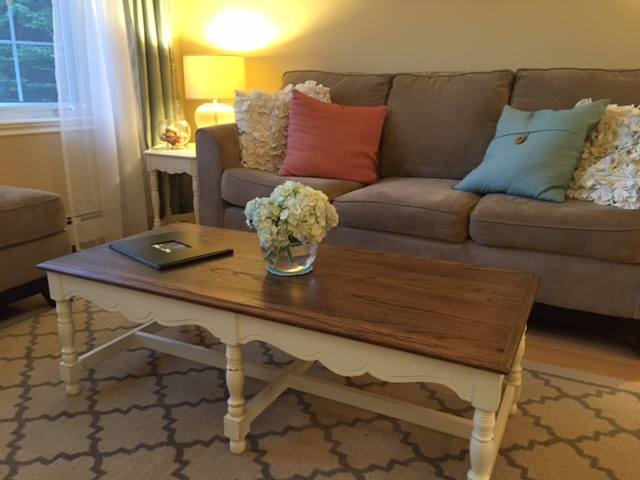
Here’s the sneak peak after the two coats of stain and paint.  It’s amazing how the curves were highlighted!  Loved it already.

y

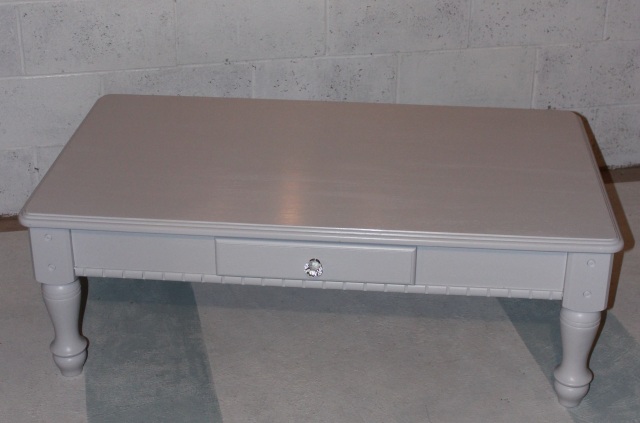
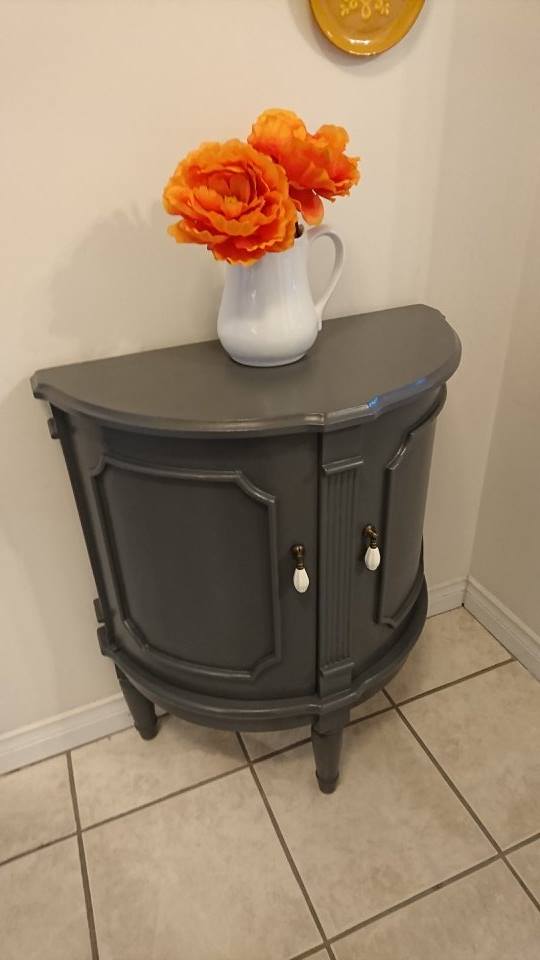
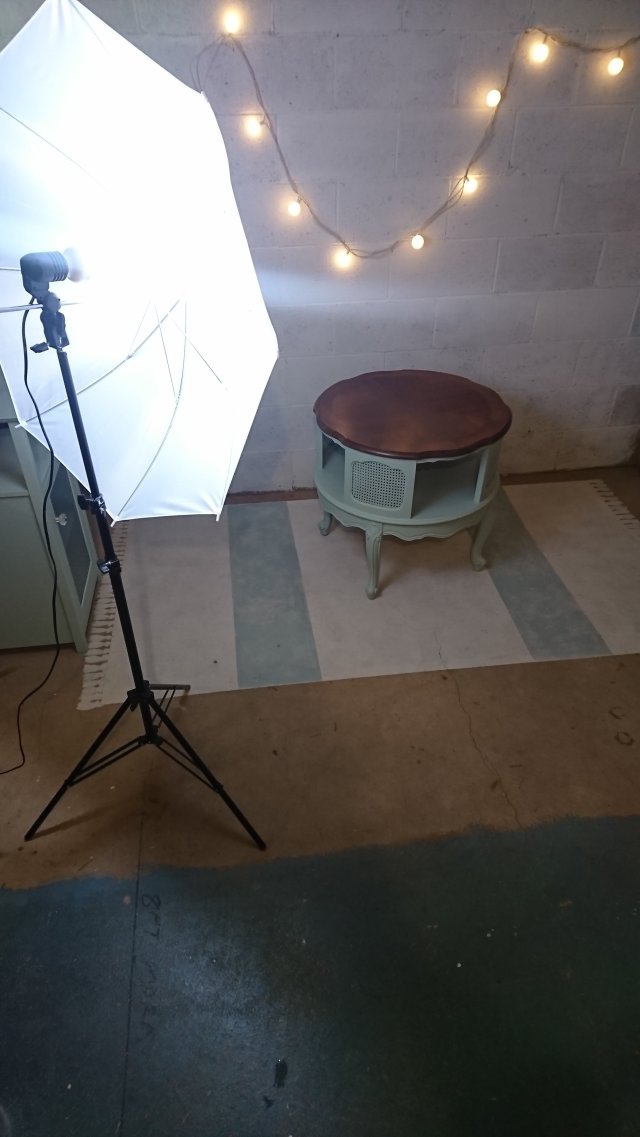
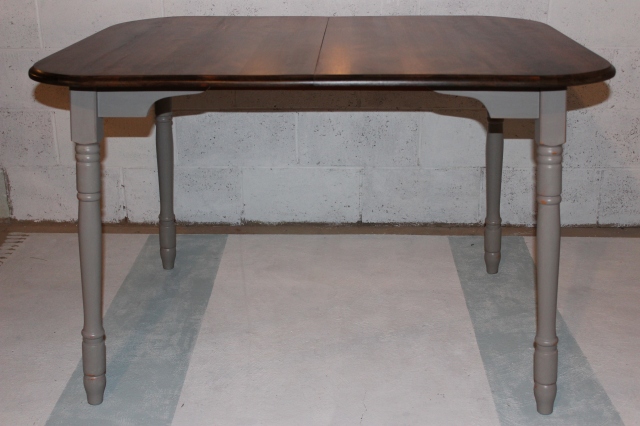
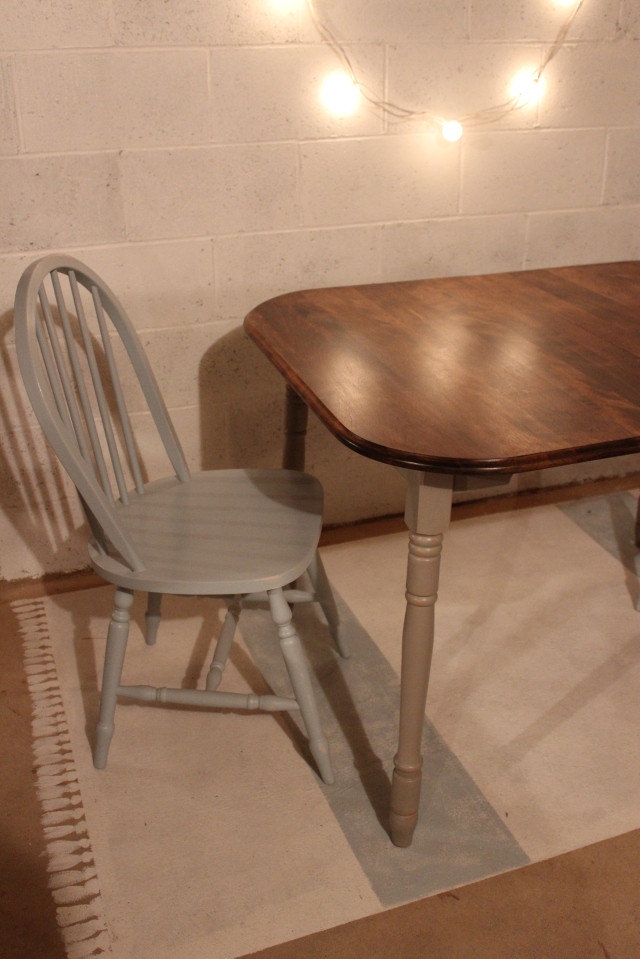
And here are the tables in their home!  I just love how they turned out.  And even better, the client was pretty happy with them!

r

d

t

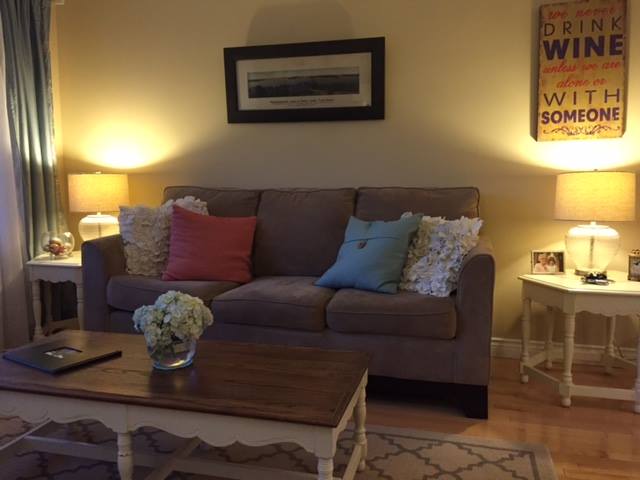
The tables were a lot of work but its worth it for me to make someone happy with their home.  That’s one big part of furniture refinishing that I love!

I’m taking a break this week, but hoping to tackle a couple desks next week.

Laurena 🙂

Refinished coffee table

I am so lucky to have friends who give me furniture!  I’ve received some treasures and am forever grateful for the freebies.  When a friend gave me these round tables, she also gave a beautiful coffee table.   Queen Anne style table legs and solid wood. Lots of potential.  I was excited to work on it!

DSC_0978DSC_0979

The table before was a reddish brown stain.  I couldn’t wait to get the top sanded down and restain it.  Especially after I started to sand and saw the wood grain.   The old finish hid the beauty beneath.

image

image

Here’s the top with the first coat of stain.   I used Provincial by Minwax.   The same stain on my antique commode and the dining table I recently worked on.  It’s fun to see the difference between each piece, all made of different wood.  With the commode, the stained wood took a warm red brown and with the other pieces, it was a slightly yellow brown.

image

The base colour was a hard decision.   I didn’t want to paint it white or black….and that’s as far as I planned.   I went back and forth between possibilities: French linen,Boxwood, a teal or a custom colour.   Finally I chose Fusion mineral paint Renfrew Blue. Its a beautiful teal.

IMG_0853

After some light distressing with a wet sponge, I applied clear  wax, buffing with a soft cloth.

IMG_0890IMG_0891IMG_0888IMG_0893

The teal with the stained top is a great combo.  They boost each other’s confidence and make the table just beautiful!

I think my goal this week will be to finish up the little projects I’ve put off for awhile.  Mirrors, chalkboards and half finished chairs.  Fun!

Laurena 🙂

French Linen dining table

Another hand-me-down piece, this time a dining table.  I had this table for awhile and wanted to refinish the top, but never had the chance to sand it.

It’s a basic dining table from the ’70s, great wood, turned legs.

image

Once sanded, the top looked like new!

image

I used Provincial stain (the same as the commode and coffee table).  Of course, on all pieces I used wood conditioner first.  It helps the stain absorb into the wood evenly and prevents blotchiness.

image

I chose to paint the legs and apron French Linen ASCP.  Love that colour.  A beautiful warm grey.  I loved the colour when I used it on a console table I had redone in the fall.  Slight distressing to highlight the shape of the legs and satin finish on the whole piece.

IMG_0862IMG_0860IMG_0861IMG_0878IMG_0870IMG_0880IMG_0879

l love refinishing wood tops. The beauty of wood grain makes me happy!  Especially after an update.  This table is one of my favourites.

I’ll be back with one more redo.  I guess I’m making up for some lost time!

Laurena

Painting with Fusion Mineral Paint

A couple of weeks ago, I finished two side tables that needed a big pick me up.  The tables were bought by my friend about 20 years ago.  The finish was the typical reddish brown from the 90’s. Back then most store-bought furniture was that colour.   Great tables, love the shape, but just they just needed an update.

I chose to use Fusion Mineral Paint in Ash.  It’s such a beautiful colour. I’ve used Ash on a few pieces, including my coffee table. I love when a colour gives a piece of furniture new life and a classic look.  Ash does just that!

As for prep work on the two tables…nil, nada, zilch. Love no prep. I just painted away.  The tables looked great after just one coat. It’s amazing the coverage Fusion Mineral paint gives. I did two coats of Ash and a couple coats of satin Varathane finish. Beautiful and classic.

Here’s the before and after….

DSC_0983


Paint always makes the details shine.  The curves of the pedestal leg is shown off and adds interest to the table.   A simple redo.  Love it!

I have a few more projects underway.  I had a big Sanding Fest last week and finally sanded down 4 pieces of furniture I’ve been wanting to refinish.  So stay tuned for future posts of a dining table, an antique commode, a dresser and a coffee table!

Thanks for stopping by!

Laurena


And another table done!

A few weeks ago, I posted about a bunch of side tables I had finished.  Like I mentioned in the post, I had quite a few chairs AND tables in stock.  I’m still taking a break from chairs….so, this is another post about tables!  Yay! 😉

The coffee table I picked up from my favourite ‘dealer’.  She lives close to me and has quite a few items on Kijiji.  I swear, once I get a larger vehicle, I’m probably going to have a shopping spree at her house.

After using French Linen ASCP on the console table, I had to use the colour again.  The coffee table had potential, with its nice curvy legs and a faux drawer.  The drawer pull needed to be removed and updated.  I had the perfect knob in mind that would go well with French Linen.  After painting and a little antiquing, I sealed it with dark and clear wax.

Here’s the before and after!

Probably everyone had similar pieces of furniture growing up in the ’80’s.  The look is very dated…but has so much potential!!

DSC_0618

Here’s the after, sweet in warm grey and a new cute knob.

DSC_0749

DSC_0751

DSC_0753

DSC_0758

Love how the table turned out.  Looks much more 2015 and less 1980.  I’d love to find more of this type of furniture.  They’re sturdy and just need a little paint to make it new again!

Thanks for stopping by!

Laurena